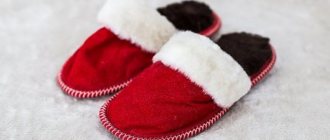
Fur slippers not only look beautiful, but also perfectly warm your feet during the cold season. They will especially appeal to children, who sometimes simply cannot be forced to walk around the house in indoor shoes. You can buy soft, beautiful slippers or make them yourself. Patterning slippers from fur with your own hands is not very difficult and even novice needlewomen can do it.
Preparatory stage
So, if you become the owner of an old sheepskin coat and a little free time, you can sew homemade chuni from it, and there will be enough material for the whole family. Sheepskin is an excellent material for indoor shoes. On cold winter evenings, your feet will not freeze, but they will not sweat either and, accordingly, there will be no unpleasant odor. It is best to choose sheepskin sleeves for sewing house shoes. There is the least amount of fittings and other finishing materials, and the structure of the sleeve will greatly facilitate the construction of the pattern.
Before you start creating a pattern, you need to cut off the sleeves from a whole sheepskin coat and measure the length of the foot, as well as the width of the ankle.
Materials and tools necessary for work
In order to make homemade chuni you will need: a sheepskin coat, a sheet of paper, a pencil, a blade, a large needle and strong silk threads in the color of the sheepskin coat.
Important! When cutting, use a blade, not scissors. The blade will give more precise cutting and smooth lines, the cut will be even and the fur will not fray.
Chun pattern from a sheepskin coat
There are many options on the Internet for different construction of homemade chun patterns from old sheepskin coats. We bring to your attention the simplest one. First you need to build a base - an insole. Be sure to make two parts for the right and left legs. You can simply outline the foot with a pencil, but you need to check the foot length measurements. Next, we move on to building the side parts, there will be 4 parts. Draw a straight line on paper corresponding to your foot length. From one edge rise 4 cm - this will be a sock. From the other edge, rise 8 cm - this will be the height of the heel. From the highest point, set aside the width of your ankle divided by 2 and draw a straight line. Connect the resulting part with the toe of the product with a smooth line. It is also necessary to build the upper part of the chun. To do this, simply build a rectangle with sides 5.5 cm and 25 cm.
Fur and sheepskin - sewing rules
Patterning a sheepskin chuni is a simple matter. Sheepskin is a universal material for sewing such wardrobe items as house boots. Such shoes will keep you warm in winter and prevent your feet from sweating in summer. Suitable for both adults and babies who are just learning to walk. And indoor boots will always come in handy for everyone.
Sheepskin chuni are most often sewn by hand using a thick needle and strong threads with the seam facing out. The seam, made beautifully with bright threads, will give the boots an elegant look.
When cutting fur chuns, one feature should be taken into account - the pile on all parts should lie in one direction, for example, towards the sock. If the seam is made on the wrong side, it will need to be made flat by sewing it to the main material with small stitches by hand or stitching it on a machine. The same applies to double boots. The resulting double seam should not interfere with wear and should not look rough.
How to sew chuni correctly with your own hands: step by step
Step 1. Transfer the pattern to the material.
Important! It is necessary to cut from the smooth side of the sheepskin coat. Cut out parts taking into account seam allowances. Add 1-2 cm to each part.
Step 2. Cut out the components of the house shoes.
Step 3. The sole can be strengthened by gluing cardboard or pieces of leather to it.
Step 4. Gather all the parts and sew one by one. First sew the side parts to the sole, then connect the side parts. The top edging is sewn last. Decorative seams with fur on the outside are relevant for chun.
Step 5. If you don’t like the shoes to fit loosely on your feet, you can sew on lacing and adjust the width to your liking.
Reference! If you are making slippers for children, do not neglect the finishing; various pom-poms and beautiful ribbons in ethnic style will look very useful.
As you can see, making such shoes will not take much time; you don’t even need a sewing machine to sew them. Warm chuni are an excellent option for the garden; they will warm your feet even on the coldest days. It is best to choose natural materials for making such and it is not at all necessary to use a sheepskin coat. These slippers can be made from an old coat or an unwanted sweater. By the way, chuni will be an excellent gift; family and friends will definitely appreciate your efforts. It is enough to show your imagination, and you will become the owner of a real designer item in a single copy.
Subscribe to our Social networks
Did you like it?
Found a mistake? Select it and press Ctrl + Enter. We'll fix everything!
Mittens
The easiest way to make down mittens is with a four-layer design. The pattern consists of three parts: the palm part, the back part and the tip (Fig. 128). It is necessary to cut out four sets of parts. Prepare two sets of bags from them. Now we connect the package of the blade with the package of the palm part. We lay the seam along contour 1, 2, 3. On the stick, in the place marked by the arrow, we lay several folds that create volume for it. At point 3, turn the stitch perpendicular to the cut of the parts towards the edge and make a tack, then lightly cut the corner (Fig. 129). We attach a rubber band to one of the bags on the back, which will tightly clasp the wrist (Fig. 130). We fold the palm bags with the front sides together and grind them down. Now it is important not to attach the stick to the palm packet. To do this, we turn it slightly towards the middle of the palmar part (Fig. 131).
| Rice. 127. This is how the pattern is enlarged | Rice. 128. Drawing of a mitten pattern |
| Rice. 129. The corner should be cut | Rice. 130. Sew an elastic band onto the back of the wrist area |
| Rice. 131. When sewing the back and palm parts of the mitten, the file should be bent to the middle of the palm part |
We process the second workpiece in the same way, but do not adjust the elastic. We turn one of the blanks right side out and insert the other into it (Fig. 132). We edge the open sections of the mitten with braid.
The most difficult thing when making mittens is not to get confused in the right and left parts.
Let's try to sew a two-layer mitten. We cut out two parts (see Fig. 128). Figures 129, 130, 131 show how to assemble a mitten blank from packages of parts. In the same way, only from single-layer parts, we assemble the inner and outer blanks with their back sides facing each other (Fig. 133) and lay a stitch at a distance of 0.5 cm from the seam cuts. After this, we grind down the seam sections on the sticks. Figure 133 shows which seams we sew together. Figure 134 shows a cross-section of the mitten blank that will be obtained after performing these operations.
Turn the resulting workpiece right side out. The direction of eversion is indicated by an arrow. We straighten the stick and get a mitten blank, which consists of three compartments (Fig. 135). Fill the compartments with down: level the down. We edge the open sections of the mitten.
| Rice. 132. Insert the inner blank into the front one. Open cuts are edged |
| Rice. 133. We sew two blanks along the cut of the seam |
| Rice. 134. Turn the mitten blank right side out |
| Rice. 135. Filling a mitten with down |
sew fur mittens from nutria skins . A medium-length skin will make a pair of children's or women's mittens. For men, mittens will require either two medium-length skins or one large nutria skin.
The nutria skin has a clearly visible line on its back, from which it is symmetrical and necessary to cut out mittens. It is better to use fur from the back of the nutria for the outside of the mittens, and fur from the belly for the inside of the mittens.
Let's make a mitten pattern according to the hand:
measure the circumference of the palm in a bent state without squeezing it, for example 20 cm and divide by 2, we get 10 cm;
measure the distance from the wrist to the top of the middle finger - 17.5 cm;
measure the distance from the wrist to the top of the little finger - 13 cm;
draw a rectangle with sides 10 cm and 17.5 cm;
mark 13 cm on both sides and round the top to the middle;
from the wrist we extend the sides by 3-5 cm - here the mitten appears, or rather its outer part;
for the inside of the mitten you need a cutout for the thumb, for which we draw two perpendicular ones, intersecting in the middle of a segment with sides of 5 cm. and 4 cm, connect the ends of the segments with an oval;
Place the oval 1 cm above the wrist and 1 cm from the side edge;
By cutting out an oval, we get a mitten pattern.
Let's make a pattern for the thumb:
the most radical thing is to circle the thumb from the bend to the end of the protrusion in front of the wrist;
Connect all the vertices with a smooth line, resulting in a height of 10 cm.
Do not forget the seam allowances on each side of 0.5 cm.
We apply the patterns to the inside of the nutria skin with the fur facing up, and trace them. Remember that the cutouts for the thumbs should be symmetrical. We cut from the flesh side with a sharp knife or blade, taking precautions.
When assembling the parts, we sew them together using a loop seam or over the edge, then turn them fur side out. We sew the binding to the edge using a buttonhole stitch, cut from the material on the bias, 2 cm wide.
Using the same pattern, we will cut an internal insulating mitten from any material. We sew it together without turning it inside out, put it on the hand, and put a fur mitten on top. We sew the edge of the inner mitten to the folded binding using a hidden seam. The mitten is ready! We sew the second mitten in the same way and severe frosts are not scary!
I'm telling you how I made boots from an old sheepskin coat.
Good day, friends!
I want to share my next experiment with an old one with fur.
I used an old sheepskin coat made of natural fur. The sheepskin coat itself was very worn, but the fur was intact and the flesh was very durable.
Chuni made for elderly people in the village. Since the floor is cold in winter and old people’s feet get cold, I decided to make these boots - chebots.
Don't forget to subscribe to the channel so you don't miss new ideas and experiments
I did it for a large foot size, about 40-41. I didn’t have a special pattern, so I made it roughly based on the size.
DIY fur slippers (boots)
First, I ripped open the sheepskin coat and washed each piece with hair shampoo.
The mezdra turned out to be excellent; when tested with water, it did not react at all, so I boldly washed it in warm water.
Then the fur was combed with a comb for long-haired cats and dried, spread on a terry towel.
I wash an old sheepskin coat
I ended up with 6 parts for each shoe, although the top could have been made in one piece. But since I didn’t have large pieces left, I made it from 2.
For each part I left 0.8-1.0 cm for the seam. .
Pattern for fur slippers
The products were sewn with a strong thread, which I use for working with leather. And I took ordinary needles, only large ones, 2 pieces.
You can see how I sewed the parts together in the video.
I sew fur parts with two needles
Video clip for those who want to watch this master class in more detail and clearly.
I sewed the parts together using two types of seams. Where it is necessary to prevent the fur from peeking out, I sew it with a cross.
And if you need the fur to peek out, sew it with a stitch.
How to sew chuni with your own hands
To make the sole waterproof, I glued a thick piece of leather from an old jacket.
And although we plan to wear them in the house, it still won’t be superfluous for the soles.
I used special glue for leather.
I make fur boots with my own hands from an old sheepskin coat
In addition, I glued pieces of fur along the bottom and on the “tongue” of the boot. You could decorate it at your own discretion, so I did just that.
Next, I cut out another insole from tsigeyka and secured it inside the shoe.
DIY fur slippers
This is what I ended up with.
DIY fur slippers
I’m sharing my calculations, maybe someone will find it useful. But according to these patterns, chuni come in sizes 40-41 and are very wide.
My patterns for
My other articles:
DIY fur brooch made from leftover fur and leather. 5 simple points of the master class
DIY children's fur hat. Old mink collars and edges at work
If the article was interesting, then like it and subscribe to the channel to keep up to date with all my new works, experiments and also master classes. And don’t forget to share the link to the article on social networks with your friends and acquaintances
.
It’s so easy to make comfortable slippers yourself if you have an unnecessary sheepskin coat and the desire.
So, first of all, we build the insole. We start with the outline of the foot. We place our foot on a piece of paper and trace it. After this, it is advisable for us to think about what shape of shoes we want. In Fig. Figure 1 shows an elongated, blunt, slightly rounded toe. Shoes are almost always longer than the foot because the shape of the toe does not match the shape of the toes. Otherwise, we repeat the contour with three exceptions, in which our insole will be narrower than the legs:
1. Thumb;
2. “Bundles” (the widest part of the leg where it bends);
3. Instep (the narrowest point of the leg).
Why? Either take my word for it, or I’ll say that in the first two places the skin will simply stretch, and in the instep the shape of the foot is such that it goes inward at an angle. The length of the insole is shown in Fig. 2. In the front it protrudes beyond the foot, in the back it barely reaches the end. We are building the top. To do this, we measure the width of the foot in several places - W1, W2, W3 (shown approximately, you can measure more places) (Fig. 3). It is most convenient to measure with a flexible tailor's centimeter, but you can also use a string. Based on the results of measurements, we construct the form shown in Fig. 4. You will probably have to suffer with the shape, selecting at random and extrapolating - you can use the patterns that I have already given as help.
We also measure the height of the backdrop h. The outer length O1 and the inner length O2 of the upper must exactly match the length of the outer and inner contour of the insole (Fig. 4). We also build the neckline by eye, having previously measured the desired depth from the toe in the direction of the rise. As you work, apply paper patterns to your leg - this will give you a general idea of whether you are moving in the right direction. We received the basic pattern (Fig. 5). On this basis, you can build a pattern for boots (Fig. 6) or boots (Fig. 7). For boots, similarly to W1...W3, we measure the width of the boot in several places, taking into account the fastener. The insole of the sole will follow the shape of the extended insole, but 1-2 mm wider.
It's always a good idea to look at finished shoes. If you are building, for example, boots for a doll, the proportions of individual parts can simply be “torn” from the finished product, taking into account the scale. I like to make shoes that fit snugly, especially keeping in mind that natural leather stretches. In addition, I am fascinated by such naturalistic details as the visible relief of the fingers, etc.)) If your tastes coincide with mine, reduce the width of the top pattern by a couple of millimeters. Do not tilt the insole - the way it was built is how it should be! If you like shoes with a more rigid shape, make a slightly looser pattern. In this case, it is useful to place the upper leather on the lining.
More pattern options:
Source
Did you like the article? Subscribe to the channel to stay up to date with the most interesting materials
Subscribe
During the cold season, walking in socks on icy floors is not only uncomfortable, but also fraught with colds. Factory products solve this problem only partially, without creating the necessary amenities. The way out of the situation will be to pattern fur slippers and make them yourself. Hand-sewn shoes look beautiful, keep your feet warm, are environmentally friendly and durable. You can make slippers from fur for all family members, regardless of their age.
Video
—Categories
- knitted and crocheted dresses (85)
- Bookmarks from Osinka (49)
- KNITTING SHAWLS, HATS (1273)
- knitting shawls (640)
- knitting hats (467)
- hats for girls (75)
- boys' hats (31)
- knitting for the little ones: both knitting and crocheting (29)
- knitting jackets (986)
- knitted jackets (422)
- crochet jackets (259)
- knitting vests (328)
- crochet vest (65)
- knitted vest (154)
- CROCHET (7591)
- learning to knit (89)
- Romanian lace (8)
- colored knitting, jacquard (7)
- crochet for men (4)
- enterlac (3)
- granny squares (306)
- continuous knitting (72)
- bolero (66)
- VIDEO (491)
- everything for summer: for children and adults (299)
- knit raglan (107)
- we knit cords, lace from cords (48)
- knitting for children (199)
- fur knitting (22)
- knitting motifs (503)
- knitting napkins (142)
- knitting bags (211)
- knitted leaves (63)
- knitted boots (53)
- knitted flowers (308)
- for curvy ladies (39)
- magazines (369)
- from plastic bags (14)
- Irish knitting (400)
- cardigan (76)
- rugs, blankets, pillows (222)
- suits (93)
- blouses, pullovers (357)
- round yoke (96)
- ribbon lace (177)
- socks, mittens (111)
- training, advice (277)
- dresses (314)
- compilation (82)
- poncho (20)
- potholders, bookmarks (127)
- patterns of frills, collars, etc. (196)
- Tops (304)
- tunics (407)
- patterns (574)
- fillet knitting (221)
- phone cases (8)
- scarves, snoods, bacti (267)
- hats, panamas (276)
- Knitting on a fork (17)
- MACHINE KNITTING (1332)
- VIDEO (422)
- patterns (156)
- knitting skirts, trousers, shorts (27)
- children's products (13)
- ;jacquard (12)
- we knit arans (21)
- we knit socks, mittens and more (45)
- knit hats (74)
- knitting products (119)
- knitting folds, pockets, neck processing (115)
- magazines on knitting by machine (158)
- training, advice (219)
- pattern making (12)
- scarves, stoles (29)
- KNITTING (6925)
- neckline, armhole, collars (436)
- arans (175)
- learning to knit (60)
- compilation (38)
- mittens (572)
- textured mittens (131)
- video (1121)
- everything for summer: for children and adults (160)
- elongated loops (8)
- knitting for children (176)
- knitting for animals (22)
- knitting for men (171)
- children's socks and mittens (32)
- for respectable ladies (95)
- magazines for 2012 (9)
- knitting magazines (178)
- knitting magazines/new/ (235)
- socks (397)
- training, advice (299)
- ornaments (509)
- raglan (399)
- sweaters, pullovers (963)
- footprints (197)
- patterns (922)
- scarves, stoles (387)
- Entrelak (62)
- knitted skirts (188)
- knitted toys (171)
- knitted napkins (6)
- country tricks (1040)
- cucumbers, tomatoes (144)
- pest control (40)
- potatoes (31)
- cottage magazines (15)
- all about vegetables (122)
- garden design (45)
- shrubs (75)
- useful tips, links (159)
- fertilizers, fertilizing, plant care (64)
- flowers (139)
- berry pickers (77)
- diets, useful health links (958)
- video (92)
- gymnastics for the eyes (50)
- bodyflex (27)
- gymnastics, (194)
- how to lose weight (48)
- treatment, body cleansing (49)
- Treating colds (31)
- treat the heart (4)
- we treat joints, all from chondrosis (61)
- healthy water, drinks (20)
- the healthiest (237)
- craft magazines (68)
- salting, preparations for the winter (798)
- eggplants, peppers, zucchini (228)
- make wine (59)
- compilation (56)
- salads (60)
- salt mushrooms (10)
- salt cabbage (68)
- salt cucumbers (71)
- salt tomatoes (101)
- salt fish (91)
- salt lard (49)
- games (6)
- cinema, films (253)
- rugs (2)
- COMBINED KNITTING (34)
- Beauty is a terrible force (56)
- COOKING (3065)
- potato dishes (96)
- meat dishes (86)
- vegetable dishes (246)
- poultry dishes (147)
- fish dishes (184)
- egg dishes (10)
- quick snacks, sandwiches (22)
- dumplings, dumplings, manti. (86)
- berry and fruit jam (57)
- waffles (3)
- video (85)
- all from berries and fruits (44)
- all kinds of sweets, creams (111)
- main courses (25)
- cook in a convection oven (17)
- mushrooms (13)
- casseroles (222)
- salting, preparations for the winter (119)
- from milk and cottage cheese (91)
- from giblets (39)
- minced meat (42)
- PORridge (27)
- drinks (92)
- first courses (59)
- cookies (77)
- pies, pancakes (269)
- selection of dishes (118)
- useful tips (83)
- puddings (4)
- rolls/meat, vegetable/ (77)
- sauces (65)
- dough, paste (162)
- decorate dishes (27)
- bread, buns, pastries (168)
- pasties, khachapuri, pizza (150)
- PATCH SEWING (88)
- master classes (126)
- PRAYERS (410)
- prayers that help in business (176)
- healing prayers (96)
- healing energies (44)
- washcloths (32)
- outfits for dolls (12)
- PANAMAS (12)
- booties (124)
- newspaper weaving (155)
- crafts (102)
- crafts from plastic bottles (44)
- Happy Holidays (17)
- POSITIVE (184)
- useful tips (324)
- computer educational programs (170)
- forewarned is forearmed (82)
- fashion items (3)
- useful sites, links (50)
- useful links for diary design (229)
- POSIMORONIM (96)
- poetry, aphorisms (731)
- poems about life (275)
- love poems (42)
- nature has no bad weather (10)
- other (426)
- bathroom ideas (1)
- useful tips (233)
- DIY repair (25)
- tips for home, interior (23)
- clean, launder, bleach (109)
- YARN (105)
- knitting calculations, patterns (51)
- PSYCHOLOGY (569)
- useful tips, links (188)
- Wisdom (86)
- video (34)
- Patchwork/knitting/ (19)
- Educational games for children (62)
- drawing (58)
- SALADS (95)
- listening to books, radio plays (474)
- Everybody dance. (39)
- CAKES, PIE (733)
- sweet casseroles (233)
- cakes (149)
- creams (42)
- no-bake cakes (35)
- cake (27)
- decorate cakes (15)
- FLOWERS made of fabric, silk ribbons (33)
- QUOTES, (230)
- sewing (774)
- video (164)
- alterations (11)
- all sorts of little things, pillowcases, etc. (80)
- for children (1)
- magazines (5)
- necessary little things (41)
- useful tips (104)
- pattern making (85)
- sewing secrets (23)
- curtains (18)
- we sew shoes, slippers, bags (51)
- we sew dresses, blouses (127)
- we sew skirts (31)
Material selection
The way you feel when wearing shoes is largely influenced by the material from which they are made. In addition to the convenience and presentation of products, it is necessary to take into account such criteria as hygiene, thermal conductivity and strength.
In order to sew warm house slippers with your own hands, you can use the following blanks:
- An old sheepskin coat or sheepskin coat. Sheepskin has high thermal insulation properties, softness and stretchability. It is better to make slippers from a sheepskin coat from sleeves or floors, since the back and chest parts can later be used to make a vest.
- Tops of winter leather boots. Natural material has high strength and wear resistance. The downside is that it has too thin a layer of fur, which is not enough to provide reliable protection from the cold.
- Artificial fur. Synthetic products look good, are not afraid of dampness, and can be machine washed without problems. It’s not difficult to sew slippers, but the prospects for such work are questionable - synthetics do not absorb moisture and cause a lot of steam on your feet. There is a high probability of developing fungus and allergic reactions.
After choosing the material, you need to decide on the model of slippers. Depending on individual preferences, the pair of shoes produced may have an open or closed toe, heel counter or cuff.
Old sheepskin coat
Artificial fur
Tops of old winter boots
A little history
All nationalities differ from each other even in the sphere of external attributes, such as shoes. A competent historian can determine at first glance where a particular pair of shoes or boots came from in a museum exhibition.
Chuni is a feature of the wardrobe of the poorer strata of society in old Russia. Initially, these were wicker shoes - made of hemp and bast. In different regions it was called differently, but this does not change the essence of the matter - short shoes that protect the feet from cold and dust, but not from water and snow.
Initially, chuni were sewn from leftover fabric and cotton wool, thus obtaining shoes of different heights and shapes - from slippers to knee-high boots. Over time, chuni began to be made from sheepskin or fur. Rubber galoshes were put on top of them to protect them from moisture. The shoes were warm, dry, and comfortable.
In some northern nations, sewn chuni are considered national shoes. For example, ugg boots, which have become a world famous brand, are essentially the chuni of the peoples of the Scandinavian countries. To sew a chuni with your own hands, you can use a variety of patterns - ready-made or designed independently according to given dimensions.
Preparing the pattern
The work on patterning fur slippers begins with making patterns . You can find ready-made patterns in women's magazines or on handicraft websites. The required size of slippers is obtained by proportionally increasing or decreasing the templates. However, it should be taken into account that the found options are standardized and may not correspond to the developed idea. In such cases, you will have to make a fur pattern with your own hands. The advantage is that this event is quite simple and does not require professional skills. To implement this you will need several sheets of A4 paper, a pen and scissors.
The sequence of actions for creating a pattern of fur slippers is as follows:
- Place your foot on a piece of paper and trace the outline of your foot. Add 2 cm on each side for allowances. If you plan to make children's patterns, it is advisable to add another 2 cm based on the growth of the child's foot as he grows older. The sole pattern is ready.
- Make a template for the sock. You can do this by applying the next sheet to your foot. Having chosen the optimal completeness, you need to make folds on the sheet and mark them with a pen. After this, cut off the excess, leaving the edges for stitching.
- Make the bootleg (backs). The front part is obtained by combining the sheet with the sock pattern. Then the paper is applied to the ankle, the joint with the back of the sole is drawn.
- Cut out symmetrical patterns for the second leg.
The pattern of the slippers is transferred to the flesh side of the sheepskin coat with a pen or white marker.
You need to cut the blanks with well-sharpened tailor's scissors, otherwise you won't be able to get an even piece.
Working with the sole
Before sewing slippers from old sheepskin coats, you need to take into account that the comfort and ease of use of indoor shoes largely depend on the functionality of the sole. This part of the slippers should be non-slip, warm and moderately hard. Of course, you can make it only from natural fur, but to create an additional thermal insulation layer it is best to use felt. The tops from old felt boots work well . If you don’t have them at home, you can buy thick shoe insoles at the market. Their size is adjusted to the sole, from which the excess allowance will be cut off.
The part must be attached to the workpiece before sewing the slippers; to do this, both elements should be glued together with waterproof glue. The composition should be applied along the edges and in stripes in the middle to leave space for ventilation.
It is recommended to take into account the property of felt to release small fragments of wool. To prevent home-made fur slippers from leaving debris on the floors, the insole should be covered with dark-colored cotton fabric.
Sole made from felt boots
Required Tools
To make fur slippers with your own hands, you will need the following tools and materials:
- professional tailor's scissors, which can be sharpened by cutting fine-grained sandpaper;
- paper, cardboard or tracing paper for making patterns;
- tailor's meter or soft tape measure;
- sharp knife;
- stationery - pen, marker, pencil, special ruler for curves;
- cotton threads No. 30, 40 and 50, lavsan threads No. 22L, 33L, 55L and 90L, nylon threads No. 470K and 565K or cotton lavsan No. 44LH-1, 65LH-1;
- sewing machine;
- several needles for working with thick fabrics.
If you plan to turn the seams with thick edges that a household sewing machine cannot process, you will additionally need a shoe awl.
Sewing order
First you need to attach the blanks to each other to make sure that they fit together exactly . If necessary, additional adjustments need to be made. To prevent the parts from coming apart during stitching, they need to be securely fixed - for this you can use office clips or thread tacking every 4-5 cm.
Sewing fur slippers with your own hands is carried out in the following sequence:
- Connecting the tops (backs) with the socks. First, a joining seam is made between the blanks, then the edges of the back part are connected. Depending on the project, the seam can be applied from both the fur and the flesh side. To avoid chafing the foot, the choice is made in favor of an external seam.
- The connection between the sole and the upper of the shoe. Here it is advisable to stitch along the inside, creating an external seam. After stitching, the excess on the sides is carefully cut off at the level of the sole.
- Trimming of external seams. It is made using braid, cord or decorative braids. Genuine leather can be glued onto the sole.
The final touch is to make the top folds. If necessary, decorative finishing of the product is carried out with glitter, beads, stickers or paints.
Mittens
The easiest way to make down mittens is with a four-layer design. The pattern consists of three parts: the palm part, the back part and the tip (Fig. 128). It is necessary to cut out four sets of parts. Prepare two sets of bags from them. Now we connect the package of the blade with the package of the palm part. We lay the seam along contour 1, 2, 3. On the stick, in the place marked by the arrow, we lay several folds that create volume for it. At point 3, turn the stitch perpendicular to the cut of the parts towards the edge and make a tack, then lightly cut the corner (Fig. 129). We attach a rubber band to one of the bags on the back, which will tightly clasp the wrist (Fig. 130). We fold the palm bags with the front sides together and grind them down. Now it is important not to attach the stick to the palm packet. To do this, we turn it slightly towards the middle of the palmar part (Fig. 131).
| Rice. 127. This is how the pattern is enlarged | Rice. 128. Drawing of a mitten pattern |
| Rice. 129. The corner should be cut | Rice. 130. Sew an elastic band onto the back of the wrist area |
| Rice. 131. When sewing the back and palm parts of the mitten, the file should be bent to the middle of the palm part |
We process the second workpiece in the same way, but do not adjust the elastic. We turn one of the blanks right side out and insert the other into it (Fig. 132). We edge the open sections of the mitten with braid.
The most difficult thing when making mittens is not to get confused in the right and left parts.
Let's try to sew a two-layer mitten. We cut out two parts (see Fig. 128). Figures 129, 130, 131 show how to assemble a mitten blank from packages of parts. In the same way, only from single-layer parts, we assemble the inner and outer blanks with their back sides facing each other (Fig. 133) and lay a stitch at a distance of 0.5 cm from the seam cuts. After this, we grind down the seam sections on the sticks. Figure 133 shows which seams we sew together. Figure 134 shows a cross-section of the mitten blank that will be obtained after performing these operations.
Turn the resulting workpiece right side out. The direction of eversion is indicated by an arrow. We straighten the stick and get a mitten blank, which consists of three compartments (Fig. 135). Fill the compartments with down: level the down. We edge the open sections of the mitten.
| Rice. 132. Insert the inner blank into the front one. Open cuts are edged |
| Rice. 133. We sew two blanks along the cut of the seam |
| Rice. 134. Turn the mitten blank right side out |
| Rice. 135. Filling a mitten with down |
