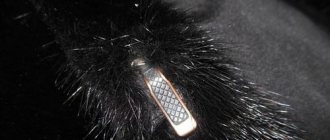
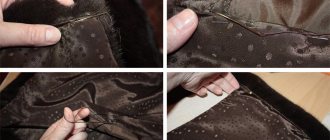
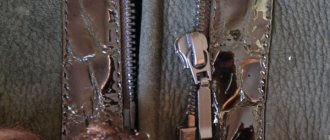
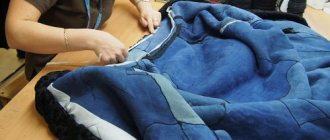
If you wear a natural mink coat for a long time or do not properly organize its storage in the summer, the natural beauty of the product may fade. In addition, problems may arise with the fittings of the sheepskin coat. But you shouldn’t despair, because the problem can be fixed with your own hands. Let's talk later in this article in more detail about how to choose hooks for a fur coat and sew them on yourself and without going to a studio.
Choosing hooks
Overlocked loops
This type of loop can be done by hand. Or you can do it on a sewing machine by selecting a special mode for this. The point of overcasting is to prevent the fabric from fraying on the button hole. This loop can be made either in the same color as the product or in contrast. It depends on the idea of the item of clothing being made. So, how to make your own buttonhole by hand?
First, you need to mark the locations of the cuts with chalk or a special marker, which subsequently completely disappears. You need to draw on the front side of the future product. You need to start and finish sewing a loop with a thread using bartacks. They can be clearly seen in the next picture.
You need to make fastenings in this way: several even stitches forward, then back and forward again.
It is necessary to sheathe the place of the product where the slot will subsequently be made not tightly, leaving a small gap. So the thread with which we sew the loop will remain intact. You need to overcast one side first, and then the other.
But you won’t be able to make a perfectly even overcast buttonhole by hand. Therefore, the manual method is relevant only for those needlewomen who do not have sewing machines. However, given the presence of this miracle of technology, which facilitates tailoring work, the process will not be fundamentally different. The loops will only become smoother and neater. But still, we’ll take a closer look at how to make buttonholes with your own hands using a sewing machine.
First, again, we mark everything with chalk (it is important that it is always sharp) or a marker on the front side of the clothing, linen, etc., based on the size of the button. The second is to install a special foot on the machine, which is specifically designed for sewing buttonholes. It looks something like the one shown below.
Next, we select and set the desired mode, not forgetting to first select the type of loop we need.
After stitching, carefully cut holes between the stitches with a thin blade. That's it, the stitched loop is ready.
Loops made from tucked cord
That's how graceful and airy they look.
How to make buttonholes by hand? This is not very difficult, and even not the most experienced seamstress can do it.
To make a roll (this is the second name for this loop), you need to cut a strip of fabric on the bias (5 degrees), the width of which will be 3 cm. The length depends on the intended size. The loop should be sewn with stitches of approximately 1.5 mm, no more. Large stitches will make it difficult to turn the roll out later. The strip should look like a funnel: at first a little narrower, and then wider. After the future loop is stitched, the excess fabric along the seam must be carefully cut off. This will make it easy to turn the steering wheel and it will remain level.
You can turn the loop out using a needle, hooking it onto the remaining thread and pushing it inside with the blunt end. Use a thimble, it will protect your fingers from injury.
After the cord is ready, it needs to be ironed by pinning one end to the ironing board. The roll does not need to be ironed, but only slightly ironed, holding the iron against its weight, because the product should remain round and not become flat.
Now the loop from the tucked cord can be sewn to our product.
Board
If the bottom side of a mink product is not fixed to the fur fabric, access to the hooks is often closed with special stitches, with which the binding is basted. They need to be cut, folded back and a hook sewn in. Do not sew the hook too carefully so as not to damage the fur fabric. A few confident stitches are enough. Experts recommend using 70L threads for these purposes, that is, a thicker thread. Next you need to secure the trim and trim.
That's all, repairing your favorite mink coat is not so difficult without the help of a professional seamstress. But by going this route, you will save a significant amount of money and show off your own talent.
The photo below shows already sewn-in hooks for a mink coat. The work looks beautiful and elegant, as if made by the hands of a first-class master from a fur tailoring studio.
How to knit loops for a fur coat with your own hands?
Look how beautiful and elegant the hook and loop looks for a mink fur beauty that can be knitted by hand. Such products, along with buttons with rhinestones, make the mink sheepskin coat irresistible.
Of course, we don’t crochet a fur coat every day. You can watch several videos to understand how to complete this task quickly and without additional problems.
It is also useful to read forums of needlewomen on this topic, because each craftswoman uses a certain technique. And you can choose the best one only after you familiarize yourself with several options.
Remember, the size of the loop for the hook should be optimal, that is, not large and not small. A loop that is too large will simply slide off the fittings. And the small one will be too tight on the button and will soon simply deteriorate. Therefore, in the process of creating a loop with your own hands, try it on the selected button for a mink sheepskin coat. This trick will prevent you from making mistakes.
Loops from a straight strip of fabric
Let's look at the instructions on how to make buttonholes by hand.
For this loop, a strip 3.5 mm wide is cut out, and its length will be 4 cm plus two button diameters. This strip is folded in half inward, inside out, and then the folded edges are sewn together. You need to step back 1 mm from the edge. Next, fold the strip in half, but crosswise, forming a triangle on the fold, and run a transverse stitch along it. We bend the ends. The loop can now be attached to the fabric. We equalize the ends. We attach it to the front side at a distance of 4–6 mm from the cut of the item. It is possible to finish the edges of this fastener by hemming or hemming.
Air loops
They are made from threads. It can be silk, floss, etc. It all depends on whether the fastener is hidden or not, whether it is a bright finish or a regular loop, and on the thickness of the fabric. For example, on thin silk, other loops may look heavy and rough, but a thin, airy one is just right. So how do you make buttonholes by hand?
The essence of the work is to make a loop from several layers of thread, and then finish it. The diameter of the loop should be 1–2 mm wider than the button. How many arcs are needed for this loop must be determined based on the thickness of the threads. For some, 3-4 is enough, but for thin silk, 12 may not be enough.
The subtleties of doing the process yourself
If you decide to repair a mink coat yourself, remember that you only need to sew hooks to the coat if you have sufficient information about this process. If you don’t have enough knowledge, be sure to read this article to the end.
After all, there are important nuances that you should definitely know if you want to sew new hooks for a mink coat.
Stitching loops
These loops are difficult to make. But there is a little trick that will make the tailor's job easier. To ensure that the fabric does not fray and is accurately marked, it is necessary to use masking tape.
How to Make Buttonholes by Hand: Step-by-Step Stitching Instructions:
It should be noted that such loops are used, as a rule, in the process of making thick outer clothing such as a coat.
We learned the basics of how to make buttonholes by hand. But sewing is a creative process. And fantasy occupies not the last place here. It’s especially cool to think and work on how to make the fasteners into a real decoration for the whole thing, and, of course, then wear this original product with pride.
Source
how to sew a loop on a fur coat. part 1
Very often, when repairing fur coats, it becomes necessary to rearrange the loops , the fur coat is wide or the loop is broken. In this master class I will teach you how to rearrange a loop on a fur coat.
There are 2 types of fur loops: loops with a connector, as in photo 1, and loops without a connector. About the second option in the next lesson.
how to sew a loop to a fur coat photo1
So let's begin. First you need to remove the loop from the old place. To do this, we trim the lining in the place where the loop is located. We outline the new location of the loop and make two small cuts. See Photo2. There is no need to cut completely, since we have a loop with a connector and the loop is inserted very simply. First you need to thread one end of the loop into the cut, and then the other. As in photos 3 and 4.
how to sew a loop to a fur coat photo 2 how to sew a loop to a fur coat photo 3 how to sew a loop to a fur coat photo 4
Now you need to tighten the ends of the loop so that it does not jump out during wear. See photos 5 and 6.
how to sew a loop to a fur coat photo 5
We thread the leather strap into the loop as in photo 7 and fasten it, sew the strap to the inside of the fur coat. First, make a cut in the non-woven lining and thread the leather strap, and then fasten it as in photo 8.
how to sew a loop to a fur coat photo 6 how to sew a loop to a fur coat photo 7 how to sew a loop to a fur coat photo 8
Then we attach the lining and the work is ready, the loop is in place (photo 9).
how to sew a loop to a fur coat photo 9
Source
How to sew a hook to a fur coat?
Hello, dear readers of the milla-sidelnikova.com blog!
In previous articles we got acquainted with hooks - regular sewing and trouser ones.
But there are also fur coat hooks. And today we will talk about them.
Sew-on hooks with loops, covered with thread or braided.
How to properly sew hooks on clothes?
How to sew or install a trouser hook?
How to sew a hook to a fur coat?
Sew-on hooks with loops, covered with thread or braided, exactly the most ordinary metal sew-on hooks with loops, the shape familiar to us all, but only very large and covered, or, if you like, beautifully and neatly braided with synthetic thread. Brown, black, grey, beige, white, etc.
Such hooks are used as fasteners for outerwear, sewn from heavy and dense fabrics. These could be coats, jackets, low-pile fur items, etc. Such hooks are not hidden, but rather put on public display, sewn on in prominent places. There they “serve” as a clasp and decoration.
Both on overlapping fasteners and on butt fastenings, sew-on hooks with loops, covered with thread or braided, are always placed horizontally on products.
And just like all the previous hooks with which we have already become acquainted, braided fur coat hooks on women's clothing are located - the hook is on the right, and the loop, accordingly, is on the left.
On products with a butt fastener, braided hooks look like this:
and on products with an overlapping fastener, so.
As you can see, braided fur coat hooks must be sewn onto the product so that the line of engagement of the hook and loop coincides, in both cases, with the line of the middle front.
And the technique for sewing braided fur coat hooks is exactly the same as for ordinary sewing hooks (see here). But they need to be sewn on extremely carefully and on the front side of the product!
Sew-on hook or clip with leather loop.
A sew-on hook or clip with a leather loop is not quite an ordinary hook. This is a connection between a metal latch hook and a leather loop. And the loop also consists of two parts - a plastic ring, which is actually a loop, and a leather strip-flag, with the help of which the loop is attached to the product.
But despite all the external differences from other hooks that are familiar to us, the clip hook works like an ordinary full-fledged hook.
Such hook-clips are produced in a fairly wide range of colors. White, cream, red, black, light and dark beige, gray, brown, etc. In general, there is plenty to choose from.
All sew-on hook-clips with a leather loop, even from different manufacturers, look almost the same in appearance. They may differ only in the composition of the metal from which they are made, and the leather strip can be made of natural or artificial leather.
And one more small but significant difference. Some hook-clips are sold with holes already punched in the leather strip, while others do not have such holes. If there are no holes, you need to make them yourself, for example, with an awl or a very thick needle. It will be easier to lay securing stitches through them, sewing the loop to the product.
A sew-on hook-clip with a leather loop is used only on products where the edges of the fastener overlap each other, that is, with an overlapping fastener. It carries only a functional load and the hook-clamp is not displayed for public viewing. And it “feels best” on products with long pile.
There is one very significant difference in the placement of such a hook on the product. The sew-on hook-clip with a leather loop is always placed vertically on the garment’s edging!
It would seem natural to place it horizontally like all previous hooks. But no! Why is that?
Because:
- This is not a regular hook where the loop just hooks onto the hook. This is a hook-latch, a clamp. And if we place it horizontally, it will be very difficult to unfasten it.
- The range of movement of the hitch between the latch hook and the loop is very large. And the horizontal placement of the latch hook would cause constant distortions and displacements of the edges of the fastener down and up.
- Being placed vertically, the latch hook takes up more area, which means it holds tighter, more securely and longer.
Now let’s look in great detail at how such a hook is sewn to a product.
I intentionally sewed a fur coat hook in a contrasting white color so that it would be better visible how it was done.
1. The latch hook must be sewn to the product before the lining is sewn.
2. So. As with any overlapping fastener, first you need to decide where the middle lines are, in this case, the left and right shelves.
These lines and the lines of the middle of the fastener too. Exactly along these lines, vertically, on the edge of the right shelf there is a hook, on the left shelf there is a loop (for women's products), we will place latch hooks and clip hooks.
1st, this is the line of the middle of the shelf and fastener. And the hook-clip must be sewn onto the product so that this line runs exactly in the middle of the hook (vertically).
The 2nd line is the hook and loop line. On both the left and right shelves, the hook and loop must be sewn so that the hitch line passes exactly through these places. Then the entire fastener will neither warp nor crumple the edges of the fastener.
How many such fur coat hooks to place on a product depends on the model. But at the same time, you need to remember that fur coat hooks are still not buttons and there is no need to place a lot of them.
However, one of them must be placed so that it is on the chest line and holds the most convex place there.
3. Having decided on the line on which the hook will be located and its future permanent location, we now proceed directly to sewing the hook.
On the wrong side of the hem, the place where the fur coat hook will be placed sometimes needs to be duplicated. Look at the material. If the leather (natural or artificial) is thin, duplicate this place with a rectangular piece of calico or any other non-woven material for reliability. It can be attached to the main product with textile glue or carefully stitched around the perimeter.
Now we outline the places where we will make the cuts. These are two points. We already have one. This is the point of intersection of the vertical line - the line of the middle of the right shelf, with the horizontal line - the hook-and-loop line. And the other point must be applied at a distance L = 1.3 cm from the first. This is the distance between the parts of the hook-latch posts.
Now at the marked places we make two small cuts 3 - 5 mm long,
and through them we “release” both parts of the hook-latch onto the front side of the collar.
The hook, with its nose, should be directed downwards, so the nose of the hook is threaded into the top hole.
We snap the latch hook onto the front side of the hem, and on the back side, through all the special holes on the base of the hook, we sew it with stitches to the product. Hand stitches shouldn't be too tight, but they shouldn't be loose either.
The hook is ready!
Let's move on to the loop.
4. Hooking the ring-loop onto the hook-latch,
We combine the previously outlined middle lines of the right and left shelves.
And thus, on the front side of the left shelf we determine the place where the loop should go.
Then, on the wrong side of the left shelf, we duplicate the place (if necessary) where the loop will be sewn.
Now, at the designated “crossroads” we make a horizontal cut, wide enough for the leather strip to fit snugly into it. We thread a strip through the cut and secure it in this place with small hand-stitched stitches. At the ring itself, but from the wrong side, we first sew the edges of the cut to the leather strip,
and then, through the holes made on this strip, we sew it to the main part.
The loop is sewn with the flag strip facing up.
That's all!
And if you came to my website in search of information “How to sew or repair a fur coat hook?”, because you want to change a hook that has become unusable, or put an additional one on an already finished product, then here is a ready-made “recipe” for how to do it . The only thing you will have to do additionally is the lining, in the places where the new hook will be repaired or placed, first rip it up, and then, after replacing the hook, sew it up again.
Bye everyone! See you in the next articles! Sincerely, Milla Sidelnikova!
Ways to replace hooks on a fur coat at home
Many owners of fur coats believe that any work on their repair should be carried out only by professional craftsmen.
In fact, this is not entirely true. And you don’t always have the financial opportunity or even just the time to go to a workshop. Plus, it's actually not such a difficult task that you can't handle it yourself. Many people are interested in how to put a hook on a fur coat. In fact, there are clear instructions, but first you need to consider several equally important nuances before getting down to business.
Possible problems with natural fur
One of the most common defects with natural fur coats is broken hooks. Also, this accessory for a natural fur coat, as in the photo below, can break out or fall off if excessive pressure is applied to it. Not less often, loops break or buttons with rhinestones on fur beauties fall off.
What to do and how to fix a fur beauty? Should you go to the store for a new purchase for the winter or contact a fur sewing studio, whose services can be quite expensive? Not at all necessary. You can simply put in a little effort to fix the problem yourself. Go to a sewing store and purchase such an accessory at a low cost. If you want to carry out all stages of the work yourself, ask the contact about how to knit such an accessory with your own hands and how to sew it to a fur lining. You can also find many videos on the forums of needlewomen who will tell you in detail about the intricacies of performing this operation with your own hands.
What to prepare before replacing the hook
If the hook on your fur coat is broken and needs to be repaired, first of all you need to prepare everything you need. The necessary items should be at hand so that you don’t have to be distracted at a crucial moment. We will need:
It is recommended to choose the most dense and high-quality threads. This will provide additional durability to the hook. If there are no too dense threads in the house, but you need to sew it urgently, then you can simply fold a regular thread several times.
Hooks and threads should be chosen in the most suitable color. Although they will be practically invisible, since they are on the inside, it is still not desirable for them to stand out particularly.
It is better to choose medium-sized hooks. Too massive ones will be inappropriate, but very small ones will not be suitable either - they can easily break or come undone.
For such purposes, it is better to choose scissors with pointed ends and small ones. The best ones for this are the usual ones from a manicure set.
Where and why are hooks sewn to a fur coat?
First of all, it’s worth figuring out where hooks are usually sewn on fur coats.
Typically, these products are used instead of buttons, as well as to secure a collar or hood. Before sewing a hook onto the hood of a fur coat or collar, you need to clearly determine its location. You must understand that at the same time the collar must be fastened tightly so that cold air does not blow in there (and the hood does not fly off on its own), but at the same time not too tight - you should take into account the fact that it is in this place that the scarf. Therefore, when designating the future location of the hook, it is better to take measurements after putting on the scarf.
Hooks have recently been used more often than other accessories. This is due to the fact that zippers on fur coats are almost never used, but buttons have already gone out of fashion. Ordinary buttons often do not look aesthetically pleasing and spoil the overall impression of outerwear, and if the buttons are made internal, this will significantly complicate the process of fastening them. This is a significant problem especially in winter. The hooks meet absolutely all the requirements :
Their only drawback is that any owner of such outerwear should know how to repair hooks on a fur coat at home. This is due to the fact that they break quite often. Even high-quality fittings are often not durable.
How to repair a fur coat at home
To sew hooks with your own hands, you do not need to be a professional seamstress, but you will need to be careful and precise.
Here is a list of tools that you may find useful:
- replacement hook;
- a piece of leather, preferably natural, but artificial leather is also possible;
- strong threads;
- needle;
- ruler;
- stationery knife.
The hook, as already mentioned, consists of two parts, each of which is partially hidden on the wrong side through slits in the skin itself and secured there.
To make it clear, watch the video on how to sew a hook to a fur coat.
How to repair a fur coat: procedure
First of all, you need to get to the fastener, since it is hidden between the skin and the lining. How can I do that:
- If the lining is not sewn along the bottom of the fur coat, then you can simply turn it inside out, and we will see the place where the hook is sewn.
- In the case where the lining is sewn along the bottom, you can carefully back up the seam between the lining and the sandpaper in the place where the hook is sewn.
- You can also rip the lining along the seam that comes from the sleeve.
Now that we've got to the old hook, we need to undo it and pull out all the old threads.
Often there are tears in the place of the old hook that need to be sewn up, leaving slits exactly the size needed for the new fastener.
Now let's strengthen this place with a piece of leather. It is better to strengthen it with glue, but you can also sew it around the perimeter. On a piece of leather you need to make in advance slits for a hook of the same size as on the skin, then attach it to the skin from the wrong side so that the slits coincide, and secure with a needle and thread or glue.
We will do the same for the other side of the fur coat, where the ring with the strap should be located. Now we thread the hook and ring through the slot and sew it from the wrong side to the fur coat. And finally, we sew up the lining if it has been torn.
If you have free time and like to do things with your own hands, then the need to repair a fur coat is an excellent reason not only to save money, but also to have a good time.
