At first, dreams of a fur coat made of mink or mouton turn into reality, and after a while disappointment and annoyance sets in - the bottom of the fur coat is frayed, worn out, and the edges of the sleeves too. What to do, the studio’s services are quite expensive. However, there is a way out; you can shorten your favorite fur coat at home yourself. Of course, you shouldn’t completely reshape a fur coat or significantly change the style at home; professionals in fur studios can handle this, but it is quite possible to shorten the product itself and the sleeves. At the same time, you can also make a fashionable voluminous hood from the remains of fur, and then the fur coat will become fashionable again, and you will save a lot of money.
How to shorten a fur coat
How to shorten a fur coat made of natural fur
You should not undertake a complete recut of a natural fur coat at home. Only a specialist - a furrier - can handle this work. Therefore, it is better to contact a fur studio.
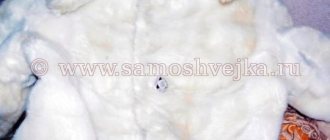
But, if the bottom of the sleeves or the bottom of the fur coat is worn out or damaged by the salt that is abundantly sprinkled on our streets, then the fur coat can be helped by shortening the bottom. It's not as difficult as it seems. All you need is desire and patience, because almost all the work is done manually.
For work we need
Step 1
So, first you need to carefully examine the bottom and mark all the damaged areas, then try on the fur coat and determine its new length.
You can either shorten it a little or solve the issue radically - make a short fur coat out of a long fur coat. The operating principle is the same.
Then you need to tear off the lining at the hem just above the marked new hem line. As a rule, the lining of fur coats is made to be loose (not sewn on the bottom).
Step 2
Lay the fur coat out on a flat surface, fold the lining up and use a pen to draw a new hem line right along the flesh. It is better to do this by measuring the required distance from the old bottom line.
Use a blade or a sharp paper knife to carefully cut the flesh, being careful not to damage the fur.
Immediately after cutting, vacuum the edges of the cut to remove all excess hair.
Step 3
Put the fur coat on yourself or a mannequin and mark the hem line on the lining exactly along the bottom of the fur coat.
Step 4
Trim the bottom of the lining 4 cm below the cut edge of the fur coat.
Lay the fur coat out on the table and level (cut more precisely) the bottom of the lining. The cut piece of lining (if it is more than 20 cm) will be useful to us, do not throw it away.
Step 5
The mesh is quite elastic, so it can stretch under the foot of a machine or overlocker. Using a not very hot iron, carefully glue a strip of non-woven fabric to the bottom of the fur coat using a not very hot iron.
Important! The core shrinks under steam, so we glue the strip without steam, using a dry iron. First try this on a cut piece of fur.
If the core is changed under the iron, then it is better to baste the non-woven strip by hand.
Step 6
Apply the cotton braid from the fur side and sew it with a narrow overlock using an overlocker (you can do it manually over the edge or using a machine). Place the stitch from the side of the braid.
Step 7
Fold the bottom of the fur coat with the braid inside out and pin it. In the corners of the hems, fold the corner so that the hem of the bottom does not peek out from the front side, like an envelope. The width of the hem can vary from 1 to 4 cm depending on the style.
Step 8
We hem the bottom, basting the braid. This is not easy to do, the flesh is difficult to pierce, so we take a short needle (it will not bend) and a thimble. We make the stitch so that it is shorter along the core. This way the stitches will not be visible from the front side. Then we manually sew up the corner at the hem. Comb the fur along the bottom, removing traces of stitches.
Step 9
We iron the cut piece of lining; if it does not fit, take a new lining in the same color and cut out a strip 20 cm wide to match the shape of the bottom.
Long sections of the lining must be ironed inside out.
Step 10
Place the lining on the bottom of the fur coat and pin it on top of the braid. At the edges, we tuck short sections of the lining strip under the edges.
Step 11
Sew the lining to the braid along the bottom using a blind stitch. The core is not caught, so sewing is not difficult.
Sew the top edge of the lining strip to the inside of the fur coat. This work is more difficult, so we use a thimble. We take threads that match the lining, so the stitches will not be so noticeable.
What is this lining for? Firstly, the inner layer is light; when the lining is removed, it will not be visible at the bottom. Secondly, the lining strip will protect the inner layer from wear and contamination.
Nutria coat, cleaning – Woman's Day
Any thing suffers from the influences of the external environment - especially outerwear items. Dust, dirt, and anti-slip agents get on the fur product. To ensure that your nutria is not harmed, follow the basic rules.
Cleaning a nutria coat:
- Nutria fur is resistant to getting wet, but this does not mean that a dirty skin can be washed. Excessive wetting will cause irreversible processes and the product will be damaged.
- Before cleaning, the pile is carefully combed with a brush with sparse and blunt teeth. Nutria should be scratched strictly according to hair growth.
- Large rolled-up parts of the pile are taken apart by hand and only then run over them with a comb.
- Lay the combed fur coat on a flat surface, sprinkle the fur with semolina and, pressing a little, wash it in the direction of the pile. Repeat this procedure on all parts of the coat until the grain is clean. To make the job more efficient, use a large sponge or soft cloth.
- Some strong stains are removed with gasoline. Pour it into a saucer, wet a sponge or cotton pad and gently scrub away the stains. After this, hang the fur coat on the balcony or outside strictly in the shade.
- If the fur coat is very dirty, then to clean it, take thin sawdust and a little gasoline, about 100 ml per 1 kg of sawdust. Mix the mixture well and peel in the same way as with semolina. It is safer to do this procedure outside. And be sure to ventilate the cleaned product.
Professional dry cleaning shortens the life of a fur product. It is advisable to do this no more than 4 times during the entire wearing period. With proper care, a nutria fur coat will last up to 10 seasons without losing its luxurious appearance.
Even the longest and harshest winter ends. This means it's time to put away your warm clothes for summer storage. You can’t just throw a fur coat in a closet or hang it on a hook. As a result, the nutria pile gets crushed, breaks and loses its attractiveness.
- Fur coats can only be stored hanging on hangers of the same size. It is better to purchase a special floor stand. It is durable and does not cause the product to sag.
- Be sure to pack this winter beauty in a case. It should be dense enough and still allow air to pass through. You can buy such a storage device in a specialized store and choose an individual size. Another option: sew it yourself from thick fabric.
- Make sure that the temperature in the dressing room is not too high. Heat is destructive to fur. It becomes brittle, dull, and yellowness may appear. Heating devices and direct sunlight are especially dangerous.
If funds allow, you can order a special refrigerator or hand over the fur for summer storage.
A nutria fur coat is a durable and beautiful product. This inexpensive, but very warm fur will protect you in the bitterest frosts. Follow the rules of storage and cleaning - this will extend the life of the fur coat.
www.wday.ru
SHORTENING YOUR FUR COAT AT HOME
Shortening a fur coat at home
Perhaps you have encountered the fact that when buying clothes, they are longer than you would like.
The thought immediately arises: taking it to a studio is expensive, turning to a home worker is a little cheaper, but what if you try to do it yourself.
I will be happy to help you with this.
First you need to put on a fur coat and fasten it with all the hooks. Then decide on the length (the assistant will fold the hem inward in several places and pin it with pins), then look in the mirror and make sure that everything suits you.
Remove the product and use a ruler to measure the width of the curved hem, for example ten centimeters (write it down so you don’t forget). Subtract three centimeters from this number (you get seven), which is exactly how much you have to cut from the bottom of the fur coat.
Now you need to remove the pins and tear the lining away from the bottom of the fur coat. From the fold of the hem, measure the required number of centimeters using chalk and a ruler (and so on along the entire length).
We connect all the marks together and cut off the hem along this line. From the cut we set aside six centimeters along the entire length of the fur coat, bend the bottom, applying the cut to these marks, and sew it on.
Thus, your hem is three centimeters. The needle injection should not be deep, otherwise the thread will be visible from the front side.
After this, we cut off the same number of centimeters from the fold of the lining as we cut from the hem of the fur coat, fold it three centimeters and sew it with temporary stitches (or pin it) to the folded hem of the fur coat (stepping back one centimeter from the cut).
We put on the fur coat, fasten the hooks and make sure that the lining does not peek out from under the bottom of the product. All that remains is to sew it on with hidden stitches and let the product hang for a while.
If your product is made from whole skins of mink, nutria, muskrat, rabbit, then you should not cut off more than three centimeters, as you will ruin the appearance of the fur coat.
Source
About sleeves
In what situations is it necessary to shorten the sleeves of a fur coat:
- if they are longer than required from the very moment of purchase;
- a decision was made to change the style of the fur coat;
- if the edge of the sleeve is worn out, worn out;
- when the sleeves turned out to be different lengths.
Shortening the sleeves is not a problem
Short sleeves are no longer a disadvantage, it is fashionable, elbow-length or three-quarter length sleeves are trending. Therefore, the decision to shorten the sleeves on a fur coat is quite relevant.
Roll up the bottom of the fur coat
How to do it at home:
- put on a fur coat, determine the required sleeve length, mark with colored thread. Compare both sleeves and make sure that their length is the same;
- Carefully tear off the lining, remove the threads and braid, unbend the sleeve and straighten it out;
- Fold the edge to the required length and secure with temporary stitches. Put on a fur coat and check the length obtained;
- Carefully measure using a ruler and draw a fold line with chalk or a pen;
- step back 3-4 cm from the resulting line to make a hem, and cut off the rest without touching the fur. Cut off the lining too, leaving a hem of 2-3 cm;
- We attach the braid (can be adhesive) to the fold with tight stitches so that it is not noticeable from the front side. To have some volume, you can attach batting or padding polyester to the fold;
- sew the hem to the sleeve using basting stitches, and carefully sew the lining to the sleeve. The cut off fur may be useful in the future for repairing a fur coat.
Fur coat repair in the studio
Although such work will be done professionally in a studio, if the work is done carefully and accurately at home, the results will be good and the savings will be significant.
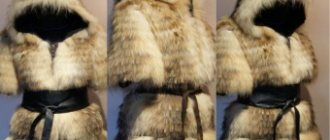
How to shorten a mouton fur coat yourself
It often happens that having purchased new clothes, at first you like the item, but over time, doubts arise, imperfections and flaws are discovered in it, and at this moment a desire arises to change something. Probably, the fur coat purchased not so long ago ceased to bring positive emotions and visual admiration; perhaps it just needs a little repair, or maybe more significant changes are required.
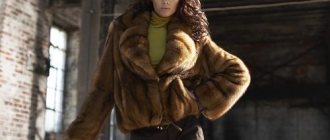
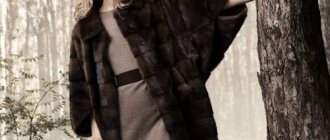
Most often, when faced with the fact that a new item turns out to be longer than we would like, the thought immediately arises of taking the fur coat to a studio, but the cost can be unpleasantly surprising. In this case, it’s worth asking the question “is it possible to shorten a mouton fur coat yourself.” Look at the photos of short fur coats, you might get some ideas.
To shorten a natural mouton fur coat you will need: • scissors; • needle for working with leather products (gypsy); • thread to match the color of the fur coat, colored threads. • blade or special knife; • chalk/fine soap; • tailor's pins; • ruler or centimeter;
To shorten a fur coat with your own hands, from the very beginning you need to imagine as much as possible the sequence of work, step by step. As a result of long-term wear or incorrect storage, the fur will undoubtedly lose its natural beauty, it will become dull, the leather fabric will become less flexible, and abrasions or torn areas may appear on the fur coat. To begin with, you definitely need to do a fitting, perhaps even more than one. Assess for defects:
• torn hem • tightening of fur lining • is the length of the fur coat the same in the back, front, and sides.
Collecting tools
To work, you need to prepare the necessary tools:
- durable threads in fur coat colors and contrasting ones;
- centimeter or ruler;
- strong needles, short and sharp;
- chalk, dry soap or soft pencil;
- special sharp knife or blade;
- sewing pins;
- sharp scissors, preferably sewing scissors;
- thimble.
Way to shorten a fur coat
How to shorten a natural fur coat at home
It often happens that at first we really like a new thing. But after a while we begin to notice shortcomings in it, and a little later there is a desire to change something.
In this article we will look in detail at how to shorten a mink coat at home yourself, without going to a workshop. For this work you will not need to buy special equipment - we will use everything that everyone has at home.
How to shorten a fur coat
To hem a fur coat with your own hands, you need to prepare all the tools and, accordingly, a work space.
Tools :
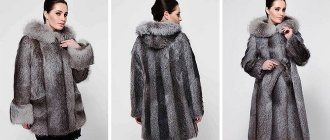
So we have prepared all the tools we need for working at home, now we can safely get down to business. Look at the photos of short fur coats, perhaps you will get some ideas for yourself:
Before starting work, we need to try on the fur coat again, and decide how much we want to shorten it. Having decided on the length, we need to fix it. Folding the edge of the fur coat, secure it with needles, then use a measuring tape to measure how many centimeters you need to remove. Write everything down on a piece of paper so you don’t accidentally forget.
So, let's get straight to work - shorten the hem of the fur coat. The first thing we need is to lay it out on the table and straighten it well, starting from the collar to the very bottom, making sure that the lining remains smooth.
1. Tear off the lining from the base of the fur coat;
After this manipulation, we will see thin fabric on the fur coat itself - batting. In order for the fur coat not to look thick and rough after the fold, this batting must be trimmed.
2. Cut off 3-4 cm of batting along the entire length.
3. Be sure to trim the lining (also along the entire length), by 2-3 centimeters, so that the fur coat itself peeks out a little from under it. In other words, we make it shorter;
4. Turn the lining back 4-5 cm and sew with temporary stitches. We do this primarily so that it does not interfere with our further work. For convenience, this can be done with colored threads;
5. Use chalk to mark the length along the entire perimeter of the fur coat. To do this, take a centimeter and measure the length we need, while simultaneously making strokes with chalk. We make sure that there is the same distance along the entire length;
6. Cut off the hem of the fur coat. From the given length, but 3 centimeters less! For example, if you want to shorten your fur coat by 10 cm, then you need to cut off 7 cm;
7. To shorten a fur coat at home, a piece of fabric of a length that matches our fur coat, 2-3 cm wide. The color of the fabric should be similar to our lining. You can use a cut piece. We fit this fabric to the front side of the fur coat (that is, to the fur), also with the front side and baste the entire length along the back with an even stitch;
8. Now this whole thing needs to be stitched with a sewing machine. We sew only on fabric! 0.5 cm from the edge;
Half the work is almost done!
9. Now we bend the edge of the fur coat inward, to the mark that we drew with chalk, and again we outline the fur coat itself;
10. Using a perfect basting mark, departing 1.5 cm from it, we sew the fur coat with neat, small, hand stitches, trying to capture a little of the fur. To do this, take a needle and thread in the color of the fur coat. Afterwards we remove the colored threads;
11. Turn the product over to the front side and check if the stitches are visible, then comb the fur with a regular comb, thereby straightening it and putting it in order;
12. Let's start working with the lining. We remove the temporary stitches that we did at the very beginning and align it along the length so that it covers the inner seam. And again we make a basting with a colored thread, now connecting our lining with the fur coat itself, as if securing it in this position;
13. We put the fur coat on ourselves and check whether we are comfortable in it.
It is important that the lining does not pull or gather the fur coat into folds!
If all is well, then you can continue working on reducing the length of the fur coat further. If it’s pulling somewhere, then you need to undo the temporary stitch in that place and re-stitch it again, and then double-check everything on yourself. Better measure seven times - cut once!
And let's move on to the last, final stage!
14. We sew, using constant, neat stitches, our lining to the fur coat. Naturally, we use threads in color;
15. Remove all temporary marks. The work is done!
About the hood
If you have a short mink coat without a hood, but you want to be at the peak of fashion, you can contact a fur studio. Having decided on the shape of the hood, you can get a fabric pattern from the studio, try it on and determine whether the size and volume of such a hood is suitable. If you have difficulty choosing a hood style, the craftsmen in the studio will offer various options, help you choose and sew the selected accessory to your fur coat. But there is another way out.
Marking before shortening
If you have a short mink coat and the cut piece of fur is quite large, you can make a hood out of it at home. To do this, you can find a suitable pattern on the Internet and carefully cut and sew the hood using it. Now the trend is voluminous hoods, which can be beautifully placed on the shoulders like a cape. The result is a completely new fashionable fur coat.
Conclusions. It is not difficult to shorten a fur coat made of mouton or mink at home. Making a new item from a worn-out fur coat - perhaps you just need to use your imagination and follow the instructions.
Find in the blog:
Conversion from a fur coat to a sheepskin coat. Part 1: shortening the fur coat with your own hands. Hand furrier stitch.
Do you have an old long fur coat that, due to the warm winter, has never been worn this season?
Or: A long fur coat is frayed at the bottom, and should I shorten it a little and cut off the frayed areas at the fold?
Or: Tired of the old length of your fur coat, do you want something new, lighter and more comfortable to wear more often?
Then you've come to the right place!
Join us, doing renovations and restorations together is much more fun! I'm just about to repurpose my old royal mink tail coat.
Moreover, everyone knows that, for example, just to shorten a fur coat you need to spend at least 3,000 rubles in the studio, and sometimes more.
After a warm winter, putting fur items into the closet for storage
(See: Memo for those who have products made from natural fur.),
I realized that the old fur coat, which I had repurposed for a very warm winter 15 years ago, had lost its appearance, and I no longer needed it so warm.
I looked through my long fur coat made of mink tails and realized that it could still serve faithfully if. put a little effort into restoring and slightly altering it.
Namely: 1. make a short fur coat from a fur coat, shortening it in length; 2. change the cuffs to new ones: restoration of the cuffs; 3. change the lining: replace the insulated one with a regular one.
Of course, with my main activity, I will do everything myself. And you... decide for yourself what and where to carry.
Shorten the bottom of the fur coat with your own hands.
Before we start showing you how to shorten your fur coat, let me explain:
When shortening/trimming the top of a fur coat, two methods of processing the bottom of the fur coat and lining are subsequently used:
1. Shortening the bottom of the fur coat and hemming the lining tightly along the bottom. 2. Shortening the bottom of the fur coat, making the lining flap along the bottom.
In my case, I make a short fur coat out of a fur coat, and when wearing it, it would be better to sew the lining tightly along the bottom.
Therefore, this type of fur coat alteration will be discussed further in more detail.
We shorten and trim a low-long fur coat with the lining hemmed tightly at the bottom.
For this I will need:
- scissors with sharp tips, so that when cutting fur you can grab only the inner core, without grabbing the pile;
- ballpoint pen with black ink. It is with black ones that they are better visible on the inside of fur coats than, for example, blue ink.
In my case, I will change the lining and that is why I flogged it all.
If you want to leave the lining the same, then simply prop it up along the sides a little higher than the future length, along the edges 8-10 cm higher.
First of all, try on and at least approximately estimate how much you need to cut from the bottom to get the correct future length of the fur coat.
What to consider before shortening (cutting off the top) of a fur coat.
Taking into account all of the above and having calculated the length of my future short fur coat, I noted from the inside out how much I would need to cut
(We sew our own retro coat from the 60s. Part 7: Assembling the top, pockets in the seam, fittings.)
I decided to do the calculation differently: namely: measure from the bottom those 28-29 cm that I will need to cut off
I measured everything to length directly on a rag.
Most often, modern mink coats are sewn without additional duplicating gaskets, and then the markings can be made directly on the core.
I'll have to spend more time.
A fur coat is not a coat and it is impossible to glue dublerin to the bottom so that the bottom of the product does not become deformed when worn. In this case, they do this: sew a braid to the bottom of the fur coat. You can buy keeper tape. If it is not available, then cut a piece of cotton fabric no more than 2 cm wide along the grain thread. I will use exactly this kind of “ribbon” braid myself.
The braid is sewn in two ways. - manually - on a machine or furrier, or using a regular zig-zag stitch
Hand furrier stitch.
The braid is sewn edgewise into the edge of the low fur coat, carefully removing the braid between the edges with a sewing needle so that it does not interfere.
To do this, use a hand stitch “over the edge”, making the distance between punctures 3-5 mm. Two stitches are made over the edge, then one in place as a tack, and again... two over the edge and one in place as a tack.