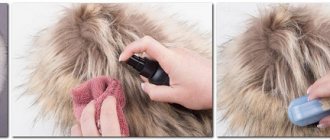
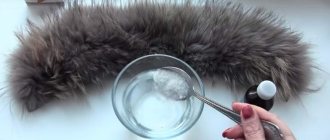
Many women have been dreaming of their own mink coat for years, but only those who were able to buy the coveted new thing know that caring for it is sometimes not easy. It is especially annoying when, with intensive wear in certain places, the fur loses its attractiveness and becomes shabby. And too careful storage leads to an equally sad result - a mink coat becomes unfashionable, which is unbearable for any woman.
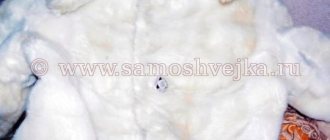
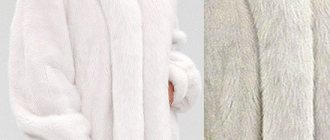
White fur coat
Shortening a fur coat. Brief instructions for use
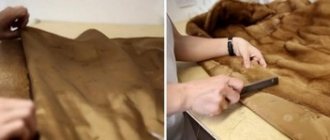
Lay the fur coat on the table, fur side down, carefully straighten it from the collar, straighten the lining with your hand. Support the lining from below. There you will probably find insulation. It will have to be cut off along the bottom side - you can’t bend it like that, otherwise it will turn out rough.
Carefully cut off 3-4 cm of insulation (the data is based on the calculation that the main length of the product will be reduced by 5 cm). It turned out that the length of the lining is equal to the length of the fur coat, however, so that it does not peek out, it also needs to be shortened. Use temporary stitches to baste the bottom of the lining.
Find in the blog:
Conversion from a fur coat to a sheepskin coat. Part 1: shortening the fur coat with your own hands. Hand furrier stitch.
Do you have an old long fur coat that, due to the warm winter, has never been worn this season?
Or: A long fur coat is frayed at the bottom, and should I shorten it a little and cut off the frayed areas at the fold?
Or: Tired of the old length of your fur coat, do you want something new, lighter and more comfortable to wear more often?
Then you've come to the right place!
Join us, doing renovations and restorations together is much more fun! I'm just about to repurpose my old royal mink tail coat.
Moreover, everyone knows that, for example, just to shorten a fur coat you need to spend at least 3,000 rubles in the studio, and sometimes more.
After a warm winter, putting fur items into the closet for storage
(See: Memo for those who have products made from natural fur.),
I realized that the old fur coat, which I had repurposed for a very warm winter 15 years ago, had lost its appearance, and I no longer needed it so warm.
I looked through my long fur coat made of mink tails and realized that it could still serve faithfully if. put a little effort into restoring and slightly altering it.
Namely: 1. make a short fur coat from a fur coat, shortening it in length; 2. change the cuffs to new ones: restoration of the cuffs; 3. change the lining: replace the insulated one with a regular one.
Of course, with my main activity, I will do everything myself. And you... decide for yourself what and where to carry.
How to mark a cutting line for a fur coat
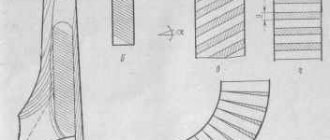
Next, outline the length of the fur coat. Mark the length that we will shorten with chalk directly on the skin. Check how clearly the insulation is cut. It is better to cut the skin not along the intended strip, but by retreating 3-4 cm more than the required length. We cut the skin with a special knife in a canopy, in no case with scissors.
We will cut a 3-4cm strip of lining fabric that matches the color of the original lining of the product. We place the fabric face to face on the fur, and baste with large stitches along the entire length. This part will be folded under, so there is no need to pull the fur out of the seam.
When basting, do not stretch the skin, otherwise the finished hem of the fur coat will form an unsightly wave. You can sew the seam by machine. We sew on the fabric, because the machine will slide on the leather, stretching it. Sew at a distance of 0.5 cm from the edge. Now you can remove the basting.
Making changes to the style of a fur coat
You can improve the style a little, which will change the mink coat and become fashionable again, with your own hands. There is no need to go to a studio and pay a fairly large amount for simple work.
There are several methods to give a modern look to a fur coat, which can be done at home:
- trim the hem;
- shorten the sleeves;
- change collar;
- make trims from other fur at the cuffs, collar and hem.
Processing the bottom edge of the fur coat. What is important
Let's return to the strip drawn along the flesh; we will bend the skin along it. Let's start from the side. Carefully fold the fabric on the edge to create a smooth edge. If there is something in the way inside, or the layer seems too thick, don’t be afraid to cut off the excess.
We bend the main board and baste the edge of the board. Focusing on the line we made, we bend the edge and baste along the entire length to the other edge. It is better to make a basting with a colored thread, so it is easier to remove it later. Time for the next fitting - we check that the bottom of the fur coat is even, including along the sides.
Step by step guide
A mink coat will become like new if you process the edge of the product and hem it to the desired length. To do this, a number of manipulations are carried out that will make the fur product updated and beautiful.
- visual inspection (carefully inspect damaged areas, marking them);
- fitting (a new length, different from the natural edge, is determined by trying on a fur product);
- stripping the lining (the lining fabric is separated from the fur coat to begin work);
Selection of lining for a fur coat
- marking (the fur coat is laid out on a flat surface, the lining is removed and a new bottom line is marked, retreating the required distance from the natural edge);
- cut (use a sharp blade to cut off the excess strip from the edge of the mink coat);
- treatment with a vacuum cleaner (immediately after cutting, vacuum the bottom of the product to get rid of small fallen hairs);
- marking (the lining is now longer than the fur coat and should also be cut off and hemmed, you need to draw a clear line on the lining fabric);
Sewing a lining for a fur coat
- cut (the lining must be cut with a gap of 4 cm to the edge of the fur);
- processing the bottom of the fur coat (the interlining is secured along the edge of the hem with an iron without steam);
- cotton insert (sew a strip of fabric to the fur part of the hem, stitching from the side of the braid);
Sewn bottom to fur coat
- form a fold (the bottom of the fur coat is folded neatly, the width should be about 4 cm);
- overcasting (the edge of the product must be processed using thread and a short needle, basted to the product with short stitches);
- sew on the lining (you can make a loose lining, then it only needs to be sewn to the mink coat on both sides).
Sewn lining
The treated bottom of the fur coat will look neat and beautiful. This product will last for many more seasons, and will also allow you to look stylish and fashionable due to the new style and length.
What length of insulation on a fur coat is needed?
Check again to see if the length of the insulation is in the way. We remove the excess, level the fur coat on the table, and baste the strip sewn to the fur onto the insulation. We seal both sides. Let's straighten the fur coat on the table and check the length of the lining. If the fur coat is flared, the lining will need to be sewn in according to the width of the product.
We do this by basting from the inside of the lining, in two seams on the sides, then stitch it by machine. Let's check the lining: there should be no large folds or tension.
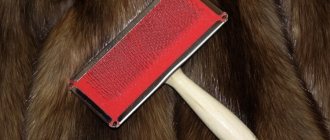
Take a thread that matches the color of the fur coat, and hand sew the bottom basted strip of fabric to the fur coat, piercing and catching the fur. Then remove the basting from the bottom of the hem. The lower corners of the bead must be sewn on by machine, and then be sure to comb with a special brush to straighten the fibers caught in the stitching.
Marking and shortening
It’s great if a relative or friend helps at the first stage. Namely, you need to determine the length to which you need to cut, and then smoothly mark it in a circle. If you have to work with your own hands, you can make a mark on both sides of the sides. In both cases, the length is double-checked:
- the product is spread out;
- carefully steam the lining with a blade or nail scissors;
- take measurements from the mark made at which the fur coat needs to be cut, and to the bottom;
- carry out preliminary markings throughout the entire product, constantly checking to see if there are any distortions;
- cut off the excess part with a tolerance of 3-4 cm per hem.
The excess part of the fur is cut off exclusively at the core, without in any way damaging the fur. The first stage of work ends here, but it’s not a bad idea to try on the already shortened fur coat again and check its length before the final work, as in the video.
Completion of reconstruction
It is much easier to trim the lining that hangs down during fitting, using existing data. The process of cutting the lining is the same as in the case of the base. Measurements are taken along the entire width, markings are applied with an allowance for the subsequent hem, and excess material is cut off. Insulation in the form of padding polyester or batting, if any, should also be removed.
Using a suitable medium-weight fabric, cut out a strip of braid, the edges of which are processed by machine or by hand. Next, it is applied to the face of the product with the front side and is fixed with contrasting threads with a large stitch so as not to pull the base. After trying on, if everything is done correctly and the bottom does not stretch, you can sew the braid thoroughly with threads that already match the tone of the fur coat.
You can sew either by machine or by hand. After all, in fact, a lot of fur coats, even from famous designers, are created by hand. At least, most of the operations involved in sewing them, although far from being done at home.
The final stage of work is fixing the top strip of braid, and then folding the lining. Difficulties can arise only if the fur coat has a flared bottom. Excess lining material will gather in folds, get in the way, and spoil the figure. The excess fabric needs to be trimmed, stitched along the sides and back, and only then can you start tucking. At the end, the fur coat needs to be combed well, freeing any lint that may have been pulled in during sewing, and leaving the new thing hanging on a hanger. That's all: the situation has been corrected, the owner of a fashionable fur coat can again go out in a new thing, catching admiring glances.
Processing the side of a fur coat with decorative braid
All that remains is to seal the lower part of the side with decorative braid. Take a matching thread and hand sew the border with invisible stitches along the very edge. Then carefully hand sew the braid on. Remove all bastings. The lining should float a little.
Working with mink fur is always very responsible and painstaking work. If you do not have the necessary furrier skills and are afraid of ruining the product, contact Mobile Tailor, we will be happy to help you.
<< Back to Lifehacks Studio
Necessary materials
Hemming the bottom of a fur coat in your own home does not require a lot of time and a large set of tools.
Necessary materials for sewing
Almost everything is available in every housewife’s drawer:
- blade (it should be thin and sharp);
- needles (very sharp and short for working with fur);
- threads (they should be durable, the color should match the color of the fur coat lining);
- thimble;
- cotton braid (the width should be about 1-2 cm, the length needs a cut equal to the length of the hem of the fur coat).
The list will be longer if additional work is required in the form of arranging a narrowed lower part of the fur coat or a detachable drawstring. In this case, additional hooks, Velcro, locks and consumables will be required to process the edge of the product.
