Shortening a fur coat. Brief instructions for use
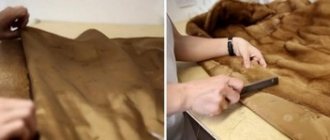
Lay the fur coat on the table, fur side down, carefully straighten it from the collar, straighten the lining with your hand. Support the lining from below. There you will probably find insulation. It will have to be cut off along the bottom side - you can’t bend it like that, otherwise it will turn out rough.
Carefully cut off 3-4 cm of insulation (the data is based on the calculation that the main length of the product will be reduced by 5 cm). It turned out that the length of the lining is equal to the length of the fur coat, however, so that it does not peek out, it also needs to be shortened. Use temporary stitches to baste the bottom of the lining.
How to mark a cutting line for a fur coat
Next, outline the length of the fur coat. Mark the length that we will shorten with chalk directly on the skin. Check how clearly the insulation is cut. It is better to cut the skin not along the intended strip, but by retreating 3-4 cm more than the required length. We cut the skin with a special knife in a canopy, in no case with scissors.
We will cut a 3-4cm strip of lining fabric that matches the color of the original lining of the product. We place the fabric face to face on the fur, and baste with large stitches along the entire length. This part will be folded under, so there is no need to pull the fur out of the seam.
When basting, do not stretch the skin, otherwise the finished hem of the fur coat will form an unsightly wave. You can sew the seam by machine. We sew on the fabric, because the machine will slide on the leather, stretching it. Sew at a distance of 0.5 cm from the edge. Now you can remove the basting.
Required Tools
It may seem difficult to shorten the sleeves of a fur coat at home. But following the exact instructions, you can get the desired result.
We prepare a set of devices necessary for work:
- needle;
- threads that have approximately the same color as the product;
- sharp blade or scalpel.
It is better to purchase a special sewing needle for such purposes - it has a triangle-shaped tip. This shape makes it easier to pierce the leather fabric, preventing tears.
The threads should not be too thin; you should give preference to more durable options.
Before you start working, you need to decide on the shortening method. The choice depends on the type of sleeve: whether there is a cuff or not.
Processing the bottom edge of the fur coat. What is important
Let's return to the strip drawn along the flesh; we will bend the skin along it. Let's start from the side. Carefully fold the fabric on the edge to create a smooth edge. If there is something in the way inside, or the layer seems too thick, don’t be afraid to cut off the excess.
We bend the main board and baste the edge of the board. Focusing on the line we made, we bend the edge and baste along the entire length to the other edge. It is better to make a basting with a colored thread, so it is easier to remove it later. Time for the next fitting - we check that the bottom of the fur coat is even, including along the sides.
Shorten the bottom of the fur coat with your own hands.
Before we start showing you how to shorten your fur coat, let me explain:
When shortening/trimming the top of a fur coat, two methods of processing the bottom of the fur coat and lining are subsequently used:
1. Shortening the bottom of the fur coat and hemming the lining tightly along the bottom. 2. Shortening the bottom of the fur coat, making the lining flap along the bottom.
In my case, I make a short fur coat out of a fur coat, and when wearing it, it would be better to sew the lining tightly along the bottom.
Therefore, this type of fur coat alteration will be discussed further in more detail.
We shorten and trim a low-long fur coat with the lining hemmed tightly at the bottom.
For this I will need:
- scissors with sharp tips, so that when cutting fur you can grab only the inner core, without grabbing the pile;
- ballpoint pen with black ink. It is with black ones that they are better visible on the inside of fur coats than, for example, blue ink.
In my case, I will change the lining and that is why I flogged it all.
If you want to leave the lining the same, then simply prop it up along the sides a little higher than the future length, along the edges 8-10 cm higher.
First of all, try on and at least approximately estimate how much you need to cut from the bottom to get the correct future length of the fur coat.
What to consider before shortening (cutting off the top) of a fur coat.
Taking into account all of the above and having calculated the length of my future short fur coat, I noted from the inside out how much I would need to cut
(We sew our own retro coat from the 60s. Part 7: Assembling the top, pockets in the seam, fittings.)
I decided to do the calculation differently: namely: measure from the bottom those 28-29 cm that I will need to cut off
I measured everything to length directly on a rag.
Most often, modern mink coats are sewn without additional duplicating gaskets, and then the markings can be made directly on the core.
I'll have to spend more time.
A fur coat is not a coat and it is impossible to glue dublerin to the bottom so that the bottom of the product does not become deformed when worn. In this case, they do this: sew a braid to the bottom of the fur coat. You can buy keeper tape. If it is not available, then cut a piece of cotton fabric no more than 2 cm wide along the grain thread. I will use exactly this kind of “ribbon” braid myself.
The braid is sewn in two ways. - manually - on a machine or furrier, or using a regular zig-zag stitch
Hand furrier stitch.
The braid is sewn edgewise into the edge of the low fur coat, carefully removing the braid between the edges with a sewing needle so that it does not interfere.
To do this, use a hand stitch “over the edge”, making the distance between punctures 3-5 mm. Two stitches are made over the edge, then one in place as a tack, and again... two over the edge and one in place as a tack.
What length of insulation on a fur coat is needed?
Check again to see if the length of the insulation is in the way. We remove the excess, level the fur coat on the table, and baste the strip sewn to the fur onto the insulation. We seal both sides. Let's straighten the fur coat on the table and check the length of the lining. If the fur coat is flared, the lining will need to be sewn in according to the width of the product.
We do this by basting from the inside of the lining, in two seams on the sides, then stitch it by machine. Let's check the lining: there should be no large folds or tension.
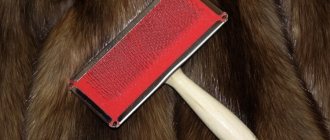
Take a thread that matches the color of the fur coat, and hand sew the bottom basted strip of fabric to the fur coat, piercing and catching the fur. Then remove the basting from the bottom of the hem. The lower corners of the bead must be sewn on by machine, and then be sure to comb with a special brush to straighten the fibers caught in the stitching.
How to shorten a natural fur coat at home
It often happens that at first we really like a new thing. But after a while we begin to notice shortcomings in it, and a little later there is a desire to change something.
In this article we will look in detail at how to shorten a mink coat at home yourself, without going to a workshop. For this work you will not need to buy special equipment - we will use everything that everyone has at home.
How to shorten a fur coat
To hem a fur coat with your own hands, you need to prepare all the tools and, accordingly, a work space.
Tools:
- Scissors (not necessarily sewing, you can take regular ones);
- Needle (for example, gypsy);
- Threads (any colored to match the color of the fur coat);
- Chalk;
- Measuring tape (centimeter);
- Sharp knife;
- Sewing machine.
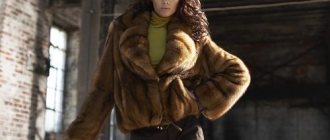
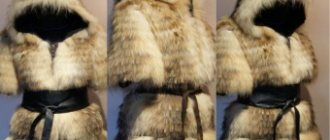
So we have prepared all the tools we need for working at home, now we can safely get down to business. Look at the photos of short fur coats, perhaps you will get some ideas for yourself:
Before starting work, we need to try on the fur coat again, and decide how much we want to shorten it. Having decided on the length, we need to fix it. Folding the edge of the fur coat, secure it with needles, then use a measuring tape to measure how many centimeters you need to remove. Write everything down on a piece of paper so you don’t accidentally forget.
So, let's get straight to work - shorten the hem of the fur coat. The first thing we need is to lay it out on the table and straighten it well, starting from the collar to the very bottom, making sure that the lining remains smooth.
Then:
1. Tear off the lining from the base of the fur coat;
After this manipulation, we will see thin fabric on the fur coat itself - batting. In order for the fur coat not to look thick and rough after the fold, this batting must be trimmed.
2. Cut off 3-4 cm of batting along the entire length.
It may end up stuck to the fur coat, so in this case we use a knife, carefully cutting the fabric from the bottom;
3. Be sure to trim the lining (also along the entire length), by 2-3 centimeters, so that the fur coat itself peeks out a little from under it. In other words, we make it shorter;
4. Turn the lining back 4-5 cm and sew with temporary stitches. We do this primarily so that it does not interfere with our further work. For convenience, this can be done with colored threads;
You need to sew it with temporary, large stitches, since later this matter will be checked again to make sure that everything was done smoothly and correctly.
5. Use chalk to mark the length along the entire perimeter of the fur coat. To do this, take a centimeter and measure the length we need, while simultaneously making strokes with chalk. We make sure that there is the same distance along the entire length;
6. Cut off the hem of the fur coat. From the given length, but 3 centimeters less! For example, if you want to shorten your fur coat by 10 cm, then you need to cut off 7 cm;
On a note ! It’s better to cut it with a sharp knife, it will be much more accurate and you won’t ruin the fur.
7. To shorten a fur coat at home, a piece of fabric of a length that matches our fur coat, 2-3 cm wide. The color of the fabric should be similar to our lining. You can use a cut piece. We fit this fabric to the front side of the fur coat (that is, to the fur), also with the front side and baste the entire length along the back with an even stitch;
Note! In no case do we stretch the fur coat; we need to baste the fabric as it lies freely on our table, otherwise, at the end of the work, our product will go in waves and puff up.
8. Now this whole thing needs to be stitched with a sewing machine. We sew only on fabric! 0.5 cm from the edge;
Half the work is almost done!
9. Now we bend the edge of the fur coat inward, to the mark that we drew with chalk, and again we outline the fur coat itself;
Important ! Make bastings with colored threads that are clearly visible. This is done to make it easier to remove them later.
10. Using a perfect basting mark, departing 1.5 cm from it, we sew the fur coat with neat, small, hand stitches, trying to capture a little of the fur. To do this, take a needle and thread in the color of the fur coat. Afterwards we remove the colored threads;
11. Turn the product over to the front side and check if the stitches are visible, then comb the fur with a regular comb, thereby straightening it and putting it in order;
12. Let's start working with the lining. We remove the temporary stitches that we did at the very beginning and align it along the length so that it covers the inner seam. And again we make a basting with a colored thread, now connecting our lining with the fur coat itself, as if securing it in this position;
13. We put the fur coat on ourselves and check whether we are comfortable in it.
It is important that the lining does not pull or gather the fur coat into folds!
If all is well, then you can continue working on reducing the length of the fur coat further. If it’s pulling somewhere, then you need to undo the temporary stitch in that place and re-stitch it again, and then double-check everything on yourself. Better measure seven times - cut once!
And let's move on to the last, final stage!
14. We sew, using constant, neat stitches, our lining to the fur coat. Naturally, we use threads in color;
15. Remove all temporary marks. The work is done!
So we refreshed our item, giving it a new look, and at absolutely no cost. So once again we reconcile the fur coat, evaluate our work and wear with pleasure the fur coat that we shortened ourselves!
Video: how to hem a mink coat with your own hands
[Total: 15 Average: 3.1/5]
Processing the side of a fur coat with decorative braid
All that remains is to seal the lower part of the side with decorative braid. Take a matching thread and hand sew the border with invisible stitches along the very edge. Then carefully hand sew the braid on. Remove all bastings. The lining should float a little.
Working with mink fur is always very responsible and painstaking work. If you do not have the necessary furrier skills and are afraid of ruining the product, contact Mobile Tailor, we will be happy to help you.
<< Back to Lifehacks Studio
Preparatory work
If you don’t have the opportunity to contact a studio or you have a great desire to change the sleeve length yourself, then you should approach this matter responsibly. Before shortening, you should try on a fur coat and decide on the sleeve length. Trying on such outerwear should not be done on a T-shirt. A blouse or any other thing that will later be worn with a fur coat is much better suited.
It happens that it is necessary to remove uneven lengths from the sleeves. Mark the required distance with a thread of a contrasting color. To avoid incorrect measurements, you should try on the fur coat again and make sure that the product will be comfortable to wear.
