Warm mittens made of mink can warm delicate women's hands even in the most severe frost. At the same time, the palms do not sweat in them, so no discomfort occurs even with an unexpected increase in temperature. In addition, these products look very stylish and, like other things made from natural fur, are very popular among fashionistas all over the world.
Bright mittens made of mink fluff with a “rice” pattern
Mittens from @vkaef_knit
We will need:
- mink down 350/50g or 175/50g
- knitting needles 3.5mm
- add. thread or pin
My density is 24p*35p per 10cm in 2 threads.
Description On 3.5 mm knitting needles, cast on 40 sts + 1 st. to join in a circle. I knit using the Magik Loop method. We distribute 20 stitches onto each knitting needle and begin knitting in circular rows.
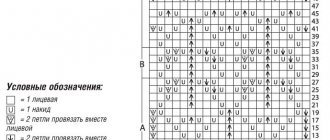
- Row 1: *P1, k1, *thus we knit all 20 stitches on the first needle. On the second knitting needle we knit all the knit stitches.
- 2nd row: we knit all the songs according to the pattern.
- Row 3: *K1, P1, *knit all the stitches on the first needle. On the second - all facial ones.
- 4th row: all loops according to the pattern.
In this way we knit 24 rows of cuff (or 7cm).
You can knit a mitten cuff of any length, but don’t forget about pattern repeat.
We will knit the thumb with an Indian wedge. We begin to form it in the 25th row.
FORMING the thumb for the LEFT mitten:
- Row 25: knit the first knitting needle according to the pattern, i.e. *P1, k1* On the second knitting needle we knit the first 11 stitches and make an increase from the loop of the bottom row tilted to the RIGHT, hang a marker. In the future, all increases will be made BEFORE the marker THROUGH the row.
- 26r: we knit all the loops according to the pattern.
For comfort:
- 1st knitting needle - back side
- 2nd spoke-palm
- 27 r: back: “rice”; palm: 12 faces. increase with a slant to the right, MARKER, 9 faces.
- 28r.: all loops according to the drawing
- 29 rubles: back: “rice”; palm 13 faces. increase with a slant to the right, M, 9 faces
- RUR 30: all loops according to the pattern.
In this way we knit until there are 19 stitches in front of the marker. at 40 rub. on the back side all the loops are according to the pattern, on the side of the palm we knit 19 stitches. remove the marker, take the needle and remove 9 sts with additional thread. We make a crossed yarn over and join a circular row.
We continue knitting in a circle on the back side of the “rice”, on the side of the palm there are facial loops. We knit in height 10 cm or 36 rows. You can knit a different length, the guideline will be the hidden little finger)
DECREASES We make decreases in each row. At the beginning of the row, decrease with a tilt to the right, at the end of the row - with a tilt to the left or in a way convenient for you. It is better to make decreases in an odd row so that the “rice” pattern is not lost - row 37: back side 2p. knit stitch with a slant to the right, then follow the pattern to the last two stitches, purl 2 with a slant to the left. We continue to knit until there are 5 loops left on each knitting needle. We cut the thread, leaving a not very short tail, tighten it and tuck it in.
FINGER on the knitting needle with which the mitten itself was knitted, remove the loops from the extra. we raise 5 more loops of thread. Total on the knitting needles is 14 sts. We knit in height 7 cm (in this case, your length may differ from mine) so that the entire finger is hidden. Cast off 2 stitches together, without 7 stitches on the needles. Cut the thread, pull it through the remaining loops, and tighten. The finger is ready! hide the ends by turning the mitten inside out. ALL! The LEFT mitten is ready!!!
Shaping the thumb for the RIGHT mitten:
- 25 rubles,: back side of the mitten * purl 1, knit 1 *. On the side of the palm we knit the first 9 faces. loops, hang the Marker and make an increase from the loop of the bottom row with a slope to the LEFT. In the future, we will make all increases THRU the row after the Marker.
- 26 rubles, we knit all the loops according to the drawing.
We continue to knit with increases every other row until there are 19 stitches after the marker. at 40 rub. We knit the back side with a “rice” pattern. When moving to the side of the palm, we remove the first 9 loops for additional stitches. thread, make a crossed yarn over and knit in a circle (don’t forget about the pattern) 10cm or 36 rows.
We make decreases in the same way as the left mitten.
Finger : on the knitting needle we remove the loops from the extra. We cast on another 5 stitches and knit 7cm. We close 2 stitches together and tighten the thread. The RIGHT mitten is ready!!!
Machine embroidery
The master takes a ready-made sketch with a vector drawing as a basis. All the necessary parameters suitable for the sketch are set on the machine, each stitch is adjusted and work with the sketch begins.
This type of work requires concentration and is expensive. For a small drawing, a master can ask from 350 rubles, depending on the complexity of the work and other nuances.
Two-layer mittens made of mink fluff – video MK
I present to your attention two-layer mittens made of mink fluff. The simplest ones, without an anatomical finger, without any tricks, so that you understand the very principle of calculations and can knit many other mittens based on them. In this video I do not show the inlaid edge for two mittens for a magic loop. This is not a step-by-step procedure, but a calculation principle for your mittens! ⠀Yarn - mink fluff 50 g 350 m, two threads from a skein, add one. Addi knitting needles 3.25. My density is 10 cm wide, 25 stitches, 10 cm high, 30 rows. ✅Take measurements from the palm. My palm circumference is 17.5 cm. Palm length is 15.5 cm. ⠀✅ We count 17.5 cm * 25 p./10 cm - 43.75 loops. For single-layer mittens, we reduce this figure. For two-layer ones, you can increase it or leave it as is, rounding up. The number of loops should be divided by 4. ⠀❗️One moment, I knit two mittens at once with a magic loop. You can knit them one at a time on toe knitting needles, but pay attention to the density and number of rows. ⠀How many stitches should you cast: we determine by the density of knitting on the needles you will knit with and the threads you will use for a palm of a certain size. ⠀✅I cast on openly using a hook and add 44 sts and knit the distance to the thumb. ⠀❗️And one more thing, here I show you the principle of calculating and knitting the most ordinary mittens without a wedge on the thumb, an Indian wedge, an anatomical finger, without patterns, arans and the like. The most ordinary ones, so that you understand the principle of calculation and, in general, how to knit these same mittens.
What can be made from old mink hats: fur UGG boots
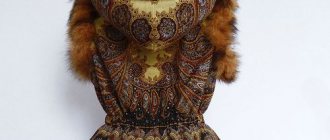
Craftswomen and fashionistas are ready to make various stylish items and even shoe accessories from old mink hats. Soft, warm ugg boots lined with mink will warm your feet even in extreme cold. And this won’t take much time; all you need to do is take your UGG boots and decorate them with beautiful fur. True, one hat will not be enough for this. You will need several old hats at once.
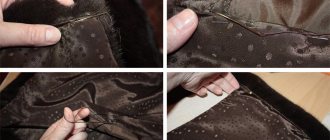
Making an accessory for boots is not difficult. First, spread out the lining from the hat, then cut out a rectangle. Only the dimensions of this rectangle must match the dimensions of the top of the boots. Next, simply cover the top of the shoe with these pieces of mink. You can also make pom-poms from mink and sew on flowers. This will make a great choice for boots. Moreover, they will go very well with a fur coat, winter coat or down jacket.
Boots lined with mink fur at the top
It’s interesting that you can cover not only UGG boots with mink skins from hats, but also other boots; it will look just wonderful. Leather inserts, flowers made from fur and other accessories are also used as decorations.
Mittens with a “Braid with Shadow” pattern
The master class is suitable for palms measuring 18-19 cm.
To execute we need:
- Down yarn “Mink” (48% mink down, 52% goat down, 350 m / 50 g) it will take 70 g to cook. in 3 threads.
- Stocking needles 3.5 mm.
- Marker, auxiliary knitting needle, hook or needle.
Right mitten Cast on 2 needles 3.5 mm. 36 p. We close the work in a circle, one p. has been reduced. There are 35 sts left. Divide 35 sts like this: 1st knitting needle – back side with a braid pattern with a shadow, 9 + 9 – palm knitting needles. That is, 3 knitting needles, 4th - working 1st row: pearl pattern *P1, k1* - to the end of the row. 2nd r. change – persons. over purl, and vice versa: *k1, p1* – to the end of the r. 3rd p: like 1st. Next, look at the diagram. 5 rows of faces. stitch From 4th to 9th – 5 r. persons iron in a circle. On the 6th p.m. We begin to make a braid pattern. There are 17 stitches on the knitting needle - this is the back side of the mitten. On the 6th p.m. in the first overlap of the braid we must add 2 stitches.
6th row: k4, remove 4 sts for extra. knitting needle at work, knit 4 knits, and in loops with extra. knitting needles make increases: k1, increase from broach, k1, inc. from stretch, 1 person, 1 person. Thus, we added 2 stitches to the overlap of the braid, knit. to the end of the river (It became 19 p). From 7th to 11th RUR: 5 RUR. persons satin stitch 12th r: Overlap again. In paragraph with additional knitting needles make approx. 1 p. That is, 1 p was added in the overlap. Then knit. stitch to the end of the river. Now we have 20+9+9 stitches on our knitting needles. 20 is the back side, 18 is the palm. Next, do not forget that we are making a braid according to the pattern of our drawing, with intervals of 5 rows. After the 3rd overlap at a distance of 6.5 cm from the typesetting river. (in the 18th row) start adding a wedge for the thumb. There should be a total increase of 12 points. At the 18th point of the palm, count 3 points and hang a marker (MK). 18th r: 3 persons. MK, yarn over from yourself and then according to the pattern of the 6th row. R19: K3, yarn over, knit. to end.
Thus, making increases in every 2nd row, we work until 12 stitches are added on the needles of the palm. From the cast-on edge it turns out 14 cm to the beginning of the finger. Remove 12 stitches onto a colored thread or pin and cast on. another 4 p., according to the pattern until the end of the river. Knit 16 r. around to the desired length.
Knitted from cast-on p. 25 cm and we will make reductions. Decrease starting from the palm: k2, v2. with switch to the left, to the last 4 sts of the palm: 2 vm. with switch to the right, k2 and also do on the back side. Track. r: no increments. Next rows: decrease in each row until 12 stitches remain on the knitting needles. We tighten these stitches with a crochet hook or needle. We fix it. Finger. We return to the postponed finger stitches. Unravel the colored thread, raise 12 stitches + 4 additional stitches. Distribute 16 stitches onto 3 knitting needles and work to the desired height. In the last r. Make 1 p. decrease 2 vm. persons with switch to the right. Pull last 8 sts.
Left mitten The beginning is similar to the right mitten. We reach the 3rd overlap. In the 18th r. We begin adding a wedge for the finger. If for the right mitten the increases were on the right, then for the left they were on the left. On the palm of your hand, count 15 stitches from right to left and hang the MK. 18th r: 15 knit, yo, MK, 3 knit., then - according to the pattern. 19th: K15, yarn over, MK, k3, then follow the pattern. We continue until we have made 12 increases. Next - repeat, as for the right one. The video shows a master class on braiding mittens with shadow:
What can be made from old mink hats: DIY crafts, photos
Mink hats come in different colors, so the same craft, made with your own hands from those suggested below, will look different. It’s up to you to decide what you can make from old mink hats. Next you will see examples of the work of craftsmen sewing fur products. Based on the proposed options, you can come up with your own and use fur and cute decorations for the purpose.
Fur elephant
Craft - flower
Fur hair clip
Soft fur toy
How to knit mittens made of mink fluff with an Indian wedge finger
In this video I describe in detail and show how to knit warm mittens made of mink fluff with a beautiful pattern. The consumption for mittens is almost 2 skeins (about 90 g). We knit in 4 main threads and 1 additional thread. So, I highlight the following stages: 1. Classic set of loops. We cast on 34 loops. 2. Elastic band 1x1, 15 rows high. 3. In the first row after the elastic, add 4 loops, now there are only 38 loops on the knitting needles. 4. Knit a pattern. 5. We knit an Indian wedge. 6. Separate the finger from the palm, 7. Form the top of the mitten (reduce the loops). Closing the loops with a needle. 8. Thumb knitting.
What can be made from old mink hats: making a bag
If you have several mink hats, then you can use them to sew a wonderful bag with various decorations. Thanks to this accessory, you will stand out from the crowd because you will have your own individual design of the product. It's up to you to decide which bag to sew. Below we will offer an option for a large bag, in which you can put not only a smartphone, wallet, cosmetic bag, but also many other items that ladies need. As you can see, you can make many interesting, useful and stylish things from old mink hats.
Mink handbag
The pattern for the bag is provided below. In order to sew the product, in addition to the fur hats, you will need a lining and backing material made of hard material so that the bag holds its shape in the future.
Pattern for cutting a fur bag:
Bag pattern diagram
Materials and tools:
- mink hats
- lining
- leather
- scissors
- chalk.
Bags made of mink hats
Working principle :
- After you draw the pattern, cut out the details of the cut and transfer them to the skins and lining. Be sure to allow seam allowances.
- Next, sew the lining fabric and mink skins. Sew hard linings inside that will keep their shape.
- Then sew on the handles, decoration accessories and lining.
The finished product will fit under a fur coat and any winter clothing, the main thing is to be able to combine it with things. A small detail in the form of an accessory will only decorate your look.
