How to knit an elongated women's vest with pockets: diagram with description
a girl in a long knitted vest with pockets sits on the sofa.
For many years, long women's knitted vests have remained at the peak of popularity. Therefore, cast aside doubts, select yarn, knitting needles, patterns and make your dream come true.
Please note that:
- thick yarn and knitting needles will significantly save you time, the number of rows and loops
- the simpler the model, the more interesting it looks
- braids and arans require more loops of the product
- elongated vests go well with belts, trousers, dresses
- pockets on such models are more decorative
And we add a number of patterns describing knitting options for elongated vests with pockets.
diagram and description of knitting a women's long vest with pockets
diagram and description of knitting a women's long vest with pockets, option 2
Fashionable fur vest with description
Administrator Published: December 21, 2015
thick yarn knitting for women
Fur vests have become incredibly fashionable again in winter 2021! The classic vest model is knitted in one piece, double knitting, using two completely different yarns: smooth wool and fur yarn.
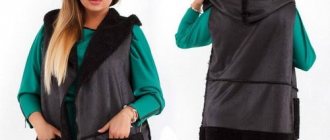
A sweeping silhouette and subtle roll-up collar add elegance to this soft and fluffy reversible vest from Vogue Winter 2015-2016. A fur vest made by yourself will warm you even more than a purchased one. This vest uses double knitting from two completely different but compatible types of yarn - smooth merino with silk and fur yarn from alpaca and merino.
The advantage of this vest is that it is made completely without seams, which is typical for popular and fashionable models. Short rows give shape to the shoulders, which are joined using the three-needle method.
The description of knitting the vest is given for two sizes: S/M and L. The model shows size S/M.
Vest sizes:
Around the chest circumference (overlapping the shelves) 36 (40)” / 91.5 (101.5) cm,
Length 27 (28)” / 68.5 (71) cm.
Knitting - women's vest with fur trim: pattern, diagram with description
a stylish knitted vest with fur on a girl.
Women love fur for the pleasant sensation of touch, the warmth and beauty of the product with it. Therefore, treat yourself to a knitted vest with its addition.
Depending on the splendor and quantity of the fur piece, insert it:
- around the neck
- along the perimeter of the vest with free front strips
- as a collar
Since the presence of fur is associated with warmth, patterns on vests are appropriate:
- braids
- arans
- bulky, for example, rice, garter stitch
As an example, let's add some successful patterns for knitting a vest with fur trim.
And a couple of diagrams with a description of the work below.
diagram and description of working on a women's vest with fur trim; diagram and description of knitting a vest with fur trim, option 2; description of knitting a women's vest with fur trim, option 3
Sleeveless vest knitted from bouclé yarn
Sizes: S; M; L; XL; XXL; XXXL.
We will need:
- boucle yarn, composed of 94% mohair, 6% polyester (50g per 50m) – 550; 600; 650; 700; 750; 800g;
- knitting needles No. 7.
Patterns:
garter stitch: knit all stitches in all rows.
Density: 10p. for 20r. equal to 10 cm by 10 cm.
How to knit shortened rows K1 - an explanation for beginners:
Short rows are knitted to round the front edge. The scheme is like this:
1r. and 2p.: tie 26; 28; thirty; 32; 36; 40p., turn the fabric. Knit a purl row; 3 rubles and 4p.: knit 24; 26; 28; thirty; 34; 38p., turn the fabric. Knit a purl row; 5 rub. and 6p.: tie 22; 24; 26; 28; 32; 36p., turn the fabric. Knit purl p.
We continue, repeating this simple algorithm: each time we knit by 2p. less until you get 10 stitches on the left needle. On these 10p. We knit the straight and reverse rows once.
Next, we knit straight and reverse rows on all loops. We got 10 each; eleven; 12; 13; 15; 17 pairs of rows (straight + reverse) performed on the outside and one pair of rows on the inside of the sleeveless vest. Repeat three times, starting from 1st.
The rounded side on the outside has a length of 30; 33; 36; 39; 45; 51cm, and on the inside - 2cm.
How to knit shortened rows K2 - an explanation for beginners:
Short rows are knitted to round the front edge. The scheme is as follows: 1p. and 2p.: tie 26; 27; 27; 27; 28; 30p., turn the fabric. Knit a purl row; 3 rubles and 4p.: knit 24; 25; 25; 25; 264; 28p., turn the fabric. Knit a purl row; 5 rub. and 6p.: tie 22; 23; 23; 23; 24; 26p., turn the fabric. Knit purl p.
We continue, repeating this simple algorithm: each time we knit by 2p. less until you get 10 stitches on the left needle. On these 10p. We knit the straight and reverse rows once.
Next, we knit straight and reverse rows on all loops. We got 10 each; 10; 10; 10; eleven; 12 pairs of rows (straight + reverse) performed on the outside and one pair of rows on the inside of the sleeveless vest. Repeat three times, starting from 1st.
The rounded side on the outside has a length of 30; thirty; thirty; thirty; 33; 36cm, and on the inside - 2cm.
How to knit a vest with fur yarn - diagram and description for beginners
Vest back for graceful and plump women
We cast on fur yarn 36; 40; 44; 50; 56; 62p. and knit a scarf pattern at 6cm height. Next row on both sides add 1 stitch. We repeat the increase after 6cm. We got 40; 44; 48; 54; 60; 66p. 20cm from the start of knitting for closed armholes. at the beginning of every day 3p on both sides. 0; 0; 1; 1; 1; 1 time, 2 p. 1; 1; 0; 1; 2; 3 times, 1 p. 0; 1; 2; 2; 3; 3 times. We end up with 36 in total; 38; 38; 40; 40; 42p.
At model height 35; 36; 37; 39; 40; 41cm closed central 8; 8; 8; 10; 10; 10p. to roll out the neck and finish the resulting parts separately. Closed along the inner edge of the rollout. 1 p. next row. There are 13 left on each shoulder; 14; 14; 14; 14; 15p. At altitude 37; 38; 39; 41; 42; 43cm closed all the loops.
The right half of the front of the vest for graceful and plump women
All measurements are taken on the short side of the part!
We cast on fur yarn 28; thirty; 32; 34; 38; 42p. We knit a shawl pattern for 16; 18; 20; 23; 26; 29cm height. Then we proceed to the shortened rows of K1 for faces. side - see description above. After 3 repetitions of shortened rows, we continue to knit garter stitch on all stitches.
In the future, we will take measurements from here. After 6 cm and after 12 cm we add 1 stitch. on the short side. We have 30; 32; 34; 36; 40; 44p. For an armhole at a height of 20cm closed. loops according to the description of the back at the beginning of each row. from the short side. We have 28; 29; 29; 29; thirty; 32p.
We continue to knit a shawl pattern with fur yarn up to a height of 35; 36; 37; 39; 40; 41cm.
Next, we begin to perform shortened rows K2. Having completed knitting all the shortened rows, we obtain the height of the part 37; 38; 39; 41; 42; 43cm on the short side. Next R. on the wrong side of the closed initial 13; 14; 14; 14; 14; 15p. under the shoulder. The remaining 15; 15; 15; 15; 16; 17p. knit with fur yarn to a height of 5; 5; 5; 6; 6; 6 cm with a scarf pattern (measured from the shoulder) - this will be the collar. Closed P.
The left half of the front of the vest for graceful and plump women
It is made using fur yarn in a mirror image of the previous part.
Assembly
We sew the shoulders. We make the side seams. Using a knitted seam, we connect the halves of the collar and sew it to the main part.
How to knit an openwork women's vest with knitting needles: diagram with description
a beautiful blue openwork vest, knitted, on a girl.
The openwork on a women's vest is a classic office style. Thanks to such patterns, beautiful ladies create feminine images and emphasize their taste and style.
The procedure for knitting an openwork vest is similar to any option discussed earlier. The only adjustment is the pattern.
The main motifs on women's sleeveless vests include:
- diamonds
- waves
- net
- flowers
- vertical stripes
For inspiration, we insert a couple of patterns describing how to knit an openwork women's vest.
pattern and descriptions of knitting a women's openwork vest, example 1 pattern and descriptions of knitting a women's openwork vest, example 2
How to knit a long women's vest with knitting needles without fastener: diagrams
a light long vest, made with knitting needles, on a girl.
Often, long vests attract craftswomen with their practicality, preserving the warmth and comfort of the image.
Models without clasp are:
- connected by interlacing fabrics in the belly-chest areas
- made of 2 strips - front and back, sewn together
- with freely hanging front strips that are not fastened together in any way
In the first case, you knit 3 fabrics, connecting and separating them at a certain height from the start of work. In this case, the bottom of the product has an asymmetrical edge.
In the second case, knit the front with more patterns than for the back. Such vests are preferable for beginning craftswomen.
Several patterns for knitting long patterns of women's vests.
description of knitting a long vest without a fastener, example 1 description of knitting a long vest without a fastener, example 2
Women's grass vest - a detailed description for beginners
Things knitted from such yarn are very original. Ladies of any size can wear them. But, given the texture of the yarn, it is better not to use it for overweight women. And for slender girls, grass models are just a godsend! Knitting them does not require highly skilled knitter, since the patterns used are very simple.
Sizes: S; M; L; XL.
We will need:
- “grass” type yarn, 100% synthetic, (100g per 18m), brown color – 800; 900; 1000; 1100g;
- regular yarn, melange, grass color, containing 60% acrylic, 40% polyamide (50g per 80m) – 350; 350; 400; 450g;
- knitting needles No. 4.5 and No. 8;
- hook No. 4.5.
Patterns:
- elastic band: 2 knits. X 2 purl. – knit with needles No. 4.5;
- persons smooth surface: in faces. rows - knit stitches, purl stitches. rows - purl. Knit with needles No. 8.
Alternating stripes: 2 rows of grass yarn / 2 rows of regular yarn.
Technique for performing decreases
In the process of work, we will need to make decreases of 1 p., retreating by 2 p. from the edge. The algorithm is as follows: at the beginning of the river. – we knit 2 p., then from 2 p. we knit 1 p.; at the end of the river – when we have 4 stitches left on the knitting needle, we knit 1 broach (remove 1 st. knit, 1 p., pull it through the removed one), 2 p. Density: face. smooth sp. No8 10p. for 13r. equal to 10 cm by 10 cm.
Description - how to knit a vest with your own hands
Back
We start knitting the pattern with set 68; 74; 80; 88p. smooth yarn with knitting needles No. 4.5. We knit 18 rubles. elastic bands (about 7cm). In the last row we make decreases of 20 at equal intervals; 22; 24; 26p. That leaves us with 48; 52; 56; 62p. Next - persons. satin stitch using No. 8 knitting needles with alternating stripes of regular yarn and “grass” (see explanation above). In every 4th row on both sides, not reaching 2 sts to the edge, add 1 st. three times, then twice more, 1 p. in every 2nd row; twice 1p. in every 6th p., three times 1 p. in every 4th r.; 2 times 1 p. in every 6th r., 3 r. 1 p. in every 4th r.; 2 rub. 1 p. in every 6th r., 3 r. 1 p. in every 4th r.
We continue knitting sleeveless vests for women using the existing 58; 62; 66; 72p. After 70; 72; 72; 74 rub. (this is about 47; 48; 48; 49 cm) from the beginning of work, we reduce the shoulder bevels on the sides of the p., retreating 2 p. from the edge. Decrease pattern: 5 times 1 p. in every 4th p., 5 times 1 p. in every 2nd row, every other row - 1 time in 5 stitches, every other row - 1 time in 6 stitches; 5 times 1p. in every 4th r., 6 r. 1 p. in every 2nd row, every other row 1 time in 5 stitches, every other row 1 time in 6 stitches; 5 times 1p. in every 4th p., 7 times 1 p. in every 2nd row, 2 times 6 p. in every 2nd r.; 5 times 1p. in every 4th; 8 times 1 p. in every 2nd r.; then in every 2nd r. 1 time 6 p. and 1 time 7p.
In the series of performing the last lateral decreases for rolling out the closed. central 12; 14; 14; 16p. and finish the resulting sides separately. To round the rollout from its inner side, close it 1 time in 2 stitches.
Before
Left half front of sleeveless vest
We cast on with knitting needles No. 8 13; 15; 17; 20p. yarn from "grass". We knit faces. satin stitch, alternating stripes. On the right side of the part we make increases, as on the back. On the left side, retreating 2p. from the edge, add 4 times 1 p. in every 2nd p., 3 times 1 p. in every 4th r. We get 25; 27; 29; 32p., continue knitting evenly on them. After 46; 48; 48; 50 rub. (this is about 35; 36; 36; 37 cm from the beginning of the work; for rolling out, we decrease along the left side of the loop, retreating 2 points from the edge.
The scheme is as follows: 4 times 1 p. in every 8th r.; 3 times 1 p. in every 6th p., 2 times 1 p. in every 8th row; 3 times 1 p. in every 6th row, 2 times 1 p. in every 8th row; 3 times 1 p. in every 6th row, 3 times 1 p. in every 8th row. For the shoulder bevels, we perform decreases using the description for the back of the sleeveless vest. Closed n. at the height of the back.
Right half front of sleeveless vest
Performed in a mirror manner to the previous part.
Strap of the right half of the front and 1⁄2 rollout of the back neck
We cast on with regular yarn using knitting needles No. 4.5 190; 200; 210; 220p. and knit an elastic band. In 20r. (this is 9cm) from the beginning we put a stitch on the left side in every 2nd r. 1 time 160 p., 2 times 7 p., 2 times 8 p.; 1 time 168p. 4 times 8 p.; 1 time in 176 p., 2 times in 8 p., 2 times in 9 p.; 1 time in 184 p., 4 times in 9 p. Knit one row on all stitches, closed. All P.
Plank of the left half of the front and 1⁄2 rollout of the back neck
Performed in a mirror manner to the previous part.
Assembly
We sew the shoulders. We sew the strips along the bottom edge, then along the front halves to the center of the rollout on the back. We join the edges of the planks and sew them with a knitted seam. We sew the sides, leaving gaps for the armholes - 23cm each. We crochet the edges of the armholes with 1 row of connections. columns. For the ties, we collect a chain of air stitches 40 cm long. Then we knit 1 connection. stitch in the 2nd stitch of the chain and in each next stitch. Sew the strings to the back. side of the slats, retreating 9 cm from the beginning of the neck rollout.
The next model of a sleeveless vest for women is knitted from yarn with a pronounced “fur” effect. A large percentage of mohair in the thread makes the sleeveless vest warm enough to be worn instead of a jacket. The range of sizes allows you to knit a vest for graceful and plump women.
How to knit a women's white youth vest with knitting needles: diagram
Youth long white vest, knitted, on a blonde
Youth women's vests do not like a bunch of braids and arans. Such patterns are associated with maturity and seriousness. And we need effects of lightness, playfulness, creativity.
Carefully study the patterns and imagine their appropriateness on your future vest.
Youth knitted sleeveless vests are characterized by:
- simplicity of cut or originality of execution
- length below average, that is, models from 75 cm and more
- the presence of a hood and/or inserts with fringe/grass/thin pieces of fur
We add a number of knitting patterns for similar vests.
white youth women's vest with knitting needles, diagram and description. example 1 stylish youth white vest knitted on a girl, description and diagram, part 1 stylish youth white vest knitted on a girl, description and diagram, part 2
stylish youth white vest knitted on a girl, description and diagram, part 3 stylish youth white vest knitted on a girl, description and diagram, part 4 stylish youth white vest knitted on a girl, description and diagram, part 5 stylish youth white vest knitted on a girl, description and diagram, part 6
How to knit a women's classic vest with knitting needles with buttons: diagram
a classic women's vest with knitting needles and buttons, photo of the model from the
Classics magazine remains relevant with any fashion trends. A women's vest with buttons is a kind of must-have in the wardrobe of a needlewoman of any skill level.
If you have not yet mastered the nuances of knitting buttonholes, knit a solid front fabric with an imitation placket and sew buttons on it.
It will be easy for advanced needlewomen:
- do both planks
- calculate places for buttonholes
- crochet them and sew them in the designated areas
Alternatively, select original buttons and skip the tying step for a finished knitted project.
The scheme for working on a classic women's vest is below.
pattern and description of knitting a women's classic vest with buttons, example 1 pattern and description of knitting a women's classic vest with buttons, example 2 pattern and description of knitting a women's classic vest with buttons, example 3
Warm women's vest knitted from mohair: diagram with description
a realistic model of a light cashmere vest on a smiling blonde.
Mohair is a thin natural yarn that gives the products warmth and originality. However, be careful when knitting a vest from it. Some tips:
- choose knitting needles 1-4 sizes thicker than the thread of yarn
- feel free to stick to openwork patterns
- combine the finished product with clothes of different colors and styles
- insert braids in small quantities and preferably large ones
A mohair vest is almost weightless and accentuates a blouse or turtleneck. On the other hand, you will be warm in it even in cool weather.
We add several patterns describing how to knit a mohair vest.
diagram and description of knitting a women's vest made of mohair; description of knitting a warm long women's vest made of mohair
Large size women's knitted vest: diagram with description
original openwork vest on knitting needles on a curvy girl
Curvy ladies know how to present themselves stylishly and brightly in clothes with the help of vests. To do this they use the following models:
- with freely falling front panels,
- extended to mid-thigh,
- with only one or two buttons at the top in the neck area, or a couple of pieces at the bottom,
- with a belt of medium thickness, knitted from yarn of the same color as the vest, or leather to match its color. Determine where to wear it below your waist. However, avoid deep odor,
- asymmetrical fashionable ones, in which the back is 10-15 cm longer than the front,
- poncho vests connected on the sides by a pair of ponchos,
- from calm tones of yarn.
Several patterns describing knitting vests for curvy ladies are below.
diagram, description of a knitted vest for a curvy lady, example 1 diagram, description of a knitted vest for a curvy lady, example 2
Openwork long women's vest
Summer vest models look very stylish. They are fashionable to wear with trousers, tight skirts, even shorts! They are suitable not only for thin, but also for plump beauties: while hiding the flaws of the figure, such models will favorably emphasize its advantages. An openwork elongated version of the vest can be worn even for beach walks - with it your look will be very romantic!
Sizes: 38-40; 46-48.
- To knit an openwork vest with your own hands we will need:
- yarn containing 40% viscose, 30% cotton, 20% linen, 10% polyamide (50g per 125m) – 500; 600g;
- knitting needles No. 4.5;
- hook No.4.
Patterns:
- openwork pattern A.: performed according to the diagram. The number of points is a multiple of 10 + 1 point + 2 cr. The diagram shows persons. rows. In purl r. Purl all loops and yarn overs. The first and last stitch in the row is the edge stitch. Between them are repetitions of rapport. In height it is knitted once with 1p. 28 rubles each;
- openwork pattern B: tie like a knot. Ah, but repeat in height from 29 rubles. 36 rubles each;
- openwork pattern C: tie like a knot. Ah, but repeat in height from 37 rubles. 60 rub.
Sequence of patterns: first pattern - 28 rubles, then 128 rubles. the second pattern, then 52 rubles. third pattern. There are 208 rows in total.
Density: 20.5p. for 24.5 rub. equal to 10 cm by 10 cm.
Description
Back
We dial 113; 133p. and do 1p. facial This row will be purl; we will not take it into account in further calculations. We continue to knit, alternating patterns. Through 156r. (63.5cm); 146 rubles (59.5 cm) on both sides for sleeves 1 time 10 stitches. and include them in the pattern. We have only 133 (153) points. After 194p. (79cm) from the beginning of the close. for the shoulder line on each side 1 time 7; 8 p., then in every second p. 1 time in 7 p., 5 times in 6 p.; 1 time in 8 p., 5 times in 7 p. Through 208r. (85 cm) from the beginning we will have 45; 51p. Of these, central 33; 37p. – neck rollout, the remaining 12; 17p. – shoulders (2x6p.; 7p.).
Left shelf
We dial 63; 73p. and do 1p. facial This row will be purl; we will not take it into account in further calculations. We continue to knit, alternating patterns. We make additions to the sleeve according to the description of the back. In total we have 73; 83p. Through 158r. (64.5 cm) from the bottom of the close. under the rollout bevel on the left side 1 time 1 p., then in every 2nd p. 22; 24 times 1 p. Don't forget to make decreases along the left edge for the shoulder bevel. To do this, we use the description of the back. At the same height as the previous part, closed. 6; 7p. for the shoulder.
Right shelf
We knit as the previous part, only in a mirror way.
Assembly
Sew the shoulders and sides. Sew the sleeves. We crochet the vertical edges of the shelves and the neckline, performing 1 r. connecting posts.
Knitted women's grass vest: diagram with description
a gray vest made of grass, made with knitting needles, on a smiling brunette.
Grass attracts needlewomen with the opportunity to create original fur products.
Knit yourself a vest with weed, highlight your originality and your taste.
Before you start knitting with this yarn, learn a number of points:
- prepare knitting needles of different diameters and regular threads, which you alternate with grass through an equal number of rows,
- To ensure that the fabric retains its shape and elasticity during wear, insert a flexible thread in areas with regular yarn,
- Plan buttons for the vest as connectors for the front panels. Or perform continuous knitting of both parts of the product and then add a wide belt,
- change the pattern when working with grass to purl rows. This way the product will retain maximum pomp.
Below are several patterns describing how to knit a women's vest with the addition of grass.
women's vest with grass with knitting needles, diagram and description, example 1 women's vest with grass with knitting needles, diagram and description, example 2
Women's knitted vest with hood: diagram with description
original vest with a hood with knitting needles and a leaf pattern.
A hood on a vest is not only warm, but also original. If you love convenience and practicality in clothing, then you already have a similar model of a sleeveless vest or you have prepared materials for knitting it.
The hood is appropriate on vests:
- from multi-colored yarn
- with or without clasp
- as a continuation of the front shelves
Knit it separately and then sew it to the finished vest, or continue the fabric to the desired height and sew it in a convenient way.
A number of ready-made patterns with a description of knitting women's vests with a hood.
pattern and procedure for knitting a women's vest with a hood, example 1 pattern and procedure for knitting a women's vest with a hood, example 2
Notes for knitting a fur vest from Vogue Winter 2016.
The vest consists of two layers, worked simultaneously using the double knitting technique, as detailed in the description. This technique does not require sewing two fabrics, and it is completely double-sided.
The shoulders will be formed using the short row method, but without the need to wrap the stitch before turning the work.
For the collar, the smooth stitches will be closed on the back side, and the fur yarn stitches will be closed on the front side, but this stitch will not stand out against the fluffy fur yarn. Thus, the entire vest is knitted with one fabric, and at the same time all the edges are neatly processed without a single seam.
Knitted poncho vest: diagrams with descriptions
gray vest-poncho with knitting needles on the model
The poncho will warm you better than a classic vest due to the closed shoulders.
There are many varieties of poncho shapes. However, needlewomen prefer:
- semicircle at the front and back with the highest points at the elbows,
- rectangular wide canvases connected at the lower ribs,
- a solid strip with a hole for the head. The first is fastened at the waist with a belt or ties on the sides in the area of the elbow bend.
A number of ready-made patterns with a detailed description of knitting a poncho are below.
pattern and description of knitting a women's poncho vest, example 1 pattern and description of knitting a women's poncho vest, example 2
DIY fur vest with description.
The vest is knitted in one piece up to the armhole, then the front and back are knitted separately.
The shoulders are connected using the three-spoke method.
When knitting a vest, two types of loops are used, knitted together with a tilt to the left:
2 loops together to the left: slip 1 loop as a knit stitch, knit 1 knit stitch, pull over it and lower the slipped loop from the knitting needle.
Pull through: (slip 1 stitch as a knit stitch) 2 times, return these 2 stitches to the left needle and knit 2 stitches together into the back walls.
Translation of the description of knitting a vest and pattern from English:
Knitting patterns for women's vests
knitted women's vest and enlarged pattern on the fabric
From the examples of knitting women's vests discussed above, you can see that a variety of patterns are suitable for them. Take into account:
- purpose of creation
- combination with other wardrobe items
- features and color of yarn
- spoke thickness
Let's add a number of alternative patterns made with knitting needles for knitting a women's sleeveless vest.
pattern patterns for knitting women's vests, example 1 pattern patterns for knitting women's vests, example 2 pattern patterns for knitting women's vests, example 3 pattern patterns for knitting women's vests, example 4 pattern patterns for knitting women's vests, example 5 pattern patterns for knitting women's vests, example 6 pattern patterns for knitting women's vests, example 7 pattern patterns for knitting women's vests, example 8 pattern patterns for knitting women's vests, example 9 pattern patterns for knitting women's vests, example 10
««««««««««««««««
Materials for knitting a fur vest.
You will need 4 (5) 100 gram skeins, each approximately 200 meters long, of Plymouth Arequipa Worsted yarn in gray #301 putty (A). This smooth yarn consists of merino wool with the addition of silk.
You will also need 15 (18) 50 gram skeins, each approximately 60 meters long, of Plymouth Arequipa Fur Natural White #200 ecru (B) yarn. This is a fur yarn that consists of alpaca wool and merino wool.
The vest will be knitted using 5 mm circular knitting needles 100 cm long.
To close the loops, prepare an additional 5 mm knitting needle.
Additional tools will require several loop holders or auxiliary yarn.
Vest knitting density:
14 loops and 22 rows in 10 cm stockinette stitch, knitted with smooth yarn A using 5 mm knitting needles.
