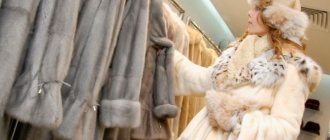
Winter clothes made from auction mink fur are every woman’s dream. Noble mink warms its owner even in the harshest cold, shimmers exquisitely in the sun and flows in the hands like silk. Such a luxurious fur coat can make any look truly respectable and elegant, emphasizing the privileged status of its owner.
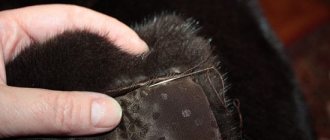
But, unfortunately, even the most expensive fur is not immune from damage. In most cases, defects are formed as a result of careless wear or improper storage. One of the most common localizations of breakthroughs is the armpit area: sometimes it is enough to raise your hand too sharply for the threads to crack at the seams. Also, the axillary region often tears when the flesh is stretched. It is possible to eliminate such a defect at home only if the owner has furrier skills and also has all the necessary materials and tools available. In order not to aggravate the situation, it is better to immediately contact the studio: qualified craftsmen will be able to carefully restore the integrity of the product and extend its service life.
How to repair if the armpits of a mink coat are torn:
- The easiest way to sew up the lining is if it is torn at the seam. To do this, you need to secure the tear area twice with threads. Double stitching prevents re-unraveling
- If the mesh is torn, it will no longer be possible to sew it along the seam: you will have to use special glue. It is necessary to connect the joints very carefully - if the slightest misalignment occurs, the fur coat will look deformed
Repairing a breakthrough with glue - step-by-step guide:
- First you need to dry the product thoroughly
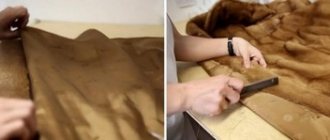
- Then tear apart the lining and lay the fur coat on a flat surface.
- Carefully and accurately attach the torn edges of the fur from the wrong side to each other - literally joint to joint
- Hem the edges, then take a piece of fabric, apply glue to it and place it on the seam
- Press down a little with your hand. Hold your hand in this position for 20-30 seconds. This will help fix the fabric to the fur coat and the glue will set. Leave to dry for two days
Important note! While drying, the fur coat should not be touched so that the fabric retaining piece does not move. Therefore, do not change its position and do not hang it on a hanger. As a rule, two days are enough for final setting. After this, you will again be able to enjoy the beauty of your product and create the most spectacular images with it.
As you can see, it is not at all easy to sew up fur and restore the interior yourself: it is a technologically complex multi-stage process that requires certain skills. Very often, an item that was not sewn up in a workshop tears again - and you have to resort to even larger and more expensive repairs. Therefore, it is better to immediately turn to professional furriers who specialize in restoring wardrobe items made from natural fur.
The masters of the BLACKGLAMA studio perform not only repairs to the armpit of a mink coat, but also many other works. They can:
- Carefully sew the torn sleeve
- Repair tears in pocket corners or splines
- Eliminate scuffs on the bottom
- Repair a broken back seam
- Narrow or shorten sleeves
- Replace the collar, restore the hood
- High-quality repair of broken fittings
Eliminating abrasions
You can fix small frays on the folds by tucking them into the inseam. To do this, you must follow this algorithm:
- Open the bottom lining and the seams that secure the hem.
- Carefully sweep away the bald spot.
- Duplicate using cold contact tape.
- Cut out the damaged area with a blade or knife.
- Next, you need to sew the edge together with the contact tape, using an overlock stitch.
- Turn the fur item inside out and tap the seam through fabric or paper.
- Sew the lining in its original place.
How to remove defects on a mink coat
The product tears most often on the back and sleeves, and in these places it is most difficult to fake it. If you need to sew up a fur coat on the back, you first need to tear off the lining and insulation from the inside. If you get to the break point, you should cut it out and apply a patch. It is not recommended to cut the fur itself for patching with scissors, as the pile will deteriorate. The patch is sewn to the tear site without pulling the skin and fur. Sew with a regular marking stitch. If you tap the area where the patch is applied with a wooden hammer, the fur will become more even. To properly sew a fur coat on your back, you need to remember that mink fur is heavy and durable. For hand sewing, use a thick leather needle and always sew in the direction of the pile.
Sewing a sleeve on a fur coat is not very easy; to do this you will have to rip open the side seam and tear off the lining. The armhole will need to be trimmed enough so that the size of the tear is clearly visible. If the fur inside is torn and the tears are even, you can sew it up with your own hands by applying a patch.
Sewing the sleeve under the arm will be more difficult: for this you will need to insert and sew on a piece of fur. It can be purchased at a studio, or, alternatively, cut from your own clothes if you plan to recut them in the future. For small tears, you can glue the inner layer yourself with soft glue. A rubber-based adhesive, such as rubber, is ideal. The edges of the torn product are pulled together with a thread and a needle, then a layer of fabric or gauze coated with a layer of rubber soft glue should be applied to this place. This way, the seam will be secured and the mesh will not deteriorate. The advantage of this method is that the skin will not tighten and the appearance will be restored. After the glue has dried according to the manufacturer's instructions, provided that the edges are glued end to end, no defects will be visible.
Putting on a patch
In order to eliminate a hole or restore a tear, you need to select a piece of fur with the same pile as on the damaged area.
Important! For the patch, you can take a piece cut from the waistband, side seam or hem.
To sew a mink coat with your own hands, you must follow the following algorithm:
- Using a blade or a tailor's (stationery) knife, carefully trim the edges of the damaged area, giving it the desired shape.
Important! When working with fur, you cannot use scissors - they cut off the pile.
- Carefully baste the patch, being careful not to pull the fur.
- Finally sew the patch on with an overcast stitch.
- In the final stage, the repair site should be lightly tapped with a wooden hammer through a thin cloth or paper - this is necessary in order to even out the fur.
Minor seam repairs
Valuable mink fur must be properly stored and carefully inspected before purchase. A common problem for the owner of the product is tearing at the seam. The seam should be sewn up with thick threads, and the fur pile should be turned outward, so that the seam itself will not be visible later. If you sew the product yourself, you need to use a needle to repeat all the stitches that have come apart. To avoid the seam from spreading, you should step over the edges of the tear. If you are repairing a product by machine, then the goat or overlock stitch is best suited for stitching. A mink coat can be glued along the seams with contact tape, then sewn with a goat-type overlock stitch. Sewing the seam will thus be the neatest and fastest option. Having connected the parts end to end, they are stitched, and then simply comb the fur with a comb. The quality of the fur and seams indicates how long the product will last in the future.
Sometimes it happens that your favorite fur coat breaks after many years of wear in the most unexpected places, for example, under the arms. This may occur due to improper operation or mechanical impact. Certain measures must be taken to repair this expensive product. Sometimes you can cope on your own, sometimes you will have to resort to the help of specialists.
Fur coat torn under the arms
What are the most common types of damage to fur products?
As a rule, mink coats faithfully and reliably serve their happy owners for fifteen to twenty seasons. However, due to insufficient storage of these products or some other unfavorable factors, there is a high risk of premature occurrence of unwanted damage and defects. The most common and common types of problems include:
- divergence of seams on a fur product;
- the appearance of characteristic abrasions in the area of sleeves, collars, pockets;
- skin tears in various areas of the mink coat.
What can cause a gap?
There are only a few reasons. They can be divided into separate categories:
- error in production;
- improper operation.
If the fur coat was initially produced incorrectly, for example, an error was made during dressing, storage or assembly, then it is not surprising that it tore. This option falls under the category of a warranty case. It is almost impossible to determine a defect when purchasing, so you won’t be able to protect yourself in advance.
A tear in a natural fur coat
If, after acquisition, the owner did not properly monitor and care for the product, violating the operating conditions, then it is not surprising that the fur coat tore under the sleeves, on the shoulders or collar.
Repair using liquid leather
There is another good way to repair a fur coat yourself using a specially designed composition. This is done using “liquid skin,” a substance that hardens when exposed to an oxygen environment. You can use a mink coat within 24 hours after repair work. This product is available in different colors so that you can easily match it to the color of the product. The composition can mask traces of recut and re-sewn loops and lapels. Before the procedure, the edges are carefully pulled together and leveled with a press, and be sure to be degreased beforehand.
What to do if your fur coat is torn due to a manufacturing defect
If the owner is fully confident that he maintained and wore the product in accordance with the required conditions, then he has the right to turn to the manufacturer for compensation. To do this, it will be necessary to conduct an independent examination, which will identify the defect and confirm that the fur coat was not negatively affected and was not torn because of the owner. This will establish a warranty case.
After this, the manufacturer will be obliged to pay compensation in the appropriate amount. However, this can result in a long and protracted process. Sometimes such cases end up in court.
What you need to repair or restore a fur coat
If the item is subject to restoration, you need to think about the material for repair. A long fur coat will make a sheepskin coat, and there will be enough fur for restoration. Shortening a long fur coat is the best option, since its floors often get dirty and worn out. The “trapezoid” model is best suited for recutting – it has a lot of fur, which allows you to get creative with patterns.
For minor repairs, you can take the fur from the underside of the turn-down collar or cuffs, replacing it with natural or artificial leather, suede, or drape of a suitable color. To replace the collar, cuffs and hems, you can choose fluffier fur. You can use a child's fur coat, or buy tanned skins at a fur store. The combination of fur and leather looks good. A fur coat can be transformed by trimming the edges of the sleeves, pockets, and top shelf with strips of leather.
How to repair a rip that runs along a seam
If the fur coat is slightly torn, then it can be repaired at home in two ways - sewn with thread or glued with a piece of fabric.
Sew with threads
If you have strong enough threads at home, then if you have the skill, you can carefully sew the hole. To do this you need:
- Open the lining from the wrong side of the product.
- Connect the edges of the torn fur coat tightly together.
- The seam must be made strong across the edge. First, pierce both edges of the fur coat, thread the thread through them, and then pierce again in the same direction at a short distance from the first.
Sewing a tear in a fur coat
It is important to make sure that the threads tightly tighten the edges of the fur coat so that it does not tear again in the future.
Glue
To glue the edges of the tear, you need to use special glue and cotton cloth. This must also be done from the wrong side:
- A piece of fabric is cut in such a way as to completely cover the gap.
- Next, glue is applied to the seam and fabric is applied.
- The edges are pressed against the fabric as tightly as possible to avoid small voids.
Fabric glue
This trick cannot be performed in difficult areas, such as under the arms or on the sleeves, where the lines are not straight.
Is it possible to repair a fur coat?
Depending on where and how the rupture occurred, it is necessary to select repair methods. There are two criteria for assessing damage:
- the tear goes along the seam or not;
- small or large damage.
Repairing a fur coat yourself
Tears that have a large area of damage cannot be repaired at home, for example, torn sleeves. They must be handled in special workshops that repair fur coats. However, if the tears are located on the bends of the seams, under the arms, they also need to be shown to the master. Small tears along the seam can be repaired quite easily at home. With those located in other places, the situation is more complicated, but with some skill they can also be repaired.
How to make repairs if a fur coat is not torn along the seams
Quite often, a fur coat does not tear along the seams due to a puncture. Then the hole is small and easy to repair. For this you will also need to use glue and fabric.
To do everything as carefully as possible, you need to place the fur coat on a hard, flat surface. The following scheme is the same as described above. In the place where it tore, it is necessary to rip the lining. Level the area itself, apply glue and cloth and press firmly. But you should not seal hard-to-reach places or large areas in this way, for example, sleeves, under the arms or collar. On bends and moving parts, the glue will come off again in the future.
Advice from Mobile Tailor
When properly stored, fur products can be used for several decades. If the flesh is not too dry, you can always repair the product.
If small defects appear in your favorite fur coat, but you are not going to part with it, check the condition of the fur. The mesdra is plastic and does not fall apart? Then feel free to start repairing it yourself or bring the item to the Mobile Tailor. Our studio has been successfully repairing fur products for 5 years.
If you decide to change the model or alter your fur coat, we will definitely help you too.
<< Back to Lifehacks Studio
Signs that repairs are needed
Clothing made from natural fur has many advantages. It has an attractive appearance, provides amazing comfort and reliably protects from the cold.
A high-quality mink coat can be worn for at least 10 seasons. However, sometimes an expensive product deteriorates in just a few months. Following certain clothing care recommendations will help you avoid this.
The reasons why there is a need for product repair include the following:
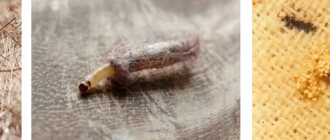
- Loss of lint. As a result, creases and bald spots appear on the surface of the clothing. The causes of such problems are washing the product, constant exposure to ultraviolet radiation, and the use of an iron. Also, bald spots are caused by the use of aggressive chemicals for cleaning, the use of a hair dryer to dry the product, and damage to the fur by moths.
- The appearance of holes and tears. Such problems are caused by various jewelry - hairpins, pins or brooches. Also, a fur coat may tear due to a mismatch in the size of the product.
- The appearance of deformations and abrasions. This is due to carrying bags on the shoulders. Also, deformed areas appear as a result of traveling in a car or full public transport.
Cleaning the fur before starting work
Before you start working, it is better to clean the fur
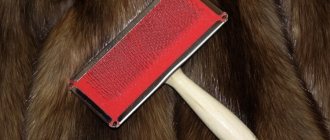
Dense fur with short pile can be carefully vacuumed. Long matted fur can be carefully combed with a wide-tooth comb.
Here are some safe ways to clean fur:
Take potato starch and sprinkle it over the product. Use the same hand movements as if you were washing regular clothes. The time of such dry washing should not exceed 10 minutes. Shake off the starch with vigorous movements and remove any remaining residue using a natural bristle brush. This cleaning method is suitable for fur products of any color. Prepare a solution of ammonia, hydrogen peroxide, and clean water: add a teaspoon of peroxide and 2-3 drops of alcohol to a glass of water. Fill a container with a spray bottle with cleaning product and spray the fur at a distance of 10cm. After treatment, dry the fur at room temperature. Take equal parts alcohol (or vodka), vinegar (table or apple), and water
Apply the composition to the pile with a brush, blot carefully with a well-absorbing cloth. Dry and comb the fur.
