Primary processing of sable skins
Sable fur is our national pride. Sable skins are among the most valuable types of fur raw materials; its share in the cost of skins in recent years has increased to 31.9% (1985) and ranks first among other fur-bearing animals . The yield of defective sable skins is still high, amounting to 86% in Eastern Siberia and the Far East (1990).
Shooting sable skins in Eastern Siberia and the Far East is usually carried out using a “tube” ( removing skins with a “stocking” is allowed) with a cut along the rump and the back of the hind and front legs. When shooting, cuts should be made carefully and carefully, especially along the rump , so that the edges of the skin are smooth without snatched areas (in the figure, cuts on the sable carcass and straightening of the sable skin on the straightener).
When removing skins, it is necessary to preserve the fur of the head with nose and ears, paws with claws and tail, subject to the removal of cartilage from the ears and vertebrae of their tail.
When removing skins with a tube, a cut in the skin tissue is made along the hairline of the hind limbs from the pads to the anus, additional cuts along the forelimbs from the pads to the elbow joint and the lower surface of the tail.
When removing skins with a stocking, an incision in the skin tissue is made around the mouth at the junction of the lips and gums. Cutting the nasal cartilage. Then the lips are folded back and the skin is gradually pulled off the head and neck, cutting the muscle fibers connecting the skin to the skull with a knife.
After removing the skin from the head and neck, a loop is put on the latter, the end of which is strengthened so that the skin is pulled off from the bottom up in an oblique direction. This prevents blood from getting on the skin . The skins from the paws using stockings (without cutting) down to the last joints of the toes. The bones of the fingers are cut off, leaving the claws on the skin . The skin of the tail is cut along its underside, then the vertebrae are removed.
The skins must be cleaned of muscle cuts, cartilage from the ears, tendons, bones from the paws and tail, dirt, blood and resin from the skin and hair; degreased without damaging the hair roots. Well-processed leather fabric is easy to place on the straightener and dries more evenly. The best presentation of sable skin straightened “planted” on a straightener with a width to length ratio of 1:2. This straightening with a rounded shape (with open, closed rump) gives the skins a beautiful appearance and ensures the greatest thickness and fullness of the hair.
, the sable skin should be planted on the ridge, while the guard hairs on it become thicker and form a beautiful, dark, even stripe. This correction is achieved by artificially wrinkling the skin tissue and stretching it in width. the fingers of both hands are inserted into the mouth opening of the skin they stretch the skin in width, starting from the throat part and, collecting the stretched parts of the skin with free fingers, reach the rump, and the skin is gradually shortened. This is done several times until the skin takes the desired shape, then straighteners and drying begins.
The sable skin , placed on a straightener with the leather tissue facing outwards, must be dried well, but not completely, then removed from the rule, rolled in birch sawdust and lightly kneading the leather tissue, paying more attention to kneading the skin tissue of the muzzle, paws and tail (straightened skin in the figure). sable).
Surprisingly, the leather fabric is quite soft; the skin must be thoroughly cleaned of sawdust, then, with the hair turned outward, the insufficiently dried areas (usually the muzzle and paws) must be hung to dry. to dry the skin at a temperature of 20-30 0 C and a relative humidity of 40-60%. These parameters, combined with intensive air exchange, ensure quick and uniform drying of the leather fabric.
Dried skins should be carefully examined, as they may contain areas of hair contaminated with resin . It is best to moisten such areas of hair with alcohol or B-70 gasoline and, after the resin has dissolved, comb it with a metal comb.
Properly removed with a “tube” or “stocking”, the sable skin should have a symmetrical and even rump, correctly cut in one piece. A tail, the presence of a nose and lips, as well as undamaged ears freed from cartilage. Straightening and drying should preserve good leather tissue for the skin and give it symmetry; when editing with an open and closed rump, the front legs are cut into a layer and tucked inside the skin , the back legs are outward for the Barguzin ridge (1:2).
The edit is round in shape with a closed rump, the paws are tucked inside the shurka for the Amur ridge (1:2). Straightening with a closed and open rump, the paws are pointed outwards of the skin , the length to width ratio is 3:1 for the Yenisei ridge .
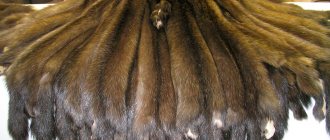
The front paws are located on the chest, and the hind paws lie flat on both sides of the tail, the hair should not be tousled, but have a natural direction of the ends from head to tail, the fluff should not be matted. A well-dressed skin, when shaken, plays with all the colors and shades that nature has awarded this pearl of the taiga.
One of the most valuable types of fur raw materials is sable skins, which hunters obtain during sable hunting (read about one of the methods of catching sable here). However, as practice shows, as a result of incorrect primary processing of such skins and the appearance of through holes on them (they are also called drafts), such raw materials depreciate in value.
Solution and processing
Before dressing begins, you will need to immerse the dried material in ordinary water shortly before and soak them until the skins are elastic.
Next, you should boil 11 liters of water and then pour it over the bran. After an hour, the bran will be able to steam. Next, they need to be thrown onto a sieve, this will get rid of the brown infusion. The remaining water must also be boiled. Having poured all the salt into a large container, fill it with hot water and stir with a stick until the crystals are completely dissolved. Next, salt soda should be poured into the bran infusion and mixed.
After the solution has cooled but is slightly warm, you can add acid. But you should be careful with it and use the instructions that are attached. It is also recommended to wear old gloves and long sleeves. The acid should be poured directly above the surface of the solution so that it does not splash. After adding, mix everything.
Now there should be cleaning of the flesh. If dressing is done on fresh skins, then the process can be omitted. The material must be dipped into the resulting solution and mixed a little. The material itself must be completely in solution for thorough impregnation to occur. Thus, the skins should lie in it for about 40 minutes. It is recommended to stir them every 10 minutes.
The second container should be filled with warm water. It will carry out cleaning and washing of the material. To do this, remove all the material from the solution one by one and transfer it to clean water. Next, you need to wash the salt from the fur. In order for cleaning to be successful, you can stir the material in water and lightly hit it with a stick. When the water becomes cloudy, it needs to be changed.
Sometimes when making at home, some people put baking soda in the water, it helps get rid of the acid. It can also neutralize skin irritation from battery acid. But soda kills the acid and thereby makes it worse, since the safety of the fur will be much lower. Therefore, you should think about what the skin will be used for in the future. If the furs will be in constant contact with the body, then it is better to sprinkle soda; if not, then you can do without it.
After cleaning is completed, the material should be secured to the crossbar so that all the liquid drips away. After this, you will need to use a sponge soaked in hoof oil and apply it to the wet flesh. 30 grams of oil will be enough for 10 skins.
After impregnation, the material should be pulled onto the grid. Then you should nail it on it, while gently stretching it. The material should dry in this form in a dark, slightly cool room.
The solution should not be drained after processing without neutralization. You should first add the baking soda and then pour it out. When adding soda, it is better to move away from the container so that during the reaction the splashes do not get on your body.
During drying at home, the material should be ventilated every day. When the material in the center is completely dry and soft, the skins can be removed. After this, you will need to place the side of the fur on a flat surface and use a brush to walk along the fur. This process allows you to achieve lightness and softness of the skin. You need to rub until the skin looks like suede. Next, you should hang the material for a few more days for final drying.
Recommendations for removing sable skins
In fact, there is no single correct method for the primary processing of such skins. Depending on the territory where they are mined - in Siberia, in the Far East, there are methods that depend on the characteristics that characterize the ridge. However, in accordance with fur standards, such skins must still be removed from the animal’s carcass using the stocking method - through the mouth, while the fur from the animal’s head must be preserved intact (it must have ears and a nose), and on its paws must be claws, and there should be a tail. In order to achieve this, it is recommended to cut the front legs from the elbow to the claws, and the hind legs - from the claws to the hocks. The skin of the tail itself should be cut along the lower part from the root to the tip of the tail in a straight line.
When you remove the skin, you need to make sure that all the films are separated and remain on the carcass. To avoid tearing the skin, remove it smoothly, avoiding jerking. If there are holes on the skin of an animal from lumbago, you should not pull the skin below such holes - only above them, you must also try to ensure that the fur is not stained with fat and blood.
Degreasing the skin should be done on a blank only if the sable's flesh is fatty. To prevent existing holes from spreading further along the skin during degreasing, they should be sewn up with white thread - this way you will prevent them from increasing in diameter.
Editing sable skins
The form for straightening sable skins, depending on different ridges, may differ in its characteristics - see Figure No. 5.
Thus, skins from the Yakut, Barguzin and Kamchatka ridges have a wide and short square edit. Barguzin ridge skins are characterized by a rump cut along the inner surface of the hind legs, and the sable's legs themselves are pulled closer to the tail. If you are dealing with sable skins from the Yakut and Kamchatka ridges, then their rump should be closed, and for the Yakut ridge, the head part should be narrowed and elongated, and for the Kamchatka ridge, the paws should be tucked inside the skin.
Skins from the Altai, Minusinsk, Tobolsk and Yenisei ridges are characterized by an elongated straightening and an open rump. They are straightened with a tube on special forked or wedge-shaped rules, and the ratio of the width to the length of the skin should be 1 to 5.
To straighten sable skins, in accordance with the requirements for the Yakut, Barguzin and Kamchatka ridges, it is necessary to use rules, which consist of 2 halves with rounded edges and 2 wedges, with the help of which you will secure the skin on the rule and give it has the shape and width you need, as shown in Figure 6.
Since sable skins come in different sizes, you should have a set of 3 of them in different sizes. For the first size, the length should be 32 centimeters, and the width when folded should be 8 centimeters, for the second size the parameters should be 40 and 10 centimeters, and for the third the dimensions should be 48 and 12 centimeters.
Placing the sable skin on the straightener
Before placing the skin on the straightener, you need to turn it inside out and gather it into an accordion, carefully stretch it across the width. The paws and tail should be let out. It will be necessary to insert one of the halves of the rule through the mouth opening, and its leg will have to enter the back leg of the skin. The second half of the rule is inserted in the same way. After this, the skin is straightened, achieving symmetrical placement of the head, front and hind legs and tail. Now you can insert wedges between the halves of the rule in such a way as to achieve the width that you need. The hind legs should be straightened out on the legs and tied to them with a strong thread. The front legs are spread in a similar way on small planks. In the process of editing the skin, you need to give it the necessary ridge shape.
Skin dressing
To prepare skins, you will need to prepare, or rather, prepare the necessary materials and tools:
You need to use about 25 liters of water; Bran about 1 kg. They should look like flakes; 1 kg salt; A couple of large containers and lids for them; Wooden stick, at least 1.2 meters. With its help, the solution will be mixed and the skins will be turned over; 700 grams of acid for car batteries; 1 kg of soda; A wooden grid or special flooring for stretching skins; Hoof oil; Metal nails and brush. The amount of material used is suitable for approximately 10 sable skins. To produce fewer skins at home, you will need to adjust the numbers.


