Fur is an expensive material; not every housewife raises the hand to throw away an old collar or hat. It’s better to make a fun craft or functional item with your own hands from natural or artificial fur. We share ideas on how to turn an unnecessary collar into a keychain, children's toy, rug, insoles and other items.
What can you make from an old fur coat? 12 bright and practical ideas
Many people have a fur coat, but every woman always wants a new model of outerwear. What to do with a thing that is no longer so good to wear, but nevertheless has an attractive appearance?
What to do with an old fur coat, how to put it to good use at home by making original things - our article will tell you about this.
Fur coat carpets
Fur coats are often used to make original carpets of various shapes and sizes. By making such a floor covering and placing it next to the bed, you will be able to provide warmth and comfort to your feet even in the coldest time of the year.
Master class on making a fur carpet
Place the fur coat on a flat surface with the wrong side up. Take a ruler and scalpel. First remove unnecessary parts.
Cut out pieces of equal sizes from good material. In order not to damage the structure of the fur coat, it is better to cut the parts along the seam.
The resulting parts of the fur coat are laid out face down according to the format of the future product. At the joints between the pieces, chalk marks the places for connections.
The fur parts are sewn together manually using an overcast stitch over the edge. The seam is made uniform, the stitch distance is 2-3 mm.
To straighten the seams, they are moistened with water and left for 10-20 minutes to straighten.
Carpets are made in square and oval shapes. They even make options in the shape of animal skin. This model is perfect for a classic interior and will highlight the impeccable taste of the owner of the room.
Homemade vest
A simple option to bring life back to an old fur coat. To do this, you just need to rip off the sleeves, cut off the bottom, and then sew a lining with fur in these places. The process is performed manually. To do this, use leather needles and strong threads to match the fur.
A leather belt will effectively highlight the look with a vest made of natural fur.
How to sew a sheepskin vest without a sewing machine: master class
Hats
A fur coat can be used to make an excellent headdress. To do this, just take an old knitted hat and trim it with beautiful fur. If you use your imagination, you will be able to make an original headdress that will be a wonderful addition to your winter evening look.
Stylish headphones
Old fur coats are often used to make fashionable earmuffs, which serve as lightweight headwear in the off-season.
When making headphones, the fur is carefully cut with a special knife (cutter) from the reverse side, and then sewn together with small stitches. It is very important not to catch the lint. The headphones will require a minimum amount of fur, so one fur coat will be enough for several more products.
Warm blanket
For a large blanket you will need two old fur coats, but the result is worth it. Only the best parts are selected, which are combined and stitched together in an original way. This fur blanket can be used to cover a bed or cover yourself. Thin padding polyester is used as the basis for the blanket.
Soft ugg boots
If there are a few soft parts left from the mink coat, they can be used to decorate the UGG boots. You can make beautiful pom-poms, attach them to shoes and thereby update your favorite pair and give it an original look.
Original capes
How to sew a fur stole with your own hands
Cozy leg warmers
Leg warmers are the easiest alteration you can make from a fur coat. To do this, you need to cut off the sleeves and decorate them on both sides. Such products are suitable for running enthusiasts in the winter season.
Stylish mittens
Warm fur mittens are the dream of every woman who prefers comfort in everything. To create such things, you should draw patterns (for this you will need cardboard), and then cut out fur parts according to the size of the future product. Mittens made from light-colored fur coats look especially attractive. If you use more imagination, you will be able to make a stylish muff.
Warm insoles
This modification option is suitable for those whose feet are constantly cold. Such insoles can be placed in winter boots, ugg boots, boots. Creating a product is very simple. You need to take cardboard and make a pattern according to the size of your foot - circle the foot and cut out the pattern. Then you need to prepare fur pieces according to the size of the workpiece and glue them to the cardboard. It is better to use Moment glue for the process, since PVA will not work.
Incredible pillows
To create a warm and soft pillow, you will need a piece of fur coat, cut to the size of the future product. The edges of the product need to be sewn from the wrong side (preferably on a sewing machine). But you can also perform this process manually. Just a few minutes and a beautiful sofa cushion is ready!
Extraordinary fur handbag
Such an accessory will make its owner stand out from the crowd, making her attractive and stylish. A woman can independently choose which bag to make - a large and roomy one or a small ladies' one.
To create such an amazing accessory you will need to take several pieces of fur, fabric for lining, whatman paper, chalk and scissors. You also need to purchase a zipper for the fastener. A pattern is made on whatman paper, then fabric is applied to it and the required amount of fur material is cut out (but with a seam allowance of 7-8 mm). Then all the parts are sewn together. This process is done using a sewing machine. The handles for the bag are cut from leather strips to match the color of the fur.
How to turn an old mink hat into a fashionable beret?
The beret is a symbol of femininity that can decorate almost any outfit. By the way, you might be interested in the article “Which hat to choose depending on the type and style of jacket or coat?” But back to our topic - it’s very easy to turn an old mink hat into a beret!
Restoration
In this example, two hats will be used, since the beret will be voluminous. Based on the pattern, you can roughly guess how much fur is needed. If you initially have a large hat, but want to make a small beret, then one headdress will be enough. Also, at your discretion, you can make the wedges narrower, but in larger quantities.
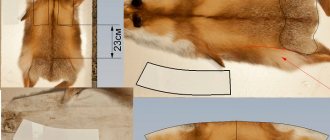
Pattern
Important: Takes a head volume of 56-57 cm. If you need a smaller volume, for example 52 cm, then take 9.5 cm at the widest part (indicated in green).
Cutting wedges
- We sew all the wedges together. In the example, the fur is from different hats, so the shade is slightly different. To beat this, we will alternate them with each other.
Sew along the entire length
As a result, we have two such semicircles
- We connect them in the center. Then we sew along the sides and form the base of the beret.
We fix it in the center
- Now we cut out the lower base of the beret. In our case, there is little fur, so the strip turned out thin. The bottom of a beret about 5 cm wide, folded in half, will look very nice. We sew all the pieces into one strip, focusing on the volume of the head + seam allowance + 2 cm for padding polyester, so that the headdress fits better and more comfortably on the head.
Cut out the rim
Important: Since it comes from wedges, the rim must be made from the same number of parts. At the same time, to add volume to the beret, we will gather the fur a little, sewing it to the bottom strip. This will also help you understand how much of our wedge you need to collect.
Part of the base is slightly narrower than the beret wedges
- We sew bias tape to the headband. Can be sewn on a simple sewing machine. But in this case, we place the trim at the bottom, and put newspaper on top of the core. If the flesh is hard enough, then the machine can handle it.
The flesh should be on top!
- Then we turn the binding inside out and literally sew a line half a millimeter from the edge.
Carefully sew the line
- Sew the fur rim to the beret. In this rim, between the bias tape and the base, we insert thin padding polyester, batting, or simply soft fleece-type fabric. To make the hat fit better, we sew on a thinner elastic band.
Rubber
- We sew behind the shirt at the bottom of the beret (at the junction with the headband) and behind the bias tape.
Sew on
- Now we cut out the lining; it’s better to use padding polyester. We also cut out 8 wedges + 1 cm along the edges for the seam + 3 cm down.
Cutting out the lining
- We sew it on a machine, turn it right side out, and take it back out. We put on a hat with a lining. We fasten with pins and sew well with hand stitches.
Stitching
DIY knitted mink hats - MASTER CLASS
In every home there will probably be old mink products that have already gone out of fashion or have lost their original quality over time. A stale fur coat, hat or collar can be given a second life by using it to make a knitted mink hat. It’s quite possible to do this with your own hands, with very little effort.
DIY knitted mink hat master class
Skin preparation:
1. Peel the skin away from the product itself.
2. Lightly spray it with warm water.
3. Soften the hard core using a special product or a mixture of glycerin and egg white.
4. Roll the treated skin into a roll and wrap it in cellophane film for half an hour (if you are using dyed mink - for 1 hour).
5. Clean the inside with a brush from dust and glue residues.
6. Use a comb to straighten the matted fur and remove any small debris from it.
Making fur strips:
1. From the side of the flesh, with a pencil, pen or marker, draw straight lines at a distance of 3-10 mm from each other.
2. Using a sharp utility knife or blade, cut the fur strips while hanging, slightly stretching the skin. It is not recommended to do this with scissors, as there is a high risk of damaging the fur.
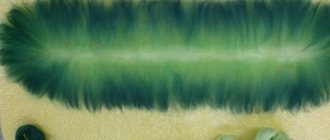
Making fur yarn:
1. Connect individual strips of fur to each other from the inside out with a thin needle using a strong thread matched to the tone of the skin. At the same time, watch the direction of the pile - it should be the same everywhere.
2. Take the first half meter of thread, lower it into water, wring it out thoroughly and attach it to any base with a metal clip.
3. Twist the fur ribbon in a spiral.
4. Secure the twisted section.
5. Perform the above manipulations with the remaining fur strip.
6. Dry the resulting material and comb it.
7. After final drying, remove all fasteners and carefully wind the threads.
Other methods of altering fur
If you are already thinking about what you can make from an old mink hat with your own hands, you should not throw away the product or give it to someone.
We will tell you about knitting from fur “threads”. Didn't you know that you can knit with more than just yarn?
Yes, imagine it!
Important! Canadian fashion designer Paula Lishman has made a real splash in the world of fashion and beauty.
She began to knit from thin fur patches, creating a new revolution on the catwalk.
So, let's learn how to do this.
Making yarn from fur:
- At the initial stage, you need to prepare and create fur yarn. To do this, take an old hat, fur coat or sheepskin coat and, using a stationery knife, cut the fur product from the reverse side into strips no more than 5 mm thick.
Important!
When cutting fur fabric into “threads,” it is best to do it in a spiral.
In this case, the strip will be longer and it will be more convenient to knit in the future.
However, you can do it as you wish or as the product allows.
- Before cutting fur threads from the fabric, you need to outline how you will cut on the reverse side with an ordinary gel pen. It will be better and smoother this way.
Important!
It is worth separating the fur carefully, without using scissors under any circumstances; the fabric should be slightly stretched and lifted up.
- If your pieces of thread are very short, you can glue or sew them. To do this, you may need regular thread or monofilament, as well as special glue.
- It’s time to start making fur thread. To do this, you need to lower the workpiece into water and secure the base with an ordinary bracket. After this, twist the fur ribbon in a circle. In appearance, it should resemble winding a woolen thread on an ordinary spindle.
Important!
Many people use a screwdriver, drill or other improvised method to speed up the process.
- You need to wind it in such a way that there are five turns per centimeter of thread. In this case, it is necessary to constantly wet the ribbon itself. After you have rolled it up, you need to dry it with an ordinary hairdryer. After performing this action, you will see how the fur suddenly became fluffy.
- Now you need to leave the tape until completely dry.
- After the thread has become completely dry, it is twisted into an ordinary ball, and you can start knitting.
Important!
Mink fur is ideal for making fur thread, but other material can also be used.
Knitting with fur yarn
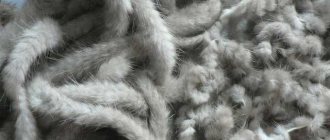
Knitting fur yarn has been gaining popularity in the last few years. This is one of the most common ways to make a mink hat with your own hands.
To make fabric from fur threads, you do not need to have special skills, because the whole procedure is done in the same way as from ordinary yarn.
When knitting, thick knitting needles are used. Quite often, fur thread is supplemented with ordinary wool thread to match the fur.
Mink stock is best suited for this action.
Important! Thin strips of fur are knitted mainly with knitting needles.
Of course, you can do this with crochet, but you should take into account the high yarn consumption.
Preparing the base of the future hat
Before you start making an exclusive headdress and watch a master class on a knitted mink hat with your own hands, you need to prepare a base, which is usually used as a ready-made knitted hat or mesh base, or a new one is knitted - knitted or crocheted from wool or cotton threads.
Depending on the size of the base cells, fur strips are prepared, which should not be much wider than it, otherwise they will curl into a tube and look untidy.
After preparing all the necessary preparations, you can study the master class of a knitted mink hat with your own hands. The following options are possible here:
I. Knitting
To get a product like a knitted mink hat with your own hands, use knitting needles (sizes 4-6) or a crochet hook and knit the product in the round using stockinette stitch. For the first row use wool yarn, for the second row use fur yarn. Next, use either wool yarn or both materials at the same time for the front loops.
When knitting, you can make hats from knitted mink inexpensively, but when using crochet, the fur consumption is much greater.
II. Threading fur strips into the base mesh
How it works: using a pin or thick needle, fur strips are threaded into the fabric in a certain order, braiding it. Using this method, it is better to fasten strips of fur together during work, since it is easier to pull a short thread. The disadvantage of this method is that the product will be too soft and shapeless. To avoid this, you can make a lining from thick fabric.
III. Sewing fur to a knitted base
To do this you will need:
1. Buy or knit the warp yourself.
2. Sew fur strips 5 mm wide along the convex parts of the hat.
Master class knitted mink hat can be seen visually using videos.
Any fashionista dreams of having in her wardrobe an original piece of fur that no one else has. A do-it-yourself knitted mink hat is a great opportunity to become the owner of a truly unique headdress, as well as to surprise others with your needlework abilities.
Mink hats
With the arrival of winter, every girl should think about a beautiful and stylish hat that will help decorate her look and add a touch of charm and femininity. The headdress becomes part of the image, so its choice should be taken very seriously. It is quite difficult to find a beautiful and warm hat with a neat cut. A mink hat would be an excellent solution.
A hat made of natural mink has been in great demand for several seasons in a row, not only among elegant ladies, but also among young people. Each manufacturer tries to satisfy the needs of the modern woman, and therefore never ceases to amaze with new models.
Designers provide a huge range of mink hats for women, where every fashionista can choose the perfect option. A separate group consists of winter models. They are very warm and provide excellent protection from wind and severe frosts.
Among modern models, knitted hats are in great demand . They are comfortable and stylish.
Mink hats with a knitted base provide excellent warmth and do not lose their attractive appearance for a long time. Knitted models are made from strips of fur, which allows you to create delightful patterns.
Elegant hats made from sheared mink are very warm and provide excellent protection from the wind. Among the variety of styles on trend are the French beret, boyarka, hat with a veil and the Coco hat.
Mink hats with an elastic band provide excellent protection from the wind because they fit tightly around your head. The elastic band adds charm and charm to the headdress.
Among the variety of beautiful and stylish models, it is worth canceling the mink hat in the style of the 90s. Simple cuts and classic colors are again in great demand. Step back in time with classic mink headwear.
Combined options
Designers never cease to amaze by using several types of natural fur. A mink with an arctic fox, silver fox, and fox looks very beautiful. For example, a knitted mink hat with a silver fox pompom combines black and gray colors, as well as furs of different densities and pile lengths.
How to transform an old mink hat into a fashionable and modern headdress: complete restoration of earflaps
Now we offer you a master class on how to alter an old mink hat, which at first glance cannot be restored at all. But we assure you that the result will give you the opportunity to believe that nothing is impossible! Especially in the fur business.
Initial view
- Let's start cutting out the lining. At the same time, we do not rip, but rather cut off the fur, since the appearance at the seams can no longer be restored.
We cut off everything unnecessary without regret
Rip out all the seams
Cutting the insulation from the ears
- Now we need to check each skin! To do this, simply sprinkle it with water in some places.
Checking
- We wait 10-15 minutes. Gently stretch the flesh.
As you can see, the result is not always positive
- Now we need to refresh the color. To do this, take regular hair dye. Ideally, take chocolate and mix it with 1 part dark brown or half black.
Dye
- Carefully dye the pile and comb it with a pet comb in different directions.
We paint
- Rinse well until the water becomes clear. It doesn't hurt to use the balm that comes with the paint. We also rinse well. Dip with a towel to remove excess moisture.
Let's dry
- Now we will stretch the skins. To do this, we nail it onto a wooden surface with small nails or staples from a furniture stapler along the perimeter. If we talk about the right side - do as you feel comfortable. If you place the fur on top, you can brush it periodically, which will speed up drying.
Stretch
What do we have after painting?
- We trim off any uneven edges or damaged fur.
Trimming
- We cut strips of approximately 0.8-1 cm. Please note that this must be done by weight. And for convenience, so as not to get confused in the stripes, do not literally cut 0.5-1 cm to the edge.
Making stripes
Front and back view
- You can use another model at your discretion. We begin to wrap the front lines on the hat. Please note that we trim off bald patches or damaged fur. We don’t sew it yet, but we hide the ends inside, on the wrong side. We will sew them together at the end, not only with each other, but also sew them directly to the base of the hat.
We wrap around the entire perimeter.
A detailed master class on creating a hat from strips of fur is in our article “How to make a fur hat from stripes?”
- We will make the top of the head from another fur. We also cut it into strips. In this example, a silver fox will be used. If you have beautiful whole fur, you can simply sew on a piece of the desired size. You need to insert a hat elastic at the bottom. Just pull it through the knitted base, and not just through the fur.
Result
Color solutions
Mink headdresses are represented not only by the natural colors of this animal. Designers are not afraid to experiment and turn the most daring ideas into reality. Thanks to modern fur processing technologies, they allow mink fur to be dyed in different colors.
The classic colors of a mink hat are shades of brown and cream. Today you can buy an original fur hat in graphite, red, milky or gray colors.
White mink hats are always in demand because they are elegant, delicate and sophisticated. But many women refuse this color due to impracticality. A white hat requires careful selection of clothes, so you should carefully combine it with other wardrobe elements to make the image look harmonious and beautiful. Bleached mink hats, which come in creamy and creamy tones, are more versatile.
Among the original color schemes, blue and light blue hats attract attention. They can be combined with outerwear in both black and blue. Colored hats look bright and unusual. Thanks to modern dyes, fur can acquire rich colors.
A classic is the black mink hat. It is presented in a variety of models, but they all have a luxurious shine in common. A walnut-colored hat is suitable for girls with light and dark hair. The pleasant color gives the headdresses charm and an attractive appearance.
Manufacturers
One of the largest retail chains in Russia is the Snow Queen. This online store provides a huge selection of fur products, among which mink hats occupy a special place. The variety of models is simply mesmerizing. Every fashionista will be able to choose a style and color to suit her taste.
The Kalyaev fur factory is a well-known manufacturer. It produces a huge selection of mink hats, carrying out careful control of tailoring and raw materials.
Many factories producing fur products are concentrated in Pyatigorsk. Manufacturers use high-quality materials, giving preference to natural furs, and provide a variety of styles and models in many colors.
Pyatigorsk fur factory "Alef" is a very famous enterprise that provides a wide range of mink hats. The factory provides beautiful styles using exquisite finishing and different colors.
Interior
Fur is an excellent material for interior decoration. Examples of decorative products with fur inserts:
- cushions for chairs and stools;
- poufs;
- armrests;
- pillows;
- storage accessories;
- vases;
- flower pots;
- picture frames.
Why get rid of fur products, even if they are shabby in places? Even if you have no idea how to adapt the material, you can always sell it to needlewomen or contact a studio.
Tips for choosing
The variety of models and styles of mink hats allows every fashionista to carefully choose a headdress so that it emphasizes the beauty of the face and looks harmonious in an ensemble with other elements of the wardrobe.
When choosing a mink hat, you should consider your face shape. For example, for chubby beauties, a model with short brim and a high crown is ideal. Those with a narrow face should give preference to low hats, as they completely cover the forehead. A beret hat is perfect for girls with a long nose. A slight overhang over the forehead will create a harmonious silhouette.
Before buying a mink hat, you should decide what you will wear it with. The style, texture and color scheme of a mink headdress depends on the outerwear.
It is worth paying attention to the price of the product, since natural fur is not cheap. Inexpensive hats should immediately alert you that they are most likely of poor quality. Natural fur cannot be very cheap. If the price bothers you, then perhaps they are offering you a fake. It is better to buy a mink hat in company stores.
Before purchasing, you should carefully inspect the headdress. If it is presented on a frame, then the model should be uncreased and not bent. Special attention should be paid to the seams. They should be smooth and invisible. If threads stick out or traces of glue are visible, this indicates low quality of the product.
Another important criterion is the lining. A quality headdress should be presented with a felt or fleece lining. If it is made of unpleasant, rough materials, then this indicates that this is a fake.
And don't forget to check the quality of the fur. A mink hat should be soft and fluffy. Simply petting the fur is enough. If lint remains visible on your hand, this indicates low quality or poor storage conditions of the fur product. To ensure the quality of a mink hat, you need to run a white damp scarf over the fur. If traces of paint remain, then you do not need such a headdress.
Video material
In any case, when deciding what you can make from an old mink hat with your own hands, you should consider various options, and only then think about throwing it away. Although we strongly advise you not to do this. Give new life to this headdress! If you make a scarf or a hat with fur trim from an arctic fox collar (photos and patterns are available on the Internet), such a modification will not be difficult. Create, experiment and you will definitely succeed!

