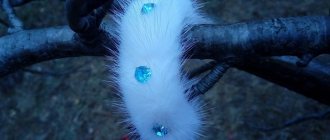
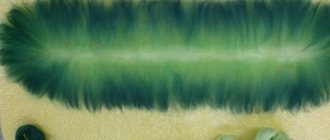
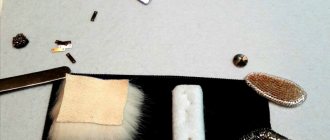
In this article we will look at a master class on how to make and attach a fur trim to a hood.
To decorate your jacket or coat, you can use various accessories. But it is the fur trim that gives it a solid and expensive look, favorably emphasizes the silhouette, making the image seem perfect and complete. In addition, the edge warms well and protects from wind and frost. And you can easily make a fur edge yourself, even without having a large amount of fur material at your disposal.
How to make a fur edge yourself: some tips on edge design
- Before making a fur edge, think about the issue of fastening. It can be sewn directly to the product or made removable. It is best to attach it to the hood with a zipper, but you can use buttons and snaps. A removable edge is much more practical to use, because a jacket or coat can be washed by simply removing the accessory from it.
- It is better to choose fur for the edge with long pile, as it looks expensive and will warm well. But it is worth considering that too long a pile can cover your face, which will cause discomfort and inconvenience. Fur that is too short can ruin the overall impression of outerwear. Therefore, when choosing fur for the edge, it is better to try it on.
- As for color, contrasting fur to the color of the main product looks best. But when choosing faux fur, you can choose coats, parkas or jackets to match. If in doubt, it is better to take beige or gray fur - you definitely won’t go wrong.
You may also be interested in reading the article “Basic requirements when working with fur: how to sew fur onto gloves?”
Cut it out
Choosing hood fur to replace artificial fur
My coat, it seems, will get dirty quickly (this kind of material), but it can be washed often, the fur trim of the hood can be unfastened, we won’t wash it. I thought for a long time about which fur to choose to replace the one I had, and settled on seal. With it, the rain is not scary, and the coat is not too warm, we have rain in winter, but real cold, snow and severe frost are very rare.
Nerpa will do just fine. I got the fur rectangle sewn together from two parts. It would probably be better to make a seam in the middle, the material allowed, but I had it a little on the side, in my opinion, it also worked out well.
Initially, the edge was attached to the hood of the coat using small loops and buttons; I didn’t invent anything and for the new edge I used the same loops and buttons, at the same distance from each other, that were on the original. After all, fish fur will probably no longer need buttons.
The fur itself is already very old, it was a sheepskin coat from my aunt, who is now in her eighties. She wore this fur coat when she was young, then my mother saved the most decent unworn remains, which, after lying around for another twenty years at her house, finally went to me. Now, after so many years, I have found a use for them!
There are a couple more pieces - we need to think about where else they can be used.
You can replace the collar in the same way. Everything is simpler here, you don’t have to sew it, but find a good ready-made collar (in stores or buy it) and perhaps change the position of the loops for attaching to outerwear.
You may be interested in:
Sheepskin fur vest - sewing from pieces
A very interesting idea is to make an original warm thing for the winter cold with your own hands - a sleeveless vest or “shower jacket” with small sleeves. Finishing, as well as connecting parts of the pattern, is carried out using a crochet hook and yarn. How does this happen, since the flesh of sheepskin is quite dense? Follow the link and find out.
How to make a fur trim on a hood with your own hands with a zipper: how to insert a zipper?
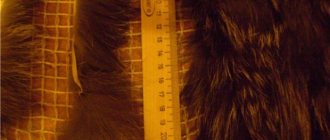
To make a fur edge, you need to prepare all the necessary materials, tools and take measurements correctly. Using a measuring tape, measure the distance along the edge of the hood from one end to the other. Basically, this length is from 65 to 70 cm. The width should be at least 10 cm. At the same time, do not forget to add 1-2 cm for allowances.
After measurements you need to do the following:
- Using a blade, carefully cut out a rectangle of fur that matches the size. Do the same with the lining fabric;
- Place the lining on the wrong side with the front part of the fur, install a zipper between them. Please note that the zipper will be inside between the fur and the lining. And you stitch it with a furrier’s stitch by hand or on a special machine. At the same time, do not forget to tuck the long pile of fur inside so that it does not get into the seam;
- If you want to perform this procedure on a regular sewing machine, then sweep everything first;
- Sew everything on the other sides as well, carefully straightening everything out. In this case, you need to leave a small area so that you can turn the product inside out. After you have turned out the edge, you should sew the area up by hand.
With a zipper
How to insert a zipper into a fur garment?
This pattern is also suitable if you don't want to use a lining. You can make a chic fur trim with a zipper even easier!
- To do this, sew one part of the zipper between two pieces of fabric.
- Then sew this part to the fur, folding the right sides of the product together. That is, you sew one piece of fabric to one side of the fur, and the other to the opposite side. At the same time, there is lint inside!
- Sew up one side part, turn it inside out and sew the second part from the side by hand.
How to insert a zipper?
Replacing the removable fur trim of the hood
Firstly, you need to take a closer look at how the edge is made - is it tightly attached to the product or is it a removable part. In both cases, rework is possible.
We just need to take into account that if we are going to wash the jacket in the washing machine (there is a special icon on the label) and not take it to the dry cleaner, then it is better that the fur part (edge of the hood or collar) be removable, for example, with a zipper or buttons
We unfasten the faux shaggy fabric and estimate how much natural fur is needed to replace this part. Now you need to rummage through your supplies, find all possible options for pieces of fur that are suitable in size, attach them to the jacket and decide which one is more suitable in color, texture, shine for replacement.
If the fur is suitable, but the pieces are too small to cut out the part, then they can easily be sewn together. The only thing that needs to be taken into account is the direction of the fur, plus the color and thickness in the stitching areas, of course.
The direction of the fur must be taken into account when cutting out a whole fur piece, first put on a jacket, apply the fur to yourself, and decide what its direction will be. If in doubt, look at “where the fur is pointing” on other products or find the answer “on the World Wide Web.”
Then everything is simple - cut it out, sew on the lining for the edge, don’t forget about the loops, buttons, zippers. That's it, the old fish fur can be put aside (it can be saved for making, for example, soft toys - you never know where it can come in handy!), and in its place we put a new edge of their natural fur. We try it on in front of the mirror and admire the result.
How to make fur trim on snaps or buttons?
If you want to make a removable fur trim, but don’t want to bother with a zipper or this option doesn’t suit you, then it’s even easier to sew it simply with eyelets.
- A hat elastic band works best as eyelets. The extreme loops should be located 2 cm away from the edge, provided that you left 1 cm for allowances.
- The distance between the loops can be determined by measuring the middle, and then placing marks at your discretion. The most optimal and convenient distance is considered to be 10 cm.
- The hat elastic needs to be cut into small pieces of approximately 3 cm, so that the finished loop is 1 cm long.
- In order for the edge to be fuller and more voluminous, in addition to the lining, you can put a layer of insulation between the two layers. Insulation with a density of 200 grams is sufficient. It must first be sewn to the lining, and then to the fur.
- The loops should be basted to the lining fabric, so you should first place marks and then attach the loops with clips. Then sew them on by machine and trim off the excess tails. After this, it’s worth sewing the parts together, just like in the case of the zipper. And if necessary, sew buttons to the hood.
Scheme
How to make a fur trim sewn directly to the product?
Above were shown the simplest ways to make a fur trim on a hood. But it can also be sewn without lining or sewn directly to the main product. Although these methods seem very easy, they have their own nuances. And the main disadvantage is that it will need to be sewn every time before washing.
- Take a piece 70 cm long. If you are making from two pieces, then make sure that when sewing, the pile faces one way!
- With this seam, placing our flesh on the front side, we touch the middle of the hood. And we begin to sew with a hem stitch, but working up and down, not in one direction! That is, they grabbed the skin and made a seam into the fabric, then vice versa - they grabbed the fabric and made a seam into the skin. This option is somewhat similar to a hidden seam, when you only grab the edges of the material.
- We sew the edge along one side, after which we cut off the excess pieces, if any. We remind you that this can only be done from the flesh side and with a sharp blade. Using scissors you will damage the pile itself!
- Next we sew in the same way on all sides. The fur will cover all seams and possible irregularities.
Tip: If you want to make the edge more luxuriant, you can put a thin layer of synthetic padding inside for volume.
Algorithm
How to sew and make a fur trim from pieces and tails?
Yes, you can make a fur trim from ponytails or leftover fur. You will spend a little more time, but the result will exceed all your expectations and efforts!
- We open our ponytails, as in the example, or smooth out the existing pieces. As a result, we should get even stripes. For smoothing we use an elastin solution. It is more convenient to use a spray bottle for uniform spraying.
Important: Do not use ordinary water! Once dry, the skin becomes very rough.
We comb every piece well!
- Now we cut off pieces of leather or natural suede to the required length, but no more than 1 cm in width! If you make a larger distance between the pieces of fur, then the edge will end up like an accordion with creases at the transition points.
- The example shows working with ponytails, but the situation is similar with any pieces! You sew on a strip of fur, a strip of leather. And so you alternate until the desired length (about 70 cm).
Important: When sewing pieces together, pay attention that the fur must be in the same direction!
Make sure you get an even rectangle!
Tip: If you don’t have enough fur, you can cheat a little - cut the pieces or tails in half. And sew them together, alternating with pieces of fabric.
If there is not enough material
- Then you cut a rectangle of the required width or simply cut off the irregularities. And now you insert a zipper, make eyelets, or simply sew it onto the hood!
- If you have thick and fluffy fur, then you don’t need to use the lining. Fold the fur in half, sew a piece of fabric on both sides to the fur rectangle. This segment can be from 0.5 to 1.5 cm in width. The longer the fur, the larger the section so that the zipper does not “chew” the pile every time it is opened.
We only sew the zipper onto fabric!
- And already sew a zipper onto these pieces of fabric. As if you insert it between these pieces of fabric. Ideally, they should match the color of the top product.
How much fur do you need to trim the hood?
For the edge, you can use any natural fur, including artificial fur. Moreover, the longer the hairline of the skin, the more “interesting” the edge will look.
Fur consumption depends on the size of the hood, but on average, a piece 65-70cm long and 10cm wide is enough. By the way, the edge of natural fur can be “collected” from small pieces, which is often practiced in factories.

