Faux fur and leather are an alternative to expensive fur skins and natural leather. In addition to the relatively low cost, these artificial materials have a number of other advantages. Firstly, faux fur and leather can come in the most unusual colors, shades and patterns. Secondly, these materials are much easier to sew with your own hands; you do not need a special furrier or sewing machine to sew leather. However, in order to sew clothes from such artificial materials, you need to know some of their tailoring and cutting features.
Features of sewing faux fur products
Even novice tailors can sew clothes from faux fur. You just need to take into account the characteristics of such fur and choose models of a fur coat, vest or jacket of a simple cut, with a minimum number of seams.
It is not recommended to make darts, folds, patch pockets, or gathers on women's items made of faux fur. But in some products, especially children's clothing and berets, you can use a small gather; it looks unexpected and attractive, although it creates certain difficulties when sewing.
Instead of slotted loops for clothes, it is recommended to make loops from cord or thin strips of leather. Buttons are not sewn to the material with threads, but are attached using a loop of cord or a strip of leather. You can fasten it with hooks or special decorative clips and buckles.
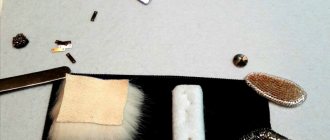
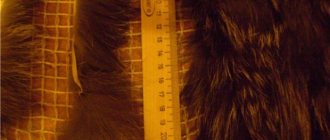
When processing the side and bottom of the product, an adhesive edge is laid to strengthen the edge of the fabric against stretching. In products made of faux fur on a knitted base, the edge (photo above and below) is laid along all sections. The edge can be made of cotton tape 1.5 cm wide, which has an adhesive coating, which makes it easier to attach the tape to the fabric base of the faux fur.
If possible, faux fur trims should be one-piece. They must be installed in the sides, collar, bottom of sleeves and cuffs. It is advisable to use non-adhesive materials such as calico and calico. See Gaskets and Adhesives.
When sewing products made from natural fur, they are made end-to-end and joined on a furrier's machine, so seam allowances are not given. Faux fur can be sewn with a regular stitching stitch on a straight-stitch machine, so when creating a pattern and cutting parts, you need to take into account seam allowances of 1-1.5 cm.
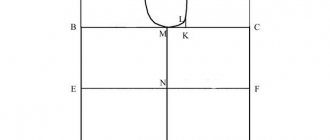
Faux fur products are made without fitting, so the details of such a product must be cut according to proven patterns. To do this, it is advisable to first test them on inexpensive fabric. If necessary, make adjustments to the patterns and only then begin cutting fur or leather.
Making changes to the style of a fur coat
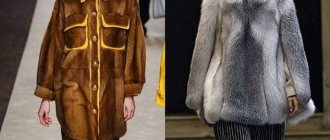
You can improve the style a little, which will change the mink coat and become fashionable again, with your own hands. There is no need to go to a studio and pay a fairly large amount for simple work.
There are several methods to give a modern look to a fur coat, which can be done at home:
- trim the hem;
- shorten the sleeves;
- change collar;
- make trims from other fur at the cuffs, collar and hem.
How to cut faux fur and leather
Faux fur should be cut in the same way as natural fur, on the reverse side. To cut, lay out the faux fur fabric in one layer with the wrong side (fabric) side up. If faux fur looks like natural fur, its pile should be directed towards the bottom of the product. In any case, the cut details should be laid out in one direction.
Before laying out the pattern on fabric, faux fur and leather, you should check the location of the pattern on the fabric, the direction of the pile, and also make sure that there are no defects in the fabric. If a defect is found, a mark is made on the fabric with threads of a different color and when laying out the parts, this place is left unused.
You can cut faux fur using a very sharp special knife, or another cutting tool with a very sharp razor blade (stationery knife). The knife should cut only the fabric base without damaging the fur pile. If you do use scissors, it is advisable to cut only with the tips of the blades, cutting only the base fabric, without cutting off the pile.
Marks are applied to the reverse side with pins, chalk or special felt-tip pens. It is most convenient to pin parts with long, strong pins with large plastic heads.
The connecting seams of faux fur products are not ironed; the seams are straightened and pressed with your fingers.
What do you need to sew a fur coat with your own hands?
The main thing is the material for work:
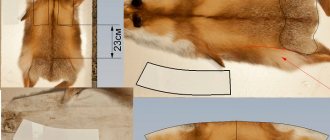
- Natural fur can be purchased in specialized stores or from hunters in the form of individual skins. Working with this material requires certain specialized knowledge and is one of the most difficult areas in sewing.
- Faux fur can be found in almost any fabric store. Working with it is much easier than with its natural analogue. This material is much cheaper in price, and it is not so scary to spoil it; it is sold in the form of a single piece, like regular fabric.
- Old fur fabrics, for example in the form of a fur coat and vest, which can be converted into a new fur coat. In this case, you need to understand that if there are abrasions and unsightly places on the material, they will have to be removed.
- Lining material. Satin or satin is often used as a lining for a fur coat; they are usually inexpensive. The product is given a rich look due to its smooth shiny surface, and these materials are very wear-resistant and retain their shape well during use.
In addition to the material itself, to create a fur coat with your own hands you will need the following equipment:
- Tailor's sharpened scissors or furrier's knife, the second option is preferable when working with natural fur.
- Clothespins are also needed for working with natural fur.
- Hammer with a soft silicone head or wrapped in cloth.
- Chalk, soap or gel ballpoint pen in a bright color.
- Metal long ruler.
- Safety pins.
- Small nails (when working with natural fur).
- Tape measure.
- A punch for installing accessories and attachments for it.
- Furrier's needles for machines, having three edges or gypsy needles.
- Comb.
- Thimble.
- The fittings are decorative and functional.
This is interesting: Felt Mask Pattern
Connecting faux fur parts
1. Tuck the faux fur hair away from the cuts and pin the pieces right sides together so that the pile does not stick out beyond the edges of the cuts.
2. Sew the edges with a wide zigzag stitch with a small interval between stitches, so that the needle extends beyond the edges on the right and left. If you have an overlocker, you can stitch the edges on the overlocker, just adjust the thread tension first. If you have a furrier machine, you can use that too. These recommendations apply only to fur on a durable basis. Fur on a knitted base must be sewn down on a sewing machine, leaving allowances of 1-1.5 cm.
3. Unfold the stitched parts and carefully pull them in different directions so that the sections move apart and are positioned end to end. The seam should be smooth, with a slight edge along the stitches.
4. The connected seams need to be “cleaned” of lint and fur hairs. Take a long pin with a rounded end or a thick embroidery needle and, from the front side, pull out the fur lint caught in the seam. After this cleaning, the seam on the front side will be barely noticeable.
Methods for processing the cut edge of faux fur
You can hem the bottom of a faux fur item by hand using cross stitches. There is no need to iron the folded hem. The soft, puffy edge looks nice, so just smooth it out with your hand. On a product made of thick, long fur, it is better to trim the bottom with a facing made of lining fabric. If you do decide to make a hem along the bottom, hem it not with one, but with two rows of cross stitches.
1. Processing by turning. Trim the seam allowance at the bottom to 2 cm. Cut out a 10 cm wide bias tape from the lining fabric. Fold it in half, wrong side inward, and iron the fold. Stitch the binding to the bottom of the product with a 6 mm seam, placing the binding on the face of the product. If fur lint gets into the seam, pull it out with a thick needle. Fold the bottom of the product along with the facing to the wrong side so that the fur is turned to the wrong side by 1.3 cm. Hem the upper edge of the facing to the base of the fur by hand using a blind stitch.
2. Processing the bottom with two rows of stitches. Trim the bottom edge evenly and finish it with a zigzag stitch along the edge or with a serger (Figure A). Fold the edge to the right side to half the depth of the hem and baste it (Fig. B). Fold the basted edge to the wrong side and hem it with cross stitches, without tightening the thread (Fig. B). Remove the original basting thread, straighten the hem, and hem the finished hem edge, placing the second stitch above the first, along the hem edge (Fig. D).
Sewing artificial leather products
Sewing products made from artificial leather is almost no different from sewing genuine leather. You will find many recommendations in the article “Working with Genuine Leather,” but there are also some peculiarities.
Artificial leather can be fabric or knitted. Leather on a knitted base has increased extensibility both in the longitudinal and transverse directions, so when sewing a product it is necessary to take this property into account. It is advisable to place a gasket made of non-adhesive materials along all cuts when sewing, as well as along the bottom line of the product, the bottom of the sleeves, and in the area of the shoulder blades.
Unlike genuine leather, artificial leather stretches greatly under the foot. As a result, the lower part fits and, vice versa, the upper part lengthens. Sweeping and pinning with pins will not noticeably help this. The only way out is to use a special foot with a wheel or roller. You can put paper strips (photo), which can then be easily removed. Using this method, set the stitch length to 4-5. With a small stitch it will be difficult to remove strips of paper.
In products made of artificial leather on a knitted base, it is advisable to place patch pockets, pockets with a leaf or pockets in the side seams. When performing finishing stitches, it is recommended to use feet with fluoroplastic soles. This will reduce skin “sagging” and facilitate tissue advancement.
Since needle puncture marks remain on artificial leather, artificial leather parts should be sewn down once, without alterations. It is advisable to use previously tested patterns. If the patterns are new, their accuracy can be checked on a model made of inexpensive fabric.
Seam allowances should be the same width, which will ensure precise joining of the cut pieces.
Instead of basting parts with thread, you can use special adhesive tape or paper clips.
Video on how to sew natural fur skins by hand.
In this video you will see how a furrier machine works. We sew together two small pieces of fur especially for you.
Connecting furrier seams need to be stretched
Pieces of skins connected into one whole must be stretched on a wooden surface. To do this you will need small nails and a hammer. A fur skin collected from different pieces is lightly moistened with a damp sponge from the side of the leather fabric and then nailed along the edges with nails to the board, at the same time slightly stretching it. This is a very complex process, experience is required, so I will not dwell on it in detail. I will only say that with the help of such an operation, the fur skins are leveled, the seams are straightened, and sometimes it is even possible to increase the size of the skin.
