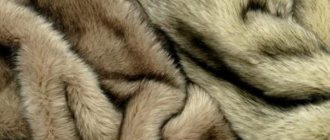
No matter what, fur is always relevant. And not only furrier's products, things knitted from fur are trendy. The pioneer of such knitting was Paula Lishman, a Canadian fashion designer; her models, knitted from strips of mink and rabbit skins, conquered the world. With our instructions, you can make your own fur hat with your own hands. To help beginners, we publish a small master class, as well as a video about fur knitting.
There are two ways to create fur knitwear. First: strips of fur are sewn onto a knitted base. The second consists precisely in knitting thin fur strips or fur yarn twisted from them.
Knitted fur hat: choosing fur and yarn
To knit a fur hat you will need:
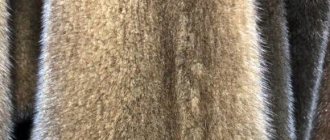
- Fluffy natural fur, you can use it, but you should pay attention to the following criteria: the fur is dense, shiny, does not fray, the inner layer (the back side of the fur skin, the skin on which the hairs are held) is elastic, not dry, and does not crack. It is best to select skins where the flesh and fur are the same color or similar. For example, black fur, black or chocolate, or gray flesh. But if black fur has beige flesh, the work will be much harder;
- Yarn of medium thickness (about 160 m per 100 g of yarn), to match the flesh and fur, respectively. It will take about 100-150 g;
- Circular or toe knitting needles, 5 pcs. Please note that the recommended knitting needle numbers are always written on the yarn packaging. You need to choose the highest value so that the hat turns out loose.
And a few more tips on choosing fur. It is best to choose long fur, as long strips will be required. Ideally, it will be one piece, but if this is not the case, you can sew fur strips together, sewing one to the other until you get the required length. For those who have quality fur but it's short, don't worry, we have an idea for you too!
The fur can be either rabbit or arctic fox, nutria or astrakhan fur. But it must be dense and fluffy. The most beautiful hats are made from mink, raccoon and arctic fox fur.
Before cutting the strips, try this test:
- Rub the skin over a sheet of white paper. The fur should not fall off;
- Brush the fur with a round-tipped comb in the direction the fur grows. It is acceptable for a little lint to remain on the comb, but if the comb is clogged with undercoat, the fur will most likely fall off both during work and during wear;
- If the fur is used, see if it needs cleaning. If yes, clean it first, and only then start working with it.
Now regarding the yarn. It can be smooth and fluffy. But you shouldn’t choose carefully, as it simply won’t be visible under thick fur. In this case, the yarn should be pleasant to the body, since it will directly adhere to the body.
Fashionable models and styles
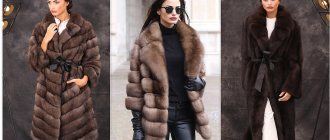
Mink hats always remain in fashion trend. They are relevant this season and will also be popular next year. This popularity of fur hats is explained not only by the luxurious appearance and high cost of fur products, but also by the attractiveness of the images. The mink is very warm and comfortable. The hat is almost weightless, so you don’t need to constantly adjust it on your head when moving.
The designers managed to emphasize the majestic beauty of mink hats in new collections. Today, every fashionista has the opportunity to choose a mink hat model for herself. The choice is truly rich and varied.
Mink hats today are represented by the following models:
- from blue mink,
- from shorn and plucked mink,
- boyarka,
- Kubanka,
- hat,
- cap,
- hat with ear flaps;
- mink beret;
- model with visor,
- cap;
- mink hood;
- knitted hat with mink.
Many women, out of habit, prefer Kubanka. This is a type of mink hat that looks like a short top hat. This type of hat is often compared to a low hat.
The boyarka has other features. The product has a round shape. The hat is completely natural, but some models may have a leather insert on top.
In general, the styles of mink hats are quite varied. And in addition to traditional models, at fashion shows you can notice new styles of your favorite headdress.
For example it could be:
- a “gnome” hat, which got its name from the design of the tip, like a fairy-tale character (you can combine it with a fur coat or down jacket and with UGG boots);
- a ball hat, the style goes perfectly with a down jacket in the shape of a trapezoid and with the same ugg boots;
- a beanie hat is also an incredibly sophisticated version of a headdress (long leather gloves and a bag will suit it);
- earflap hat with pompoms or tassels (a favorite accessory of young fashionistas).
Crocheted fur hat: master class with photos
In this section we will tell you how to make a crochet knitted fur hat. To work, we will need a thin hook, a thin thread in the color of the flesh and fur, as well as strips of fur, which we will now tell you how to cut correctly.
- So, you cannot cut fur with scissors, as you will ruin it. On the contrary, it is best to cut fur with a stationery knife, as well as with a regular T-shaped razor blade (as in the USSR).
This is what cut strips of fur look like
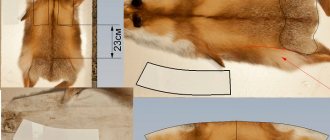
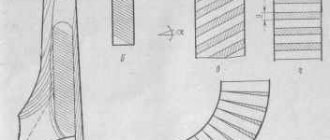
- We take a skin, a collar or a piece of fur and see where the fur goes. This is the fur growth line. In this master class we cut perpendicular to the growth line. This way, we will get uniform stripes, and subsequently they will look as natural as possible. The photo shows how the collar is cut. We cut the strips into a thickness of 1-1.5 cm. If you wish, you can experiment with the width of the strips, but not thinner than 1 cm.
Cutting the fur
- Now we sew all the strips together to make a single long strip. Pay attention to the color rendition around the edges. It is best to sew in the same order as the strip is cut.
- That is, we sew the bottom strip to the next top one, while we sew all the strips along the right edge (you can also sew along the left, it’s not important, but it’s important that it’s always on the same side). This way your fur will be dense and the shade will fit perfectly, and the seam will be invisible.
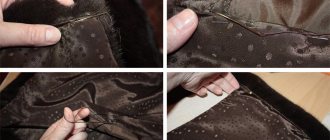
- The fur must be sewn using a furrier's stitch. Since this master class is for amateurs and you may not have a professional machine, therefore, it is worth mastering hand stitching. Watch a short video in which the master will show you this simple but durable seam.
For this work, it is best to use strong threads, as they can break under tension.
Fluffy keychain
You can use pieces of an old collar to make fluffy key rings. Any fur is suitable; colored faux fur with long pile looks especially colorful.
How to make a fluffy hedgehog keychain, master class:
- We will need dark fur, a key ring with a base, a piece of white flannel or plush, stuffing, satin ribbon, and beads.
- On paper we draw the body of a hedgehog. You need two such parts, and one will consist entirely of white fabric, and the second will be sewn from black fur (thorn) and a corner of the fabric (muzzle).
- We attach the templates to the fabrics and trace them with a margin of 1 cm.
- Sew the muzzle and back.
- Sew both pieces together, leaving a hole to turn inside out.
- We fill the keychain with padding polyester or other filler.
- We insert a satin ribbon inside so that a small loop is formed. The ring for the keychain will be attached to it. Now we sew the hole with a hidden seam.
- All that remains is to sew on the beady eyes, nose and put the ring on the loop.
Video: Do-it-yourself furrier stitch without a furrier machine
When we have a fur blank, we start knitting. We make a magic amigurumi ring and knit 6 single crochets in it. Tighten the ring and add a fur strip. Please note that we draw the hook as close to the flesh as possible, thereby spreading the down.
So, the knitting pattern:
- 1st row – crocheted amigurumi ring;
- 1 row – 6 single crochets;
- 3rd row - with a fur strip. 12 loops (each loop has 2 single crochets);
- 4th row – without fur. Double the columns through the loop. 2 single crochets with 2 loops, 1 column, and again 2 columns with 1 loop, etc.;
- 5th row - with a fur strip. Now double through 2 loops;
- Row 6 - without fur. Double through 3 loops.
We knit the bottom of a fur hat
- So we knit the bottom. You will get an even circle. The perimeter of this circle is equal to the volume of the head + 1 cm.
- For example, the volume of the head is 56 cm, which means we knit a circle until the volume is 57 cm. Sometimes it is difficult to achieve an equal value; the result is either 56 or 58 cm.
- Do not worry. In this case, knit 56 cm, and in the next row add 1-3 loops to reach a volume of 57 cm.
- In this case, additives should be proportionally distributed around the perimeter so that there are no “bumps”.
Finished bottom of a fur hat
- Next, knit without additives in single crochets, also alternating rows with and without fur. Having knitted the entire height of the hat, cut the strip and secure it.
- This is done like this: leave a thread tip of about 20 cm. Thread the thread into a gypsy needle and thread the tail of the strip. It is folded inward and sewn to the wrong side.
Ready-made crocheted fur hat
Now all that remains is to sew or knit, as you wish, the lining to the hat and sew it on. It is on the lining that a gap of 1 cm is given. But if the lining is planned to be silk, then 0.5 cm will be enough.
How to make fur thread
A couple of tips on using fur thread in a product.
Prepared mink or rabbit fur yarn can be used for knitting luxurious winter hats. The photo shows magnificent models where successful combinations of furs, fabrics and yarns are used. Completely different textures combine incomparably and make a woman’s image truly bright and romantic.
The methods for making fluffy hats differ in the technique of execution: in an ensemble with thread. Knitting with fur does not require any special skills. For the hat, loops are cast on circular knitting needles to knit without a seam, and in every second row fur yarn is added to the regular thread. There are a great many options for creative approaches, maybe the rare addition of mink or a beautiful elastic band with a fluffy top, or maybe an original combination of fleecy strips of different colors and textures.
A video with useful tips will help you get comfortable with this simple technique.
Knitted fur hat: step by step
In this section we will tell you how to make a knitted fur hat with knitting needles. To work, you will need strips of fur (this time cut vertically along the growth line), yarn with a thickness of about 150-170 m per 100 g, knitting needles, a gypsy needle, and high-quality sewing thread No. 40. And also a piece of felt and suede. It is desirable that everything be the same color scheme.
So, let's get to work. The first thing we will do is knit the fabric. To start with the calculation:
- Cap volume = head volume + 1 cm;
- (Hat depth – 4 cm (bottom))*2 + = height of the knitted fabric.
If everything is clear about the volume, then we will analyze the second point in more detail. For example, we have a size 56 hat. In this case, look at the table, from which we understand that the standard depth of the header is 17.80; for simplicity, let’s round it up to 18.
So, (18-6)*2=24 cm.
Head measurement table for calculating headdress depth
It follows from this that we need to knit a cylindrical fabric without seams with a volume of 56 cm and a height of 24 cm. We knit with a 2*2 elastic band.
Knitted fabric with elastic band 2*2
- If you have a knitted fabric of the required size (an old jacket, hat, etc.), you can cut and overcast the edges on a machine.
Sewing edges on a sewing machine
- Now let's move on to cutting the skin. It can be moistened and stretched until completely dry. Next, you should make markings 14 cm in height and vertical stripes of 1-2 cm (this thickness corresponds to the width of two front loops on the canvas). Next, cut the strips using a knife or blade.
Skin marking
- Carefully cut the flesh, lifting the edges of the fur so as not to cut the hairs and not spoil the table. If you are cutting for the first time, do not rush, but do the work carefully.
Cutting fur strips
An important point: it is best not to cut 0.5 cm to the edge on one side. Thus, the fur on one side will be cut like an accordion, and on the other side it will be kept on a single sheet. This will make it easier to assemble the product.
This is what the cut strips look like
- Now we move on to the second fur, which is fluffier. We cut strips of 12 cm with the same thickness of the core. And let's move on to sewing.
Cutting the second fur
- You will need a blank, if you don’t have one, a bottle or a plastic 5-liter bottle, depending on the volume of the cap. The knitwear should be greatly stretched, this will make sewing easier.
We stretch the knitted fabric onto the blank
- As shown in the photo, we retreat 12 cm from the top and begin to sew the strips towards the bottom so that in the finished hat the pile faces down. Sew on two front loops, as shown in the photo. There will be about 40 stripes in total, but everything varies depending on the number of loops on the knitwear.
Sew on the stripes
- It is best to fasten the thread at the highest point and gradually sew strips in 0.5 cm increments. Stitches must be sewn first in one direction, then in the opposite direction. So that the fur fits tightly to the knitwear.
Sew on the second layer of stripes
- Now we move on to sewing the top strips. Their number coincides with the number of lower stripes.
Seam close up
This is what a hat blank with fur sewn on looks like
- Next we move on to creating the bottom. To do this, apply textile glue to the felt and carefully glue suede (can also be replaced with leather). Place a circle pattern 12 cm in diameter on top and outline it. Once everything has frozen, cut out a felt-suede circle.
Bonded felt with suede
- We turn the hat blank inside out so that all the fur is inside. We straighten the fur so that it does not peek out.
Turn the fur inside out
- Now we sew it to the edges of the hat as shown in the photo, so that the felt looks inward and the suede remains on the outside. Sew tightly, as shown in the photo.
Sew the bottom to the hat
- Next, we fold the wrong side of the knitwear - the lining, and also sew it to the bottom. If desired, the felt bottom can be covered with a circle of the same yarn and sewn to the lining.
Sew the lining to the bottom
- All that remains is to turn the hat inside out and comb it thoroughly.
Finished hat
How do you like these two options for knitted hats? Which one would you like to repeat?
And in conclusion, we’ll add another master class on how to make a knitted fur hat, where the stripes will be in a spiral, forming an interesting relief.
