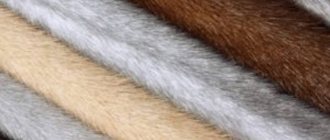
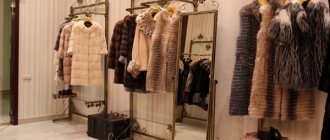
Purchasing a stylish fur coat that looks like animal skin, but at the same time artificial, is available to any woman. Natural fur is beauty and chic. A fur coat made from it is for those who can afford to combine comfort and luxury: materials approaching the quality of furs such as mink and sable have not yet been invented by the fashion industry.
It is possible to sew wonderful fur clothes in a studio, or you can try to create it yourself; patterns for fur coats can be found on the Internet. In the fascinating world of handicrafts, during the process of making a fur product, positive emotions are guaranteed, the result is a dream come true.
Hand-sewn fur coat
About the intricacies of working with different types of fur
Correct selection of fur and sewing fur coats require practical skills; how to sew an artificial fur coat quickly and exclusively? The ability to work with different types of fur, taking into account their characteristics and differences, with a manual furrier’s stitch, a furrier’s machine, special knives for cutting skins, the basics of cutting fur fabrics, is not the full amount of knowledge that you need to have when starting work. Preparation for sewing products from natural and artificial fur and, directly, the process itself are significantly different.
Natural fur
To purchase natural fur, you should contact specialized stores or hunters (if you need separate skins). Before starting work, especially if the fur is presented in the form of small skins, it is necessary to connect them in such a way that a single canvas is presented.
Artificial fur
The step-by-step process is as follows:
- Joining skins.
- Unfolding and straightening (use a hammer to tap the seams from the inside out).
- Determination of the pile on the skins, taking into account the length, and their combination.
- With hand stitches there is a “little slack”, but the tension is distributed equally.
- In order to avoid deformation of the fabric, some parts and sections of the fur coat are duplicated using cushioning material.
- Cotton tapes are used to strengthen the seams (shoulder seams connecting the armhole and neckline elements).
- To align the seams, in order to increase the size of the fabric, stretching is done on a flat surface; nails are used for this purpose.
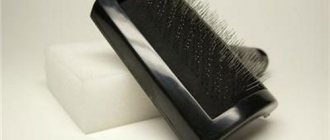
- Using a metal comb, processing is carried out in the places where the skins are connected.
- It is necessary to match the skins, taking into account the length of the pile, its consistency and shade.
Note! To avoid damage, fur is cut using a blade or a special shoe knife, rather than scissors.
Any store that sells fabrics offers a choice of faux furs. They are easier to work with, they are cheaper and are sold in one piece.
A household sewing machine is used to sew faux fur products. Products made from natural fur must be sewn by hand, or a special furrier's vertical machine is used.
You may be interested in How to sew men's and women's shirts at the seams
Uncover
Sewing a faux fur coat with your own hands is a different process, and the work involved in preparing the fur coat pattern is also different. To sew “artificial”, before cutting, you should take into account the length of the pile. Fabric with short pile - the cutting direction does not matter; with long pile, cutting is done taking into account its direction. When sewing parts together, in this case, straight stitches are used, and to pull the pile out of the seams, you need to use a needle or use a steamer.
Excess fur on the fabric allowances is cut off. The hem areas are subjected to heat treatment in order to reduce volume. When processing lapels and shoulder seams, it is necessary to strengthen them with strips; for these purposes, you can use cotton fabric.
Faux fur coat
Important! If there is a pattern on the faux fur fabric, its adjustment is carried out before cutting.
Working with fur can also be complicated by the dust that arises when processing fleecy fabric.
Finding a template and taking measurements
The first step is to create a fur coat pattern made from natural fur. Or search for a pattern for a pattern in open sources, for example, in fashion magazines. In order for the pattern of a fur coat made of natural fur to be successful and the product to fit well, focus on the outerwear you already have, for example, a jacket or coat.
To ensure that your future fur coat suits your body type, find out the following parameters:
- chest height;
- waist and chest circumference;
- shoulder and back length.
There will be a table where you got the pattern from - choose the appropriate size. To cut out all the parts evenly, transfer them to paper. When you start cutting, do not forget to mark the places where joining and stitching will subsequently take place.
About types of faux fur
Faux furs, which are reproduced by modern technologies, have characteristics that confirm their high quality, and are in appearance little distinguishable from natural ones. They have been a trend for the last few years. The products are part of the collections of many famous designers. The choice is wide and varied. And if you think about one thing: “Faux fur coat, how to sew, what to choose?” Let's resolve the issue. To make a choice in favor of a specific fur, an individual approach is required.
Faux fur material consists of two layers: a smooth woven or knitted base and a piled outer side. The woven base of faux fur includes materials in the form of:
- synthetic;
- viscose;
- cotton;
- woolen;
- silk
Textile fibers
Textile fibers (synthetic, mixed or natural, for example sheep wool) form the basis of faux fur fibers. The positive qualities of these fabrics include:
- durability;
- wear resistance;
- thermal conductivity;
- beautiful appearance.
One of the main advantages of faux fur is that you can sew things from this material yourself, and in the future, with simple care, it is possible to sew a faux fur coat with your own hands using patterns.
Preparing the skins
This is perhaps the most important stage in cutting a fur coat from natural fur. Its further quality directly depends on the preparation of materials. Be as careful as possible.
Cut the skin using a furrier's knife. Try not to damage the pile. Carefully get rid of everything unnecessary: head, paws and tail. Then the defective areas of the flesh and pile are eliminated. Leave two to four centimeters as reserve for the hem areas.
The skins are laid skin side down for about an hour. Before this, they are carefully moistened so that water does not get on the fur. Next, they are turned over, stretched flat, and the edges are secured with thin nails or staples.
After the skins have dried, they are placed on the pattern. All fibers should be directed in one direction, and fur shades should be combined with each other. The skins are pricked and then the excess is cut off from the skin.
About tools for working with fur
To work with fur, a small number of tools are required. For example, to repair a leather coat you only need a needle and the ability to make reliable seams. Sewing a fur coat from astrakhan fur requires not only knowledge of how to perform this type of work, but also how to use a set that includes furrier’s tools. Unlike sewing faux fur products, working with natural fur requires mastering the operations performed by a furrier’s machine, plus numerous special tools and devices.
Sewing tools
What equipment will you need to create a fur coat yourself? This kit is presented:
- sharpened tailor's scissors or a furrier's knife (preference to the second option);
- clothespins (when working with natural fur);
- a hammer with a soft silicone head (can be wrapped with cloth);
- chalk, soap or helium ballpoint pen (bright color);
- long metal ruler;
- safety pins;
- small nails (stretching natural fur);
- measuring tape;
- a punch and nozzles (with its help, fittings are installed);
- furrier's needles (with three edges or gypsy needles);
- comb;
- thimble;
- decorative and functional fittings (fur coat hooks, hanging loops, buttons).
You might be interested in Several options for sewing a fabric basket for laundry or toys
Stitching parts
The cut parts of the product must be swept away. Then try it on. If there are any fitment defects, correct them by adjusting the parts. You may have to add darts, or move further away from the edge when basting (in case the item “hangs”).
It happens the other way around, the cut parts lay for a long time and were not stitched. During this time, the woman's figure changed. The allowances left may not be enough. Here you will have to add elements.
The length of the part with fur must correspond to the length of the lining. The base and lining are cut out separately, but using the same patterns.
Faux fur coats
Next you need to do this:
- The details of the shelves and sleeves are machined.
- The lining is sewn separately.
- The lining and the main part are sewn together.
- All small details are processed: collar, hood, cuffs, pockets, belt, etc.
- The bottom of the product is hemmed. To do this, you must first put on the item and check the length. The edges should be smooth on all sides. Where necessary, trim with sharp scissors. Take it off and tuck the edge around the entire perimeter. Baste by hand, then measure again. If the length suits you, finish it by machine. In some models, the edges are not folded at all. This is the case when sewing with wedges.
- Decorative details can be sewn on after processing the bottom.
- Lastly, the fastener is sewn in: zipper or buttons.
That's all! Women's faux fur coat is ready. You can wear something new and amaze others.
About calculations of the required footage for a fur coat
First of all, you need to choose a style. Having decided on the model (straight, trapezoid or cocoon), you can begin to calculate the footage.
The main parameters of the product are presented:
- length (distance “upper shoulder point - preferred length”);
- sleeve length (the value “upper point of the shoulder - desired length”).
Depending on what is planned: the fur coat is straight, or the silhouette is flared (size 42 48), - one length is enough in a canvas whose width is 150 centimeters. The size is larger - for a given width, more fabric will be required (up to two lengths). If the product being manufactured is intended to be decorated with structural elements, a reserve of material will be required (0.5–0.8 m). Additional costs for allowances when processing seams and shrinkage (0.1–0.2 m) should be taken into account. Elements in the form of collars (rarely found), lapels, patch pockets - they contain remnants of fur fabric.
Ready product
In the case when the product includes different types of fur, the footage of the fabric is calculated taking into account the height of each part, and separately.
When determining the lining fabric, the calculation is carried out taking into account the style of the product, as with the yardage of the main fur fabric, the length of the product itself and the sleeves are taken as a basis.
Additional Information. Inexpensive fabrics, such as satin or satin, are used as lining material. They are wear-resistant, easy to use and look presentable - they have a smooth shiny surface.
About the technology of sewing a fur coat or sheepskin coat using a pattern
Sewing fur products begins with preparing the pattern. For sewing, you can use a ready-made pattern for a fur coat or sheepskin coat, or you can borrow a drawing from the Internet. But it’s not difficult to make a pattern yourself.
Pattern
Basic Rules:
- Each cut piece must match in the direction of the pile.
- Parts of each part must be mirrored;
- Symmetrical design in detail is required;
- Only the base of the fur is subject to cutting (the pile is not cut).
Cutting a fur coat begins with modeling the back (1 part) and the shelves (2 parts). A sleeve pattern is created (they can be single-seam, straight or flared). And then the collar or hood is cut out. A collar pattern, for example, for a mink coat is not difficult to construct. The hood will require diligence.
You might be interested in this: Constructing a pattern and sewing an owl pillow from felt or fabric
About sewing a children's fur coat
The material from which fur coats for children are made is inexpensive fur, in the shape of a rabbit, squirrel or cowtail. Sewing a small fur coat is not a painstaking and time-consuming process. Of course, there are features. For example, the width of the sleeves - they should be tailored taking into account the child’s mobility. But the width is normal, not “flying”, so that the baby does not freeze. The length is also averaged.
Children's version
The pattern is initially made from thick fabric and is pre-basted. The “preliminary model” is tried on the child. And only taking into account the shortcomings and their corrections can the pattern be transferred to fur fabric. It should be noted that higher quality fur is used to sew sleeves and collars. Seam allowance is allowed at least 0.4 mm. You should leave up to 2-3 cm for the hem. Next, the process of sewing the product, which includes:
- sewing fasteners;
- stitching of side seams;
- lining hem;
- sewing shoulder seams;
- sewing on the finished collar;
- sewing in sleeves (together with lining).
A wonderful fur coat for the baby is ready. It's safe to say that your baby will be warm in winter.
Recommendations for cutting
If everything is clear with the patterns and they are made correctly, you can start cutting out the parts. Accuracy is also important here. The material should be laid out fur side down on a dry, flat surface. The fabric should be laid out in one layer. It is better to make extensions on parts with bends.
Unfold several elements:
- Back: solid or made of two composite shelves;
- two front shelves;
- two sleeves;
- two parts of a hood or gate;
- two cuffs (if provided).
Each pattern is pinned to the fabric and outlined with tailor's chalk. Taking into account the necessary allowances. Then the parts are carefully cut out along the contour. The scissors must be sharp, otherwise you can damage the fur. You must cut strictly in the direction of the pile.
