DIY fur hat: choosing material for the product
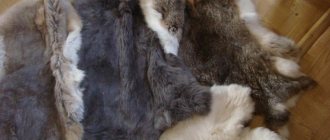
Do you want to sew a fur hat with your own hands? First, let's choose fur so that the finished product can be worn for a long time and please the owner.
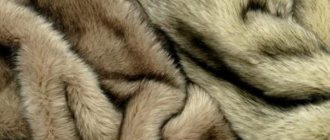
- Matte or shiny. If you have a matte piece of fur in front of you, then no matter what you do, it will not add shine. There are types of fur that are initially matte, such as matte mouton, llama, sheepskin, etc., but we perceive most fur exclusively with shine and gloss. Therefore, no matter how thick the fur is, if it is dull and matte (not counting those listed above), it is better not to use it for a hat;
- Fur condition. Rub the skin, run a damp hand over it, and lightly comb with a round-tooth comb. If the fur sheds, it will quickly lose its appearance and shape. It is better to take fur for work, the hairs and down of which are dense and hold well in place;
- Mezdra. This is the base, the reverse side and the very skin on which the hairs and edges are held. It should be elastic, elastic and not crack when bent. You should not use fur with damaged flesh.
In order to sew a fur hat, you may need one or several types and shades of fur. It all depends on your preferences. You will also need a sewing machine or a gypsy needle for hand stitching, a lining for a hat and other materials.
To work with leather and fur, you definitely need to master the furrier's stitch; it is not difficult, and you can learn right away from the product. You can learn the nuances by watching the short video below.
Ushanka hat, insulated for cold weather
As materials listed above, add a hammer and mini nails, as well as a piece of plywood no thinner than five millimeters.
To begin, as always, make a pattern for a cap, which can only be made from a pair of equilateral parts, ears and a visor. It’s like on the cap of Russian officers.Next, you need to follow the operations that are available in the video, since the description cannot be immediately understood. You will need to correctly cut out and cut out eight different parts of the future hat and sew them.
Let’s just explain why plywood is needed to make a women’s winter hat. On this site, all the parts are laid out one by one, moisten their fur, stretch them as far as possible, and nail them to the plywood with small hardware. Wait for the fur to dry, remove the parts from the board.
Sew on the ears and visor last. Turn the product with the fur outward, strengthen the ribbons for tying the ears when they are located at the top, or at the bottom in severe frost.
In each section of the article, when finishing work, take a photo of a fur hat you made yourself.
Fashionable models and styles
Mink hats always remain in fashion trend. They are relevant this season and will also be popular next year. This popularity of fur hats is explained not only by the luxurious appearance and high cost of fur products, but also by the attractiveness of the images. The mink is very warm and comfortable. The hat is almost weightless, so you don’t need to constantly adjust it on your head when moving.
The designers managed to emphasize the majestic beauty of mink hats in new collections. Today, every fashionista has the opportunity to choose a mink hat model for herself. The choice is truly rich and varied.
Mink hats today are represented by the following models:
- from blue mink,
- from shorn and plucked mink,
- boyarka,
- Kubanka,
- hat,
- cap,
- hat with ear flaps;
- mink beret;
- model with visor,
- cap;
- mink hood;
- knitted hat with mink.
Many women, out of habit, prefer Kubanka. This is a type of mink hat that looks like a short top hat. This type of hat is often compared to a low hat.
The boyarka has other features. The product has a round shape. The hat is completely natural, but some models may have a leather insert on top.
In general, the styles of mink hats are quite varied. And in addition to traditional models, at fashion shows you can notice new styles of your favorite headdress.
For example it could be:
- a “gnome” hat, which got its name from the design of the tip, like a fairy-tale character (you can combine it with a fur coat or down jacket and with UGG boots);
- a ball hat, the style goes perfectly with a down jacket in the shape of a trapezoid and with the same ugg boots;
- a beanie hat is also an incredibly sophisticated version of a headdress (long leather gloves and a bag will suit it);
- earflap hat with pompoms or tassels (a favorite accessory of young fashionistas).
Reviews of women's fur hats
Fashion trends do not stand still. Every year new models of women's hats appear. There are options that do not lose their relevance. These primarily include voluminous ear flaps and beret hats. They, in turn, have many modifications depending on the design and type of fur. Faux fur hats are also popular. They are distinguished by a variety of colors and affordable prices.
This is interesting: Pattern for women's mini skirt made of stretch fabric (size XS-XXL)
How to choose according to face shape?
Mink always suits you. But do not forget about the rules for selecting a headdress based on your face shape . A slim figure, an oval face and regular facial features allow you to choose hats of any style. Curvy fashionistas should choose their accessory more carefully. For example, such a lady is unlikely to suit a voluminous headdress or a hat that is too fluffy. Such models are more suitable for fragile and sophisticated women.
- Girls with a pointed face shape (triangular type) should pay attention to models of fur hats with earflaps. The “ears” of the hat should hang freely at the sides. If, in addition, the girl lets down her long hair, then she can choose a hat that is more rounded, but quite voluminous.
- Designers recommend that chubby fashionistas turn their attention to models of earflaps with “ears” tied back. Also suitable for them are hats and fur berets, slightly shifted to the side. A rounded face type allows you to wear voluminous hats, for example, large knitted ones using mink.
- A square face type needs to be visually “stretched out”. Therefore, girls with this type of face can be advised to choose a hat with ear flaps, but not with a deep fit along the forehead, and other models of hats, except for a papakha.
- For an elongated face shape (rectangular face), a low mink hat is suitable. This could be, for example, a boyar hat, or a model of a hat with earflaps, in which the “ears” are neatly tied back. A fur beret will look good.
There are practically no restrictions on the choice of accessories for women with an oval face type and regular features. In this case, you can choose any hat style you like.
Color
Many fashionistas are sure that mink products should only be in natural shades. It is worth considering that the headdress is matched to the outerwear in the appropriate color scheme and according to the color type of the face and hair. A wide range of shades of natural fur allows every fashionista to make the right choice. It’s also worth giving up your prejudices and taking a closer look at models with dyed fur. Only the model must belong to a well-known brand to avoid fakes. In this case, modern fashionistas have a truly huge scope for choosing accessories.
And yet, when choosing a mink hat by color, you should adhere to the basic recommendations of designers.
- Brown-haired women look great in products of deeper dark colors - all shades of black and brown. Walnut, mahogany and scanglow models are also suitable here. You can also choose colored versions of the hats, then you should take a closer look at the deep blue models.
- Blondes, of course, can afford contrasting colors - black and white. Also, girls with a northern type appearance should take a closer look at models in purple, blue and pink shades.
- For redheads, hats in warm brown shades are suitable, as well as models with golden fur, and accessories in yellow or green colors.
- Mink hats in mahogany or walnut colors look impressive on brunettes. Or it could be pastel-colored models. From headdress models, you should choose tinted items in burgundy, blue, red, and turquoise colors.
Whatever the hair color, it is important to note that their shade and fur color should not be identical. For example, a white mink hat looks great against the background of golden hair. Blondes should choose accessories in light gray tones.
Ideal hats for a fur coat
Not just a hat, as we have already noticed, can enrich and complete an image with fur coats. Below we will look at each of these options in a little more detail.
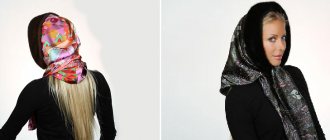
Handkerchief
A scarf with a fur coat was worn back in the Middle Ages. To replace fur hats, which not every woman could afford, different types of scarves were in use throughout Europe. If the fur color is closer to natural, then the most suitable solution is a scarf with a floral pattern.
Stole
A rectangular fur or velvet cape, or, in other words, a stole, with fur looks very feminine and interesting if you are already tired of scarves, for example. In terms of ornaments, polka dots and checkered patterns are universal and always appropriate, but there are also crazier options: skulls, smiley faces, or comic book scenes on scarves and stoles. Choose one that suits your mood and is appropriate where you are going.
Hat
There are an incredible variety of hats in shape, color and material; choosing a hat that suits the style and shape of the face has now become possible for absolutely everyone. With veil, embroidery, ribbons, sides, fringe, plain or metallic - see what suits your specific look.
Cap
Caps go well with cropped or straight styles. These can be either baseball caps or berets with a visor. In the first case, the image is more daring and modern, in the second it is elegant and versatile.
Beret
Along with all the “timeless” hats, there is also the beret. Both leather and knitted models are current, mainly in basic shades or patterns: monochrome check, stripe, small and large polka dots.
Bandage
Wear headbands with feminine and elegant styles of mink and other products. They will look appropriate and unusual, while fulfilling their main function. If there are no suitable ones in stores, then such a bandage can be easily knitted. Scandinavian ornament or any other will look very interesting.
Knitted hat
Knitted hats can balance out almost everything - make your going out look more versatile, and in the case of bright clothing items, bring a certain note of calm and balance. The finishing of such hats is very different, the main thing here is moderation.
Knitted hat
You won’t outrage anyone with a knitted hat for a fur coat like before. This wardrobe element is confidently attached to fur coats of various models. The main thing is the size of the knit, the color and whether the hat suits your face. A leather, knitted or felted earflap can only in rare cases make the wearer look like a polar explorer; it all depends on the finishing of the hat itself and its fit.
Fur hat
What to wear with a mink hat is definitely not with any other fur. This adds visual age. Not all fur looks good with mink (astrakhan fur, for example), so these types of hats go best with a coat, even if it has a fur collar or cuffs.
The most popular styles of natural fur hats
Today, every girl will be able to choose a hat that suits her needs and capabilities. The fur of the hat can be artificial or natural. It can also be eco-fur. In this case, the headdress can be of a classic type and even extravagant.
Modern fashionistas prefer the following models of hats:
1. Hooded hat.
Perfect for any face type. This model is the most practical option for a headdress. The hood protects both the head and neck.
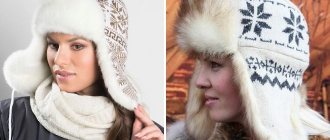
2. Ushanka hat.
This model of fur hats is relevant at all times. Only the length of the fur changes, the way the hat is worn and its color. Ushanka goes well with sportswear.
3. Fur beret.
To make berets, the fur is cut short. Fur berets look stylish and neat.
4. Classic winter hat made of natural fur.
As a rule, such models are sewn from mink fur. It looks expensive and elegant.
5. Kubanka.
This model differs from the others in that it has no brim, but a high crown. This hat looks great on short girls, as it adds a couple of centimeters to their height.
6. Cap.
A cap made of short-cropped fur is created for brave girls who want to look eccentric. Under the cap, you can make a hairstyle of curling curls. Oddly enough, this model can be the final touch in creating the image of a business lady.
What to wear with a fur hat
A fur hat is selected in a color close to the outerwear or accessories. Hats made of expensive fur are not suitable for all things.
If you need a universal hat that you can wear with any item in your wardrobe, look towards classic models.
To wear with a laconic coat, feel free to choose hats with voluminous or dyed bright fur, but if the outerwear itself looks original, choose a simple hat style.
How to choose the right fur hat for the winter
Since the main purpose of a fur hat is to warm your head when it’s frosty outside, the choice should be in favor of a headdress made of natural fur. But since the cost of fur hats is quite high, you need to take the choice of a hat seriously.
Choosing fur
How many seasons a hat will last you directly depends on the fur from which it is made.
- The most practical and wear-resistant are hats made from seal and mink fur. They will serve you for at least 10-15 seasons.
- The raccoon, fox and arctic fox do not have these characteristics. With proper care, you will be able to wear a hat made from the fur of these animals for about 10 seasons.
- Muskrat and nutria will last you 6 or even 7 seasons.
- The most whimsical are hats made of rabbit and chinchilla fur. Expect to only wear them for 4-5 winters.
Important : When choosing a hat made of natural fur, consider the durability of the fur itself. Practical fur is not afraid of either snow or rain. Once dry, the hat will return to its original shape and will not lose its attractiveness.
Pay attention to weight
Remember that the weight of the hat should not be large, since it will be difficult for you to wear such a hat. The weight of the headdress depends on the length of the fur, the material used as insulation, and the quality of the skin.
We look at the thermal insulation properties of fur
If you need a warm hat, we recommend choosing fur hats made from raccoon, silver fox, fox or arctic fox. Less warm, but still practical fur that will keep you from freezing is chinchilla, beaver, rex, rabbit, nutria, and mink. The ranking of the most impractical ones is completed by headdresses made of marmot and ermine.
We look at the quality of the product
To understand whether the fur is of high quality, run your hand over it against the pile. If the finish is good, there should be no lint left on your palm. Also, the hat should not have any visible flaws in the form of bald spots or loose fibers. The fur should be shiny and shimmer.
Trying on a winter hat
Don't neglect fitting. This is one of the important steps on the path to choosing a fur hat. Please note the following rules:
- The hat should not fall through. It should fit tightly on your head.
- The hat should not dangle, but should not put pressure on the head.
How much does a real fur hat cost?
First of all, the cost of a product is influenced by the value of the fur from which it is made. So, a mink hat costs about 10,000 rubles. Rabbit and mouton hats cost about 3,000. A winter raccoon hat will cost more. Its cost will be about 5,000 rubles. A red fox and silver fox hat is not inferior in price to mink hats.
Eventually
The modern fashion for hats made of natural fur allows every girl to choose for herself what she likes and what she will feel comfortable in.
Knowing what fashionable styles of fur hats are relevant today, what furs the hats are made from and how to choose the right headdress, you can make your look stylish and unique!
First way
All we need: angora yarn (500 m/100 g), number two knitting needles, fox fur skin, stationery knife, thread and needle, comb, piece of fabric, safety pins. Head circumference – 56 cm. Hat length – 22 cm.
Work process
- Knitting: 2X2 elastic band in two threads.
Cast on 162 loops. Knit with an elastic band 2X2 15 cm.
Decrease: divide the entire number of loops into eight wedges. Knit, decreasing, another 7 cm. As a result, at the end of the work, 66 loops should remain on the knitting needles. Close the loops, but do not sew the product, first sew on the fur!
Using pins, divide the fabric into four parts.
- Cut the fox fur skin along the belly, cutting off areas that are unevenly covered with fur. Cut strictly in the direction of the pile from the side on which there is no fur with a sharp stationery knife. In this case we have a fur rectangle. For convenience, it was cut in half in the direction of the pile. Cut strips 0.5 cm wide one at a time and sew them on immediately so as not to make a mistake in the sequence.
Be sure to sew stripes onto the front rows of the elastic! Sew from the center of the hat down. Watch the direction of the pile: it should be directed from top to bottom. After you sew on the fur, the strips need to be combed.
Fasten the strip to the bottom of the knitted base, sew it to the front row with a seam over the edge using frequent stitches (every 0.4-0.5 cm), placing the fur. At the end of the front row, carefully fasten the thread and cut off the excess fur.
So, strip by stripe, decorate half of the hat.
When sewing stripes on the second half, the long pile interferes with sewing. And since the stripes are sewn only on one side of the first stripe, you can cover the already sewn half of the hat with fabric and secure it with pins.
After all the strips are sewn on, we begin assembling the hat.
Fold the fabric inside with the fur, straighten the pile and sew as you usually sew a hat. Gather the edge of the crown with a strong thread, pull and secure.
Turn the finished product inside out, shake it, comb it again - the hat is ready.
Another way to create fur knitwear. Everything is the same as in the first option: a base with wide loops is crocheted or knitted, and strips of mink are woven into them using a hook.
The most common fur knitting is mink fur knitting. We suggest you learn another way to create fur knitwear.
Making fur yarn:
- Cut the mink fur from the flesh side with a sharp stationery knife into strips half a centimeter wide. In order for the thread to be longer, it must be cut in a spiral. Short strips of fur are sewn or glued.
- Then attach 0.5 m strips with a staple to any base, wet them well, squeeze them out, twist them tightly lengthwise (about five turns per 1 cm), stretch them a little, dry them with a hairdryer, and comb them carefully. Dry the resulting thread, unfasten it from the staples and wind it into a ball.
Knitting such yarn is done with very thick knitting needles, sometimes with the addition of wool thread to match. Things turn out to be very pleasant to the touch, but they need lining, because the knitting is loose and blows out.
DIY fur hat: tablet model
Interested in the question of how to sew a fur hat with your own hands, but don’t know which model to choose? The best old proven method is trying on. Go to the store and try on hats, just 20-30 minutes and you will decide which model suits you.
But there is also a win-win option - a tablet fur hat. This model suits absolutely everyone, the main thing is to decide on the color, height and pomp of the hat. Well, we’ll tell you how to sew such a fur hat with your own hands.
To work we will need:
- A sheet of paper for a pattern, a pencil and a ruler;
- A measuring tape if you don’t know the exact volume of your head;
- Fur;
- Lining fabric;
- Stationery knife or blade;
- Pen;
- Needle and strong thread No. 40;
- Sewing machine.
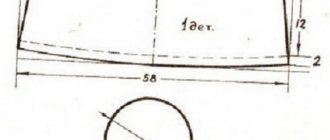
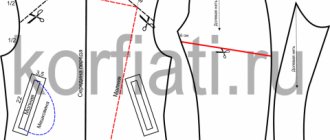
So, let's start by creating a pattern. As an example, we provide a photo of the pattern, but only as a sample to work with.
DIY fur pill hat pattern
- Draw a rectangle 58 cm (head volume can be from 48 (for children) to 60) in length and from 10 cm to 14 in height, depending on the size of the hat, in our case 12 cm;
- On the left and right along the bottom of the rectangle, as shown in the photo, we put 2 cm along vertical lines (standard for all sizes), and draw a smooth line to the bottom. The result is a straight line with rounded ends;
- In the middle we lay a dotted vertical line with a dotted line. From top to bottom along this line we set aside 1.5 cm (standard for all sizes);
- At the top we set aside 2 cm (standard for all sizes) on the right and left, but along horizontal lines and from the middle, where the -1.5 cm point is placed, we draw lines to the edges;
- You should end up with a figure like the one in the sample photo.
- Draw a circle with a perimeter equal to the perimeter of the top of the pattern. In our case, this is a diameter of 16. The standard formula for finding this value is p=π d;
- We cut out the pattern from paper, apply it to the flesh and outline it with a pen. Don't forget to add 0.5 cm to the allowances;
- For cutting, you will need a T-shaped razor blade or a sharp stationery knife, you can also use a scalpel.
- We make a small incision (a couple of millimeters) and, lifting the fur, carefully cut the flesh. Ideally, cut only along the flesh, without even touching the down. In this case, the loss of valuable fur will be minimal, and you will not have cut pile and tabletop;
- Now we do the cutting on the lining;
- Fold the long part of the lining in half, baste it, sew it on a machine, apply a round bottom, baste it and sew it on a machine, process the edges;
- We fold it according to the same principle, but this time with fur, make sure that the fur does not stick out on the wrong side, if necessary we correct it and sew it with a furrier’s seam;
- We attach the bottom and also stitch it;
- We turn the hat inside out and check the quality of the seam; if there are any shortcomings somewhere, we rip the seam and stitch it again. We check until everything is fine. But if you don’t stretch or tighten the skin, you’ll most likely sew it well the first time;
- Now turn it inside out again and insert the lining. On the wrong side, we grab the lining in several places with a thread so that it fits perfectly in the hat, and then sew a hidden seam along the edge so that the edges of the lining and the inner part are hidden under the seam;
- All that remains is to comb your hair, try it on and go for a walk.
Mink tablet hat
Step-by-step sewing of a hat
And now the fun part, we’re sewing a hat.
- Now you need to stitch along the darts.
- Fold them in half. It is important that the stitch ends at the point marked with chalk.
- We hide the tail from the overlog inside using a needle with a large eye and cut off the end. We do the same with the second side.
- Now you need to iron the edges.
- We smooth the seam in different directions (one allowance in one direction, the other in the other).
- The same goes for the grooves (one to the left, the other to the right).
- On the one hand, it is necessary to transfer the marks to the front side.
- Fold the hat in half, straighten the seam allowances in different directions, combine and pin with a needle.
- We do the same work with the slices: combine and chop.
- We will sew the line, focusing on the side marks. In order for the marks not to move, but to turn out symmetrically, they can be captured in this place with 1-2 stitches.
- We start the line on the overlog from this mark. When we reach a place where there are many layers and grooves, we need to manually turn the wheel. Just be careful not to break the needle.
- We hide the tails inside the line. Iron it well and turn the hat inside out.
- Straighten everything, iron it and make a lapel.
The knitted hat is ready. It is recommended to carry out wet-heat treatment so that it does not lose its shape.
Choosing a quality mink hat
A mink hat is a real attribute of the Russian winter. But, as they say, every hat is different, so if you set out to purchase a mink hat, you need to know the following:
- First, you need to think through in detail the image with which the mink hat will be combined, based on what kind of winter outerwear you have. If you have an elegant down jacket or fur coat - no matter how long - then feel free to choose a hat that matches the color and style. But if you have a jacket or down jacket in a sporty style, then it is better to postpone the desire to buy a mink hat until you have suitable outerwear in your wardrobe.
- The place where you go to buy matters a lot. These can only be branded showrooms, and not mini-markets or transitions, where you will most likely be offered counterfeit or stolen goods. Beware of low prices for such a hat - no matter how tempting this offer may look, remember that mink fur cannot be cheap. Otherwise, what you are offered is not mink fur.
- Pay attention to the quality of the product. A quality hat always has a fleece or felt lining. A lining made of rough materials indicates a low quality product. The same goes for loose threads, uneven stitching, and traces of glue. If you notice a lot of seams on the hat, it means that such a hat was sewn from the remains of fur, and not from whole skin. This is also not a quality hat.
- Carefully inspect the fur of the hat. It should not be shabby and greasy, but smooth, soft and shiny. Tug the lint - if there are hairs left in your hand, then this is not a high-quality hat or it was poorly stored.
A fur hat is warm and comfortable - just what you need for the Russian winter.
How to turn an old mink hat into a fashionable beret?
The beret is a symbol of femininity that can decorate almost any outfit. By the way, you might be interested in the article “Which hat to choose depending on the type and style of jacket or coat?” But back to our topic - it’s very easy to turn an old mink hat into a beret!
Restoration
In this example, two hats will be used, since the beret will be voluminous. Based on the pattern, you can roughly guess how much fur is needed. If you initially have a large hat, but want to make a small beret, then one headdress will be enough. Also, at your discretion, you can make the wedges narrower, but in larger quantities.
Pattern
Important: Takes a head volume of 56-57 cm. If you need a smaller volume, for example 52 cm, then take 9.5 cm at the widest part (indicated in green).
Cutting wedges
- We sew all the wedges together. In the example, the fur is from different hats, so the shade is slightly different. To beat this, we will alternate them with each other.
Sew along the entire length
As a result, we have two such semicircles
- We connect them in the center. Then we sew along the sides and form the base of the beret.
We fix it in the center
- Now we cut out the lower base of the beret. In our case, there is little fur, so the strip turned out thin. The bottom of a beret about 5 cm wide, folded in half, will look very nice. We sew all the pieces into one strip, focusing on the volume of the head + seam allowance + 2 cm for padding polyester, so that the headdress fits better and more comfortably on the head.
Cut out the rim
Important: Since it comes from wedges, the rim must be made from the same number of parts. At the same time, to add volume to the beret, we will gather the fur a little, sewing it to the bottom strip. This will also help you understand how much of our wedge you need to collect.
Part of the base is slightly narrower than the beret wedges
- We sew bias tape to the headband. Can be sewn on a simple sewing machine. But in this case, we place the trim at the bottom, and put newspaper on top of the core. If the flesh is hard enough, then the machine can handle it.
The flesh should be on top!
- Then we turn the binding inside out and literally sew a line half a millimeter from the edge.
Carefully sew the line
- Sew the fur rim to the beret. In this rim, between the bias tape and the base, we insert thin padding polyester, batting, or simply soft fleece-type fabric. To make the hat fit better, we sew on a thinner elastic band.
Rubber
- We sew behind the shirt at the bottom of the beret (at the junction with the headband) and behind the bias tape.
Sew on
- Now we cut out the lining; it’s better to use padding polyester. We also cut out 8 wedges + 1 cm along the edges for the seam + 3 cm down.
Cutting out the lining
- We sew it on a machine, turn it right side out, and take it back out. We put on a hat with a lining. We fasten with pins and sew well with hand stitches.
Stitching
