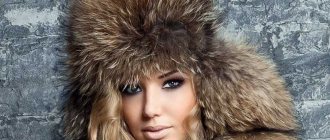
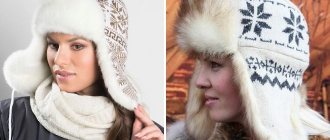
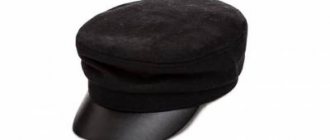
In winter it is very important to wear a hat. Especially residents of cold regions need warm and windproof head protection. The ideal option for this would be a fur hat . And you don’t necessarily need to run to the store to get it. A homemade hat, the so-called hand-made one, will make your headdress not only functional, but also unique. We will give you, needlewomen, three examples of how to sew a fur hat with your own hands.
What kind of fur is best to make a hat from?
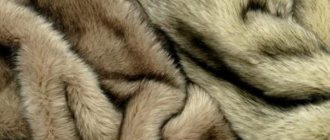
The choice of fur is determined by a person’s personal preferences and financial capabilities. It is also worth considering the outerwear with which the headdress will be worn. The hat should match or emphasize the chosen image. So, a product made from fox skin will be very impressive and bright. Therefore, you need to understand in advance what it looks harmonious with.
On a note! The most in demand when sewing women's hats are mink, arctic fox and leopard. Products made from rabbit are considered budget products, while more elite products are made from lynx fur and other valuable animals.
How to choose according to face shape?
Mink always suits you. But do not forget about the rules for selecting a headdress based on your face shape . A slim figure, an oval face and regular facial features allow you to choose hats of any style. Curvy fashionistas should choose their accessory more carefully. For example, such a lady is unlikely to suit a voluminous headdress or a hat that is too fluffy. Such models are more suitable for fragile and sophisticated women.
- Girls with a pointed face shape (triangular type) should pay attention to models of fur hats with earflaps. The “ears” of the hat should hang freely at the sides. If, in addition, the girl lets down her long hair, then she can choose a hat that is more rounded, but quite voluminous.
- Designers recommend that chubby fashionistas turn their attention to models of earflaps with “ears” tied back. Also suitable for them are hats and fur berets, slightly shifted to the side. A rounded face type allows you to wear voluminous hats, for example, large knitted ones using mink.
- A square face type needs to be visually “stretched out”. Therefore, girls with this type of face can be advised to choose a hat with ear flaps, but not with a deep fit along the forehead, and other models of hats, except for a papakha.
- For an elongated face shape (rectangular face), a low mink hat is suitable. This could be, for example, a boyar hat, or a model of a hat with earflaps, in which the “ears” are neatly tied back. A fur beret will look good.
There are practically no restrictions on the choice of accessories for women with an oval face type and regular features. In this case, you can choose any hat style you like.
DIY natural fur hat
One of the popular models among women is a hat in the shape of a papakha or a pillbox. It goes well with drape and wool coats and suits absolutely all women. The main thing is to choose the right height. Its peculiarity is to visually enlarge the head. To sew such a thing you will need fur, lining fabric, paper, a knife, thread, needles and a sewing machine.
Hat pattern
The pattern of the model consists of two elements: a circle and a rectangle. To draw it correctly, you need to measure the circumference of your head using a centimeter tape. The height of the product is taken based on personal preference. You should end up with a rectangle with sides equal to the height of the product and the width of the head. To cut a circle, use the length of the resulting rectangle. Patterns are drawn on paper and cut out.
We sew a hat from natural fur step by step
You can sew a headdress yourself in a couple of hours. To do this, follow the following sequence of actions:
- Place the patterns on the wrong side of the fur skin and attach them with pins. Next, they are outlined with a marker and an increase of about 1.5 cm is made on the seams.
- The parts are carefully cut out using a knife or scalpel.
- The same parts must be made from lining fabric.
- Connect fur and lining with wrong sides. They are secured with pins and stitched by machine 1 cm from the edge.
- Before connecting the cap to the circle, you should carefully examine the direction of the fibers. In such variants, they usually look at the person's face.
- The circle and rectangle are connected to each other on the wrong side using pins.
- Next, they are ground together on a machine 1 cm from the edge.
- The hat is turned inside out and the seam is freed from any lint stuck there.
- Next, the fabric lining is placed in a fur blank and pinned. There should be a small gap left so that the cap can be turned inside out.
- The fur blank and lining are stitched on a machine and turned inside out.
- The unstitched hole is processed manually with a hidden seam.
REFERENCE! At the end of sewing, shake the resulting hat and lightly comb the fur.
Before altering an old mink hat, check the inside: tips
Important: Be sure to inspect the interior and the fur itself before starting work! The pile should not crumble, and the core should be dense and moderately hard, but not over-dried by time! If the product is already crumbling at the disassembly stage, then during sewing the core may even crack.
- To remake an old mink hat, you need to completely or partially disassemble it. In any case, even if the changes are minor, we will definitely change the lining! To do this, carefully evaporate the old base and peel it off from the fur.
- If you used a lot of gelatin when gluing, then wet the inside of the cap well. Don't get the fur wet! And lightly tear the flesh from the base.
- When you have taken the hat apart, be sure to inspect the leather part! Old flesh can deteriorate, especially if it was poorly repaired. In this case, acid begins to accumulate, which literally eats away the flesh.
- To do this, wet the flesh and pull it a little. It should become plastic and not tear.
- If you are working with pieces, then trim off all the irregularities. You can just test them for strength - lower the fur trimmings into water for 10-15 minutes. Bad fur will literally begin to fall apart in your hands. You can't work with such fur! If the product is not sewn, then it will fall apart when worn.
- Ideally, strengthen any punctured or worn areas. You can use special glue and thin fabric. Moment glue and spunbond (used in furniture production) proved to be the most durable We cut strips 1 cm wide, grease them with glue, and apply glue to the leather base.
Strengthen the fur around the perimeter and in weak spots!
How to sew a faux fur hat with your own hands
Faux fur hats are no less beautiful than those made from natural fur. And if you make a compacted lining, then they will not be inferior in their ability to retain heat. In addition, you can practice on faux fur if you are sewing such a product for the first time. The model with long ears at the back looks very impressive and extraordinary. It is especially popular among young girls. To make it you will need a piece of fur 20 cm in width and 160 cm in length.
Pattern for a hat
To create a pattern, you need to draw a rectangle with a length equal to the circumference of the head and a width of 20 cm. Draw two tails that are 35 cm in length and 10 cm in width. Their tip can be made pointed. We cut out the patterns drawn on paper and cut them out.
We sew a faux fur hat step by step
Having prepared all the necessary materials, we begin the process of sewing the product in the following sequence:
- Place the patterns on the wrong side of the fur skin and fasten them with pins. Trace with a marker or chalk, leaving a seam allowance of about 1 cm.
- Carefully cut out the resulting parts.
- We take the base of the hat and fold it right side inward and sew it together, manually not reaching the end of 15 cm, to make it easier to sew on the tails.
- Next, take the tails and sew them to the hat, 1 cm short of each edge.
- Next, we sew the remaining 15 cm of the hat base to the end.
- Turn the hat right side out.
- We begin to sew the tails.
- Using a measuring tape, measure the circumference of your head, fold the hat in half and sew it together.
- We find the middle of the headdress and sew it together, making small gathers with the pile facing up.
- For beauty, you can sew a spectacular brooch or earring onto the product.
IMPORTANT! For this model, it is better to choose voluminous fur with long pile.
Fluffy keychain
You can use pieces of an old collar to make fluffy key rings. Any fur is suitable; colored faux fur with long pile looks especially colorful.
How to make a fluffy hedgehog keychain, master class:
- We will need dark fur, a key ring with a base, a piece of white flannel or plush, stuffing, satin ribbon, and beads.
- On paper we draw the body of a hedgehog. You need two such parts, and one will consist entirely of white fabric, and the second will be sewn from black fur (thorn) and a corner of the fabric (muzzle).
- We attach the templates to the fabrics and trace them with a margin of 1 cm.
- Sew the muzzle and back.
- Sew both pieces together, leaving a hole to turn inside out.
- We fill the keychain with padding polyester or other filler.
- We insert a satin ribbon inside so that a small loop is formed. The ring for the keychain will be attached to it. Now we sew the hole with a hidden seam.
- All that remains is to sew on the beady eyes, nose and put the ring on the loop.
Features of sewing products from natural and artificial fur
There are certain nuances that need to be taken into account when working with fur. So, when cutting out parts, you should bend the fur in the opposite direction in order to cut the skin and touch the valuable pile. The tool must be well sharpened so as not to tear the skin.
ATTENTION! Specialized companies for sewing fur products use furrier machines. It is difficult and sometimes impossible to sew a product using a regular sewing machine. You need to carefully select thick needles and sew slowly with a large stitch so as not to damage the machine. In some cases, it is better to use a simple thread and needle.
You can please yourself with a fur product even without having large financial resources. By following simple recommendations during the season, it is possible to sew several spectacular hats from both natural and faux fur.
How to change a coat into a short coat
Crochet pattern for a hat
How to transform an old mink hat into a fashionable and modern headdress: complete restoration of earflaps
Now we offer you a master class on how to alter an old mink hat, which at first glance cannot be restored at all. But we assure you that the result will give you the opportunity to believe that nothing is impossible! Especially in the fur business.
Initial view
- Let's start cutting out the lining. At the same time, we do not rip, but rather cut off the fur, since the appearance at the seams can no longer be restored.
We cut off everything unnecessary without regret
Rip out all the seams
Cutting the insulation from the ears
- Now we need to check each skin! To do this, simply sprinkle it with water in some places.
Checking
- We wait 10-15 minutes. Gently stretch the flesh.
As you can see, the result is not always positive
- Now we need to refresh the color. To do this, take regular hair dye. Ideally, take chocolate and mix it with 1 part dark brown or half black.
Dye
- Carefully dye the pile and comb it with a pet comb in different directions.
We paint
- Rinse well until the water becomes clear. It doesn't hurt to use the balm that comes with the paint. We also rinse well. Dip with a towel to remove excess moisture.
Let's dry
- Now we will stretch the skins. To do this, we nail it onto a wooden surface with small nails or staples from a furniture stapler along the perimeter. If we talk about the right side - do as you feel comfortable. If you place the fur on top, you can brush it periodically, which will speed up drying.
Stretch
What do we have after painting?
- We trim off any uneven edges or damaged fur.
Trimming
- We cut strips of approximately 0.8-1 cm. Please note that this must be done by weight. And for convenience, so as not to get confused in the stripes, do not literally cut 0.5-1 cm to the edge.
Making stripes
Front and back view
- You can use another model at your discretion. We begin to wrap the front lines on the hat. Please note that we trim off bald patches or damaged fur. We don’t sew it yet, but we hide the ends inside, on the wrong side. We will sew them together at the end, not only with each other, but also sew them directly to the base of the hat.
We wrap around the entire perimeter. A detailed master class on creating a hat from strips of fur is in our article “How to make a fur hat from stripes?”
- We will make the top of the head from another fur. We also cut it into strips. In this example, a silver fox will be used. If you have beautiful whole fur, you can simply sew on a piece of the desired size. You need to insert a hat elastic at the bottom. Just pull it through the knitted base, and not just through the fur.
Result
