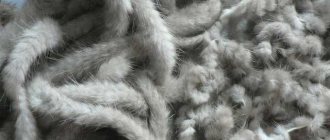
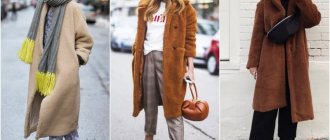
Do you know when you have an old thing lying around in your wardrobe that seems to be missing something? We know what to do with this one. Especially if you happen to have a piece of fur at hand, and you have a couple of hours of free time on the weekend. We tell you how to revive an old sweater and other things and show in detail how to beautifully decorate clothes with fur and other handmade things.
Important: it is not necessary to use real fur. Products made from artificial materials also look great.
How to choose fur for accessories with your own hands: tips
It would seem that the price of natural fur is very high and, therefore, such a hobby is very expensive. But no! Look around you and you will find many options for budget as well as free fur. Any fur that has retained its fluffiness and shine is suitable for jewelry.
Fur is often sent to waste and clothes and hats are not made from it, since it has an excessively thin or, on the contrary, oak core (the underside of the fur, the skin on which the pile and down are held). And such fur can be obtained for free or for mere pennies, and it is quite suitable for accessories.
So, what kind of fur is suitable for DIY accessories? Any. The only requirement for it is decent appearance.
Where to get fur for DIY accessories:
- Go through your (and your family's) old things. Fur coats that no one wears anymore. Collar trims and fur cuffs. Grandmother's collars, collecting dust in chests, etc., for years. You can also ask your friends and acquaintances if there are any unnecessary fur items that they would throw away, and you can take them for needlework;
- If you have friends who work in an atelier, check with them to see if they have any fur scraps or perhaps they can tell you other ateliers where you can go;
- Go to message boards and look for “fur scraps”, “fur scraps”, “fur pieces” . When choosing, pay attention to the size of the flap and pricing policy. Since very often they sell practically garbage at incredible prices. If you are planning a large accessory, make sure that the trimmings are of the same color palette;
- And the last option is second-hand stores. If you like handicrafts, visit on the last and penultimate day before delivery and you will be able to choose not only fur, but also high-quality cotton, leather and much more for almost nothing. A thing that does not represent any value may turn out to be an ideal raw material for a master’s work.
Varieties of decor
Needlewomen have come up with so many options for decorating hats that you can easily choose the most original one.
Flowers made of thick drape or felt will decorate any headdress
- Cut a piece of felt and cut it into strips of the width you need.
- Sew the ends of the strips together, assemble them into a flower, and make petals.
- Decorate each felt strip with tiny rhinestones to make them sparkle in the sun.
Such an unusual wardrobe item will attract all the looks of others.
Pattern knitting
A headdress knitted with knitting needles does not need to be decorated. The knitting itself is a decoration.
The fantastic pattern created by entwined loops amazes the imagination.
Delicate and beautiful DIY fur bracelet: step-by-step instructions with photos
Do you want to learn how to make fur accessories with your own hands? We suggest starting with a fur bracelet with rhinestones. This item was made from mink fur, but you can consider any fur of your choice.
Delicate and beautiful DIY fur bracelet
- To work, you will need a piece of mink fur, about 2 cm wide (it can be wider, depending on the desired thickness of the bracelet) and as long as the volume of your wrist.
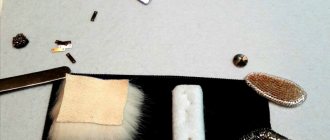
- You also need high-quality rhinestones (the better and more expensive the shine, the more interesting the product looks on your hand), and accessories for the bracelet: 2 end caps, a lobster clasp and connector rings between the ends and the clasp.
Material for creating a fur bracelet with your own hands
And for work, find at home a pen and a ruler, a stationery knife or a blade for a T-shaped razor, or a scalpel, strong threads with a thin needle, scissors and PVA glue with a brush.
Important: choose sew-on rhinestones, preferably on the “leg”.
Delicate and beautiful DIY fur bracelet:
- Turn the fur over, flesh side up, and look at the condition of the skin. If it is wrinkled, moisten it with a little water without detergent, stretch and fix until completely dry.
- If the inner layer is thinned and cracked, apply self-adhesive dublerin or non-woven linen to it. They will strengthen the skin.
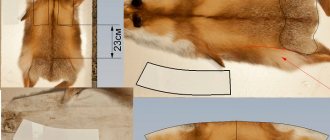
- Draw an even rectangle whose width is 2 cm, length = wrist circumference - 1 cm per clasp.
- For example, the arm circumference is 17 cm - 1 cm, which means the length of the segment is 16 cm. Draw a rectangle using a pen and make a longitudinal line in the middle along the entire segment as in the photo. Please note that the direction of the pile is along the length of the bracelet.
Cutting out fur
- Make a minimal cut with the blade and lift the fur. Cut on the fly, cutting only through the flesh and without even touching the undergrowth. This way you will best retain maximum fluff and lint on the bracelet, and the edges of the strip will be fluffy and beautiful.
Trying out places for rhinestones
- Apply rhinestones from the inside out and mark these places with a pen. Pierce the skin with a needle and sew rhinestones on the front side in a few stitches, but so as not to press down the fur, since the fur can simply cover the rhinestones.
Sew on rhinestones
Sewn rhinestones on fur
- Now we are making the product as a double-sided bracelet, and here we will need that same vertical line in the middle of the canvas. We examine the fur and see which side is less fluffy.
- We coat exactly that side of the flesh with PVA glue, let it stand for a minute, then apply glue again and apply the edge to the middle of the inner part to cover 1 cm of the flesh.
- Now we do the same with the other half, but even more carefully so as not to stain the other half of the fur.
Gluing the base
- We open the ends, apply them to the edges and carefully squeeze them using tweezers.
Attaching endings
- We attach rings and a carabiner to the ends. The product is ready!
Ready-made fur bracelet with your own hands
This mink bracelet will become the main thing in an evening look, and maybe a wonderful addition to a fur necklace made using the same technique.
Types of jewelry
Beautiful accessories made with your own hands are not at all bad taste or a sign of lack of money. On the contrary, such jewelry demonstrates good taste, an original look at modern fashion and a sense of style. These are the valuable qualities possessed by eminent fashion designers who have achieved stunning success on the fashion world stage.
Jewelry of various styles
[Show slideshow]
Want to learn how to make a luxury accessory and feel like a creative designer? It is enough to know a few secrets and learn how to make jewelry with your own hands at master classes, which experienced needlewomen are happy to share. In addition, creating jewelry at home is quite a profitable activity. Before you start practical exercises, you need a little theory.
There are different categories of jewelry:
- Classic style. Classics can be manifested in laconic forms, color combinations, and choice of materials. Earrings, bracelets, necklaces made of stones, beads, beads and other materials in this style are distinguished by their versatility; they can be safely worn both to business meetings or office work, and to social events.
- Ultra-fashionable style. This category of jewelry is distinguished by creativity, extravagance and originality. Style is manifested in contrasting color combinations, unusual synthesis of materials, and manufacturing technologies. It all depends on trends, and, as you know, fashion can surprise. This can be jewelry made of wood, feathers and beads, metal and any types of textiles.
- Avant-garde style. Asymmetry, unconventional combination of materials, originality in every detail. Such DIY decorations made of wood, metal or textiles will harmoniously complement, for example, eccentric steampunk. Taking a fresh look at age-old traditions, you can make ethnic jewelry with your own hands in an avant-garde style.
Making jewelry with your own hands is not an easy, but very exciting activity. For beginners, we offer several interesting tutorials on creating original and original jewelry with your own hands.
Basic styles, rules for selection and wearing
DIY fur bracelet from a tail: master class with photos
Holidays are good, but rare, you say. Can you wear your own fur accessories every day? Of course you can! For example, a bracelet made from a tail. By the way, the tails are difficult to work with and usually lie there until the last minute, waiting for at least some idea. And here she is! We suggest making a simple and original bracelet from raccoon, fox, etc. fur. But at the same time, you can make a bracelet from an ordinary piece of leather by drawing a pattern 4 cm wide and gluing it together, as in the previous master class.
Materials for work
DIY fur bracelet from a tail:
- The tail is the size that coincides with the volume of the wrist +1-2 cm, so that it can be put on the hand, since it will be without a clasp. If the tail is longer, you need to trim the tip with a blade, leaving the upper part intact;
Attach the chain to the fur
- The chain is decorative, the length is equal to the circumference of the wrist +1-2 cm;
- We apply the chain to the middle of the fur, as in the photo, and using a needle or awl we pull out the hairs on both sides. Sew the chain to the fur with a hidden seam;
- On top of the chain we sew buttons, beads or any other decor as desired;
Sew on decorative elements
- We connect the bracelet at the ends, use a thread to make a strong, tight seam and tighten the thread. We fasten the chains together and sew them to the base;
- Additionally, we correct the pile with a needle or awl so that everything looks perfect. Can be worn with both fur items and cashmere sweaters and dresses.
DIY fur bracelet
Spring inspiration to help craftswomen
Modern girls are increasingly bolder in decorating their knitted hats with all available materials. It turns out fresh, original, not boring! Every young lady can create her own highlight. Decorating with large rhinestones can be a great idea. It takes little time, but it turns out very beautiful. Any monochromatic item turns into an original accessory.
It is best to attach rhinestones to the lapel of a cap. Before starting work, select rhinestones of different shapes, arrange them as your imagination dictates, and start attaching them. You can glue any repeating motif and even the first letter of your name.
To secure the elements, use a glue gun:
- First, draw a picture on paper of how the rhinestones will be positioned. For example, from large crystals, make flowers that will appear as if in a haze created by an environment of small crystals.
- Lay out the details on it.
- First glue the large pieces to the hat.
- Start gluing small ones behind them, just don’t overdo it. The headdress looks beautiful when only its front part is decorated.
DIY fur earrings
And when talking about DIY fur accessories, it’s impossible not to mention earrings. This fur accessory will become the main element in photo shoots and is also suitable for winter looks.
DIY fur earrings:
DIY fur earrings
- So, for work we will need two identical decorative elements. These can be medallions, stones, pearl hemispheres, etc. There are no restrictions.
- A couple of pieces of fur, bases for a French earring and PVA glue. You also need a blade or stationery knife, pieces of leather or felt, a pen and a coin.
Materials for work
- We turn the fur over to the wrong side and apply a coin, or draw an even circle with a diameter of 2.5 cm, while our element is 1.5 cm in diameter, so be guided by your element.
Cutting circles from fur
- Heat a dry frying pan and place fur circles on it, nap side up, wait until they rise to a hemisphere. Remove and turn over.
Fur circles removed from the frying pan
- Pour PVA glue into the formed cavity and fill it with crushed pieces of leather or felt. This way the hemisphere will be fixed.
Fill the hemisphere with glue and felt.
Glue the decorative element onto the Moment glue. Let it dry. We attach the chains and earrings, tighten everything with pliers and you can try it on!
Glue the decorative element, chain and earrings
Their fur accessories also include bags, but we cover this topic in a separate article . And ideas for fur hats are in this and this article.
And in conclusion, we suggest watching a master class on making fur accessories with your own hands.
Embroidery and appliqués
Decorating with embroidery is a painstaking task. However, an embroidered hat will decorate any woman and girl.
You can create an original model by emphasizing the knitting structure with bright contrasting threads. It is best to decorate hats knitted from thick, bulky yarn in this way. Use a bright thread to embroider the cap in a circle or select a small area on the side surface.
Another option is to embroider a pattern or inscription using beads, beads, sequins or rhinestones. While working, you need to make sure that the fabric of the hat does not tighten, otherwise the finished product will look sloppy. A hat with an applique made of thick fabric, suede or leather will look good on younger girls. From scraps you can assemble an image of an animal or a cartoon character. All parts are sewn or glued to the cap.
Lace trim
You can decorate a knitted women's hat even with such, at first glance, inappropriate material as lace. However, with a skillful approach, you can combine the incongruous. Of course, not all lace is suitable for decoration. The following varieties are popular:
- dense knitted;
- made using the tatting technique - lace made from the same yarn as the hat;
- lace in a contrasting shade on the lapel;
- Brazilian-style openwork lace mugs;
You can simply and originally design a thin stocking cap made of dark knitwear. The algorithm of actions will be as follows:
- Cut out a small triangle or semicircle along the bottom edge of the hat. Choose the location for the future insert at your discretion - on the side surface, front or back.
- Several pieces are cut out of the lace fabric, repeating the shape of the cutout on the hat. For convenience, you can use a cut piece of the hat as a template, leaving an allowance of a few millimeters.
- The lace blanks are folded together, then the insert will be more dense.
- Sew the resulting part into the cutout on the product.
- The insertion site is additionally decorated with yarn or lace.
