Furs and diamonds are the best decorations for girlish beauty. Everyone, without exception, dreams of a luxurious mink coat, mittens or rabbit muff. But not all girls know that beauty can be created with their own hands, and with a skillful approach it will turn out better than in an expensive store.
Fur knitting is a separate art form, invented in the 70s of the last century. The brilliant Canadian fashion designer Paula Lishman was the first to use rabbit fur as yarn for knitting. She can be called the inventor of fur knitwear, who broke all the laws of the usual art of knitting.
Bold designers of unique clothing and experienced needlewomen could not ignore such a breakthrough in home creativity. With their own hands they began to create real masterpieces, combining the luxury of noble material and the simple beauty of knitted fabric. Craftswomen use strips of mink and rabbit fur to create magnificent warm hats, uniquely beautiful cardigans, capes for going out and fluffy mittens.
Knitted hats with fur fantasies
Every needlewoman who has at least once created a knitted product will be interested in the question of how to knit a fur hat using knitting needles using available materials. For this type of creativity you will need fur strips, which can be bought or cut from old, out-of-fashion fur coats, leftover mink or rabbit skins.
Buying ready-made fur ribbons is expensive and they are not always available for sale, but giving a second life to your grandmother’s sheepskin coat will be very beneficial for the family budget.
It is not difficult to prepare a fur thread as in the photo: thin strips from 2 to 8 mm are cut with a blade or a stationery knife, as desired.
Read
Pleated skirt: knitting according to patterns
Important! When cutting mink ribbons, the skin holds its weight!
To keep the fur thread long, it is not cut at the edge of the skin, but the knife is turned in the opposite direction. If the fur strips are short, they can be carefully sewn together with a few stitches from the mezra side (the reverse side of the fur).
Advice! It is advisable to moisten old, rustling skins with warm water from a spray bottle, put them in a bag and leave for 40-60 minutes to completely soften!
The finished fluffy ribbons can be kept straight or converted into twisted threads. A video with a visual process of cutting and twisting will help novice needlewomen cope with this enjoyable activity.
Fur products
The first person to come up with the idea of knitting from fur with her own hands was Canadian fashion designer Paula Lishman. It was thanks to her imagination that models began to appear on the catwalk in stunningly beautiful knitted items made from mink and rabbit fur. She revolutionized the fur industry. Now fur knitting has become very popular!
We make fur yarn
The first thing we need to do to start knitting from fur is to prepare the material itself. Surely everyone in the house has an old fur coat, hat or vest that they no longer want to wear, but it’s a pity to throw it away. We invite you to make a completely new and incredibly fashionable item out of it with your own hands. To do this, take fur, for example, mink, and cut it into thin strips 5 millimeters wide. Use a utility knife to avoid damaging the valuable fur. Under no circumstances should scissors be used. It is better to cut the fur in a spiral, so the width of the strip will be longer. But there is no strict rule on how to cut fur fabric, so cut it as you wish.
We make fur yarn
To ensure that the tapes are even, first draw the cut points on the skin. You need to cut along the side of the flesh, slightly stretching and lifting the skin. If you follow these tips, cutting fur will not cause you much trouble.
Sometimes the strips are not long enough, then they can be sewn together with regular thread of a suitable color, monofilament, or glued with special glue. After the fur is cut, we proceed to making the thread itself. We take the first 50 centimeters of the thread, lower it into water, squeeze it well and secure it with a staple to any base. Then, we begin to twist the fur ribbon, just as we twist a wool thread on a spindle. To make this process go faster, you can use any available tools, for example: a drill, mixer or screwdriver.
The twist density is approximately 5 turns per 1 centimeter of fur thread. That is, quite dense. We fasten the twisted section and continue twisting the rest of the thread, do not forget to moisten it thoroughly before doing this. We carry out such manipulations with absolutely the entire fur strip. After the thread is twisted and fixed, it needs to be dried with a hairdryer and combed a little. Before your eyes, the strip will immediately become fluffy. Leave the thread in this taut position until completely dry. Then unfasten the staples and wind the resulting yarn into a ball. That's all, the thread is ready for knitting fur knitwear! Mink looks best in knitted items, but any other fur can be used.
Another way
Knitted fur jacket
Another method, although less common, but also quite original, is based on the fact that the thread is twisted around the frame thread and then stitched. Thus, it becomes possible to regulate the twist density and thread thickness. You can use any yarn for the frame thread, but the main thing is that it is not too thin and matches the color of the fur. And the fur must be fluffy, you can use, for example, mink. This method is more economical and allows you to obtain fur yarn of greater length than in the first method. Yarn obtained in this way will be less fluffy, but very durable. In this method, you will have to twist the fur ribbon manually.
For this yarn, you can use the skin of almost any animal, but the most popular is mink. Although recently, thanks to dressing, products made from beaver, fox, rabbit, and sable fur look no worse. For fur knitwear, sheared or plucked fur is perfect.
How to make fur thread
A couple of tips on using fur thread in a product.
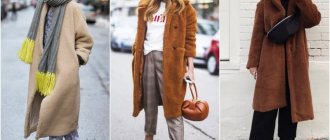
Prepared mink or rabbit fur yarn can be used for knitting luxurious winter hats. The photo shows magnificent models where successful combinations of furs, fabrics and yarns are used. Completely different textures combine incomparably and make a woman’s image truly bright and romantic.
The methods for making fluffy hats differ in the technique of execution: in an ensemble with thread. Knitting with fur does not require any special skills. For the hat, loops are cast on circular knitting needles to knit without a seam, and in every second row fur yarn is added to the regular thread. There are a great many options for creative approaches, maybe the rare addition of mink or a beautiful elastic band with a fluffy top, or maybe an original combination of fleecy strips of different colors and textures.
A video with useful tips will help you get comfortable with this simple technique.
Ideas for inspiration
Needlewomen get ideas when they come into contact with mink fur. This valuable material will never go out of style. You can create real exclusive models with your own hands from your grandmother’s old fur coats.
The photo shows the creative finds of the Japanese fashion designer. A mink fur ribbon was threaded into a knitted fabric and the model turned from an ordinary jacket into a warm outing coat.
The video selection presents a chic collection of things knitted from fur. Fashionable models of hats and fur coats are made of fluffy strips of mink, rabbit and silver fox.
Fur headband
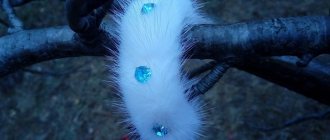
The simplest model that can be made from strips of mink fur is a warm fluffy headband as in the photo, it will perfectly warm you in the cold winter and will not spoil your beautiful hairstyle.
The video and easy-to-read master class will not only demonstrate how to make such a headband, but also give useful tips on working with fluffy stripes.
Important:
- have all the necessary tools at hand and calculate the consumption of fur yarn;
- create a holey blank according to the size of the head, knitted or crocheted;
- strips of yarn must be numbered and evenly cut so that they look even and harmonious in the finished product.
Knitting with fur can be a completely waste-free production. The photo shows a magnificent shawl in the form of a mesh and fluffy balls sewn onto it.
You can use knitting needles to knit any mesh fabric of any shape and attach fur pompoms to it. Decorate the edges of the scarf at your discretion with fringe, ponytails or various beads. You can come up with a beautiful brooch that will act as a button and turn a fur shawl into a going out cape.
Important Tips
- The cells of a knitted hat must be at least 5-7 mm.
- Using a pin or tapestry needle, fur yarn is used to braid the warp cells. The longer the pile, the rarer the braiding can be.
- During the process, it is important to ensure that the fluffy thread does not twist and lies in even rows, face up.
- For ease of work, the base is sewn together after braiding all the gaps. To disguise the seam, it is braided at the final stage, and behind it all the edges of the finished product are formed.
- At the end of the work, you need to secure all the ends and brush over the fur surface.
A short video and visual master class will demonstrate an easy way of knitting - braiding. Advice from a craftswoman: at home, fur can be dyed in any fashionable color with hair dye!
Video: How to make a fur pompom
The video is a simple master class that will show you how to create fluffy balls with your own hands from leftover rabbit fur and use them to decorate any knitted item.
Knitting with fur is a rather labor-intensive and painstaking process that requires special care, but the result is worth the effort. Completely unnecessary, old pieces of fur can turn into real weekend items. They will allow you to save your family budget, create a designer model and always look like the latest fashion.
Read
Tips for choosing yarn for knitting
First way
All we need: angora yarn (500 m/100 g), number two knitting needles, fox fur skin, stationery knife, thread and needle, comb, piece of fabric, safety pins. Head circumference – 56 cm. Hat length – 22 cm.
Work process
- Knitting: 2X2 elastic band in two threads.
Cast on 162 loops. Knit with an elastic band 2X2 15 cm.
Decrease: divide the entire number of loops into eight wedges. Knit, decreasing, another 7 cm. As a result, at the end of the work, 66 loops should remain on the knitting needles. Close the loops, but do not sew the product, first sew on the fur!
Using pins, divide the fabric into four parts.
- Cut the fox fur skin along the belly, cutting off areas that are unevenly covered with fur. Cut strictly in the direction of the pile from the side on which there is no fur with a sharp stationery knife. In this case we have a fur rectangle. For convenience, it was cut in half in the direction of the pile. Cut strips 0.5 cm wide one at a time and sew them on immediately so as not to make a mistake in the sequence.
Be sure to sew stripes onto the front rows of the elastic! Sew from the center of the hat down. Watch the direction of the pile: it should be directed from top to bottom. After you sew on the fur, the strips need to be combed.
Fasten the strip to the bottom of the knitted base, sew it to the front row with a seam over the edge using frequent stitches (every 0.4-0.5 cm), placing the fur. At the end of the front row, carefully fasten the thread and cut off the excess fur.
Article on the topic: Crochet slippers on a felt insole: diagrams with descriptions and video
So, strip by stripe, decorate half of the hat.
When sewing stripes on the second half, the long pile interferes with sewing. And since the stripes are sewn only on one side of the first stripe, you can cover the already sewn half of the hat with fabric and secure it with pins.
After all the strips are sewn on, we begin assembling the hat.
Fold the fabric inside with the fur, straighten the pile and sew as you usually sew a hat. Gather the edge of the crown with a strong thread, pull and secure.
Turn the finished product inside out, shake it, comb it again - the hat is ready.
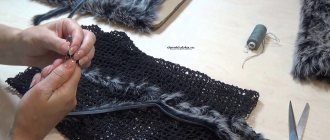
Another way to create fur knitwear. Everything is the same as in the first option: a base with wide loops is crocheted or knitted, and strips of mink are woven into them using a hook.


