Home / Floor cleaning
Back
Published: 04/12/2020
Reading time: 12 min
0
24
- 1 What can be made from old mink hats: mink headphones
- 2 What can be made from old mink hats: fur beret, pattern diagram
- 3 What can be made from old mink hats: how to sew mittens?
- 4 What can be made from old mink hats: DIY crafts, photos
- 5 What can be made from old mink hats: making a bag
Before altering an old mink hat, check the inside: tips
Important: Be sure to inspect the interior and the fur itself before starting work! The pile should not crumble, and the core should be dense and moderately hard, but not over-dried by time! If the product is already crumbling at the disassembly stage, then during sewing the core may even crack.
- To remake an old mink hat, you need to completely or partially disassemble it.
In any case, even if the changes are minor, we will definitely change the lining! To do this, carefully evaporate the old base and peel it off from the fur. - If you used a lot of gelatin when gluing, then wet the inside of the cap well.
Don't get the fur wet! And lightly tear the flesh from the base. - When you have taken the hat apart, be sure to inspect the leather part! Old flesh can deteriorate, especially if it was poorly repaired. In this case, acid begins to accumulate, which literally eats away the flesh.
- To do this, wet the flesh and pull it a little.
It should become plastic and not tear. - If you are working with pieces, then trim off all the irregularities.
You can just test them for strength - lower the fur trimmings into water for 10-15 minutes. Bad fur will literally begin to fall apart in your hands. You can't work with such fur! If the product is not sewn, then it will fall apart when worn. - Ideally, strengthen any punctured or worn areas.
You can use special glue and thin fabric.
Moment glue and spunbond
(used in furniture production) proved to be the most durable We cut strips 1 cm wide, grease them with glue, and apply glue to the leather base.
Features of sewing products from natural and artificial fur
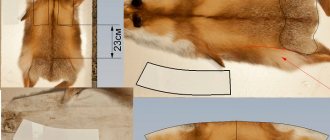
There are certain nuances that need to be taken into account when working with fur. So, when cutting out parts, you should bend the fur in the opposite direction in order to cut the skin and touch the valuable pile. The tool must be well sharpened so as not to tear the skin.
ATTENTION! Specialized companies for sewing fur products use furrier machines. It is difficult and sometimes impossible to sew a product using a regular sewing machine. You need to carefully select thick needles and sew slowly with a large stitch so as not to damage the machine. In some cases, it is better to use a simple thread and needle.
You can please yourself with a fur product even without having large financial resources. By following simple recommendations during the season, it is possible to sew several spectacular hats from both natural and faux fur.
How to change a coat into a short coat
Crochet pattern for a hat
How to change a hard mink hat into a soft one?
We will start with this master class on how to alter a mink hat. After all, before, hats were hard and kept their shape well. Because we tried to gelatinize the base as best as possible. Today, not only has fashion changed, but such accessories have also turned out to be not very comfortable, since they often press. Therefore, we will begin our analysis with how to disassemble the hat and make it more convenient, without greatly modifying the appearance.
- First of all, we tear off the lining.
- Now a little advice - if you see hand stitches inside, then this is a good sign. This means that the felt cap was dry when the skin was pulled on. This means that it will be easier to remove. If the felt had been wet, the bonding with the flesh would have been stronger.
- But in order for the headdress to keep its shape, it is worth leaving the upper part of the cap. To do this, we cut it out along the most protruding points.
- We insert it into our cap, secure it with pins in the center, and turn the product inside out. Now we sew the firth itself to the flesh and along the protrusion using normal hand stitches in a circle. Make sure that the stitches on the fur side are small and do not touch the pile itself.
- We outline the line of the future new hem. In this case, the fastening tape is light. Therefore, so that it is not visible and a new one is not sewn on, we simply change the hem line.
- To insulate and add some volume, we will insert batting. We take measurements on the hat for the desired size. Ours is asymmetrical, so we measure from all sides.
- Cut out the batting to the desired size. To make the bottom of the cap a little thicker, insert a strip of drape - 4 cm to the circumference of your head. Sew directly to the fur part. On the pile side the stitches are small.
- We attach the batting. To do this, we lower it a little behind the strip of drape. We sew our batting to it.
- Now we make a fur fold. For this we use thin felt. We cut it out in a semicircle and simply fold it into the widow and sew it to the desired place.
- Now we completely sew on the batting and secure it to the top of the felt cap. Sew the securing tape to the felt. You can optionally insert an elastic band or ribbon so that you can adjust the volume.
- We cut out the new lining on the bias. Never use old lining material! We also cut out a round base approximately 18 cm in diameter.
- We sew it, bend it at the top and also go through it with a stitch. Now we need to tighten the upper part. To do this, we pierce the fabric and now throw the material in a spiral. It’s like winding the fabric around a needle.
- Distribute the folds evenly. We take an ordinary jar as a basis. First we place the round part, then the rectangular base. We secure everything with an elastic band or rope to prevent fidgeting. And sew it on by hand using a regular seam.
- We insert our lining into the fur base and secure the bottom with pins. We place it evenly - the lining should be completely flush. We secure it with pins, and then sew it with a regular seam directly to the fur, capturing a millimeter of the mesh and about 0.5 cm of the lining.
How to turn an old mink hat into a fashionable beret?
The beret is a symbol of femininity that can decorate almost any outfit. By the way, you might be interested in the article “Which hat to choose depending on the type and style of jacket or coat?”
But back to our topic - it’s very easy to turn an old mink hat into a beret!
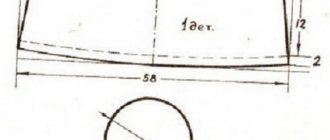
In this example, two hats will be used, since the beret will be voluminous. Based on the pattern, you can roughly guess how much fur is needed. If you initially have a large hat, but want to make a small beret, then one headdress will be enough. Also, at your discretion, you can make the wedges narrower, but in larger quantities.
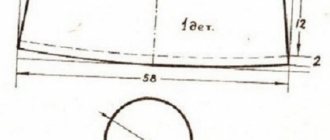
Important: Takes a head volume of 56-57 cm. If you need a smaller volume, for example 52 cm, then take 9.5 cm at the widest part (indicated in green).
- We sew all the wedges together. In the example, the fur is from different hats, so the shade is slightly different. To beat this, we will alternate them with each other.
- We connect them in the center. Then we sew along the sides and form the base of the beret.
- Now we cut out the lower base of the beret. In our case, there is little fur, so the strip turned out thin. The bottom of a beret about 5 cm wide, folded in half, will look very nice. We sew all the pieces into one strip, focusing on the volume of the head + seam allowance + 2 cm for padding polyester, so that the headdress fits better and more comfortably on the head.
Important: Since it comes from wedges, the rim must be made from the same number of parts. At the same time, to add volume to the beret, we will gather the fur a little, sewing it to the bottom strip. This will also help you understand how much of our wedge you need to collect.
- We sew bias tape to the headband. Can be sewn on a simple sewing machine. But in this case, we place the trim at the bottom, and put newspaper on top of the core. If the flesh is hard enough, then the machine can handle it.
- Then we turn the binding inside out and literally sew a line half a millimeter from the edge.
- Sew the fur rim to the beret. In this rim, between the bias tape and the base, we insert thin padding polyester, batting, or simply soft fleece-type fabric. To make the hat fit better, we sew on a thinner elastic band.
- We sew behind the shirt at the bottom of the beret (at the junction with the headband) and behind the bias tape.
- Now we cut out the lining; it’s better to use padding polyester. We also cut out 8 wedges + 1 cm along the edges for the seam + 3 cm down.
- We sew it on a machine, turn it right side out, and take it back out. We put on a hat with a lining. We fasten with pins and sew well with hand stitches.
The most popular styles of natural fur hats
Today, every girl will be able to choose a hat that suits her needs and capabilities. The fur of the hat can be artificial or natural. It can also be eco-fur. In this case, the headdress can be of a classic type and even extravagant.
Modern fashionistas prefer the following models of hats:
1. Hooded hat.
Perfect for any face type. This model is the most practical option for a headdress. The hood protects both the head and neck.
2. Ushanka hat.
This model of fur hats is relevant at all times. Only the length of the fur changes, the way the hat is worn and its color. Ushanka goes well with sportswear.
3. Fur beret.
To make berets, the fur is cut short. Fur berets look stylish and neat.
4. Classic winter hat made of natural fur.
As a rule, such models are sewn from mink fur. It looks expensive and elegant.
5. Kubanka.
This model differs from the others in that it has no brim, but a high crown. This hat looks great on short girls, as it adds a couple of centimeters to their height.
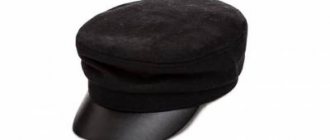
6. Cap.
A cap made of short-cropped fur is created for brave girls who want to look eccentric. Under the cap, you can make a hairstyle of curling curls. Oddly enough, this model can be the final touch in creating the image of a business lady.
What to wear with a fur hat
A fur hat is selected in a color close to the outerwear or accessories. Hats made of expensive fur are not suitable for all things.
If you need a universal hat that you can wear with any item in your wardrobe, look towards classic models.
To wear with a laconic coat, feel free to choose hats with voluminous or dyed bright fur, but if the outerwear itself looks original, choose a simple hat style.
How to choose the right fur hat for the winter
Since the main purpose of a fur hat is to warm your head when it’s frosty outside, the choice should be in favor of a headdress made of natural fur. But since the cost of fur hats is quite high, you need to take the choice of a hat seriously.
Choosing fur
How many seasons a hat will last you directly depends on the fur from which it is made.
- The most practical and wear-resistant are hats made from seal and mink fur. They will serve you for at least 10-15 seasons.
- The raccoon, fox and arctic fox do not have these characteristics. With proper care, you will be able to wear a hat made from the fur of these animals for about 10 seasons.
- Muskrat and nutria will last you 6 or even 7 seasons.
- The most whimsical are hats made of rabbit and chinchilla fur. Expect to only wear them for 4-5 winters.
Important : When choosing a hat made of natural fur, consider the durability of the fur itself. Practical fur is not afraid of either snow or rain. Once dry, the hat will return to its original shape and will not lose its attractiveness.
Pay attention to weight
Remember that the weight of the hat should not be large, since it will be difficult for you to wear such a hat. The weight of the headdress depends on the length of the fur, the material used as insulation, and the quality of the skin.
We look at the thermal insulation properties of fur
If you need a warm hat, we recommend choosing fur hats made from raccoon, silver fox, fox or arctic fox. Less warm, but still practical fur that will keep you from freezing is chinchilla, beaver, rex, rabbit, nutria, and mink. The ranking of the most impractical ones is completed by headdresses made of marmot and ermine.
We look at the quality of the product
To understand whether the fur is of high quality, run your hand over it against the pile. If the finish is good, there should be no lint left on your palm. Also, the hat should not have any visible flaws in the form of bald spots or loose fibers. The fur should be shiny and shimmer.
Trying on a winter hat
Don't neglect fitting. This is one of the important steps on the path to choosing a fur hat. Please note the following rules:
- The hat should not fall through. It should fit tightly on your head.
- The hat should not dangle, but should not put pressure on the head.
How much does a real fur hat cost?
First of all, the cost of a product is influenced by the value of the fur from which it is made. So, a mink hat costs about 10,000 rubles. Rabbit and mouton hats cost about 3,000. A winter raccoon hat will cost more. Its cost will be about 5,000 rubles. A red fox and silver fox hat is not inferior in price to mink hats.
Eventually
The modern fashion for hats made of natural fur allows every girl to choose for herself what she likes and what she will feel comfortable in.
Knowing what fashionable styles of fur hats are relevant today, what furs the hats are made from and how to choose the right headdress, you can make your look stylish and unique!
How to transform an old mink hat into a fashionable and modern headdress: complete restoration of earflaps
Now we offer you a master class on how to alter an old mink hat, which at first glance cannot be restored at all. But we assure you that the result will give you the opportunity to believe that nothing is impossible! Especially in the fur business.
- Let's start cutting out the lining. At the same time, we do not rip, but rather cut off the fur, since the appearance at the seams can no longer be restored.
- Now we need to check each skin! To do this, simply sprinkle it with water in some places.
Checking
- We wait 10-15 minutes. Gently stretch the flesh.
- Now we need to refresh the color. To do this, take regular hair dye. Ideally, take chocolate and mix it with 1 part dark brown or half black.
- Carefully dye the pile and comb it with a pet comb in different directions.
- Rinse well until the water becomes clear. It doesn't hurt to use the balm that comes with the paint. We also rinse well. Dip with a towel to remove excess moisture.
- Now we will stretch the skins. To do this, we nail it onto a wooden surface with small nails or staples from a furniture stapler along the perimeter. If we talk about the right side - do as you feel comfortable. If you place the fur on top, you can brush it periodically, which will speed up drying.
- We trim off any uneven edges or damaged fur.
- We cut strips of approximately 0.8-1 cm. Please note that this must be done by weight. And for convenience, so as not to get confused in the stripes, do not literally cut 0.5-1 cm to the edge.
- You can use another model at your discretion. We begin to wrap the front lines on the hat. Please note that we trim off bald patches or damaged fur. We don’t sew it yet, but we hide the ends inside, on the wrong side. We will sew them together at the end, not only with each other, but also sew them directly to the base of the hat.
A detailed master class on creating a hat from strips of fur in our article
- We will make the top of the head from another fur. We also cut it into strips. In this example, a silver fox will be used. If you have beautiful whole fur, you can simply sew on a piece of the desired size. You need to insert a hat elastic at the bottom. Just pull it through the knitted base, and not just through the fur.
Home workshop
To give your headdress the required size, it is enough to use steam and a five-liter jar of compote, for example, but in this case you should understand that the hat can only be stretched a couple of centimeters.
So, you need to determine in advance the item that will replace the block from the workshop. An excellent option would be not only a glass container for sealing food, but also any other round object that will allow you to give the dish the required shape. So, it could be a pan or a lampshade.
When you have decided on the shape, proceed to boiling water. How you get steam (whether it’s a kettle or a steamer) doesn’t matter. You just need to hold the fur product for 5 minutes over a steam bath and pull it onto the prepared block.
Next, be patient. Before you put on your expensive clothing again, you will have to thoroughly dry it for a couple of days. In this case, places of direct exposure to the sun's rays and proximity to heating devices should be avoided. Everyone knows that the sunny environment has a detrimental effect on the appearance of the product. But what happens to it under thermal influence?
Video: How to alter an old mink hat using strip knitting?
My customer was given a new fur hat, she really likes it, but it turned out to be too big. What to do? Remake it of course! And this master class is about how to sew a hat
.
Upon closer inspection, the hat turned out to be molded, that is, on a rigid base. Such a hat can be sewn in a maximum of 2 cm, I need 1.5 cm.
Preparation: remove the lining; in fur products it is sewn on by hand with hidden stitches. Unscrew the facing; it holds the bottom edge of the cap and at the same time secures the cap from moving on the molded part.
Find the seam of the fur connection in the back of the hat, rip it open with a sharp knife or razor, almost to the “crown”, that is, 1.5-2 cm short of the bottom of the hat. Carefully remove the molded part.
Open the seam on the molded part.
We reduce the fur part: retreat 7 mm from the seam along the bottom line and connect with a straight line to “no” or to the moment where the seam was opened. On the other side, do the same, using a sharp knife to cut off the excess along the marked line.
Connect the edges and, tucking the fur inside, sew the back seam with a thick nylon or silk thread in the color of the fur. Start from the top of your head. Take 2-3 mm, the sewing technique is as follows: two stitches over the edge forward and one back, you get something like an overlock. Try not to move the cuts, you can fix them in two or three places with pins. Now you need to straighten the resulting seam, to do this, lay the hat with fur on a board (at least on a cutting board) and tap the seam with a wooden hammer, or in extreme cases, the other side of a screwdriver.
Straighten and comb the fur. Ready! Master class on how to sew a hat
finished. We sew a soft hat using the same technology, only faster and easier. Hats to fit your heads, dear needlewomen!
I would be grateful if, when copying my articles to your website, blog, personal page or diary, you provide a link to the source.
A fur coat is the main attribute of any women's dressing room. Some have more than one, but for most it is the only and unforgettable copy. When a fur coat loses its presentable appearance, becomes very outdated or worn out in some places, you can correct the situation - remake or alter the old fur coat. Options for new products depend on the degree of wear of the fur coat and its individual elements.
The length of time a fur coat has been used can be noticeable by frayed sleeves, elbow bends, collar and shoulder seams, but if the product is long, then its hem can be significantly damaged.
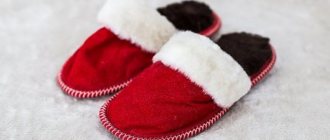
You can remake an old fur coat and get different things: a fur hat, jacket, vest, boa, shoes (house slippers), mittens, coats, car seat covers. All this can be altered from a worn fur coat by selecting the surviving parts from it.
Remaking an old mink coat
If you have an old mink coat, do not rush to sell it for next to nothing. A good solution would be to alter an old mink coat and turn it into a modern model.
What can be done:
- You can completely change the cut of an old fur coat.
- Shorten the length, make a lighter model - a car coat.
- Remove or modify the hood.
- If the old fur coat has become short, you can make an insert at the waist.
- You can also increase the length of the sleeves.
- The technique of combining two types of fur will be very effective.
- For those who like experimenting, you can, along with altering the style, repaint an old mink coat in a different color.
Examples of altered mink coats:
Advice.
Before altering a light mink coat, it is recommended to dry clean it to remove old stains and odors.
Remaking an astrakhan fur coat
Karakul has been a fairly popular fur for a long time. But fur coats made from it are not original. Old astrakhan fur coats do not look fashionable. The solution to this may be the decision to alter an old astrakhan fur coat.
Remaking an astrakhan fur coat: BEFORE and AFTER photos
You can sew a fluffy collar to an outdated model. Here you should carefully consider the choice of fur color.
Combination of astrakhan fur and other fur (mink and sheepskin)
Combining fur with leather also looks good.
Remaking an old fur coat into a vest
An excellent option to breathe new life into a product would be to repurpose an old fur coat into a fur vest. The scope of work on alteration will be as follows:
As a result of altering an old fur coat, we can get the following fur vests:
Turning an old fur coat into a vest is quite simple and many people can do it with their own hands.
Combination of fur and leather
Another option for repurposing an old fur coat is to use fur together with another material - suede or leather. If suddenly a suede coat, as often happens, is frayed on the arms and collar, then it can be decorated with cut fur strips from an old fur coat. Fur also goes well with leather and thick textiles.
It is also easy to create a new product from an old fur coat and leather inserts; this is done in several stages:
- The old product is ripped open, as in the previous case. The fur (the inner part of the fur) is first checked for holes and abrasions, and they are eliminated.
- Ribbons of different lengths are cut from leather.
- Leather and fur strips are sewn alternately, while observing the dimensions of the pattern.
The resulting product after alteration can be supplemented with a leather belt, but then you need to provide a leather insert at the waist in advance.
It is possible to use leather strips only on certain areas of a combined fur coat: on the arms or pockets and waist.
Examples of how you can alter an old fur coat:
Remaking an old sable fur coat
Hats
You can turn old fur coats into fashionable hats. You can use them to realize any of your fantasies or look up ideas on the Internet. Among the simplest options are:
- Fur hats for children with ties
- these can be seen on many children in winter. They are beautiful and warm, it is quite possible to sew such a product with your own hands. - Knitted hat with a fur pompom
- the pattern for knitting can be very diverse, braids look great. - Fur headphones.
These fashionable products are worn in the off-season as a light headdress. You can make several of these headphones from one fur coat, enough for the whole family. When creating them, you need to sew the fur from the wrong side, but only carefully so that the stitches are hidden in the pile.
How to care for a hat with earflaps
- The hat should be dried and stored away from sunlight, batteries and electrical appliances in a dry, cool and dark place;
- Clean the lining of your headgear regularly. It is advisable to unfasten and wash the lining material separately. In addition, you can clean the lining with soapy water, ammonia, or alcohol-based wet wipes;
- When washing and rinsing wool hats, use water at approximately the same temperature, otherwise the wool may also shrink. Choose special shampoos, gels or powders for washing woolen clothes. Store and wash wool separately from items made from other fabrics and materials;
- A fur hat cannot be washed or washed in water. For cleaning, use a dry soft brush or sponge. The fur is combed using a rare metal comb;
- Dirt on a fur hat is removed with a sponge or soft cloth soaked in clean gasoline. You can also use a solution of one tablespoon of ammonia, three teaspoons of table salt and a small amount of water. Wipe the fur with a brush and the prepared mixture, leave to dry and comb the product;
- Oatmeal will help restore the presentable appearance of fur hats. To do this, you need to grind the flakes and sprinkle on the hat, then carefully comb out the fur. Alternatively, you can use sawdust, semolina or potato starch. Such products will gently and delicately clean the material, remove dirt, dust and grease;
- Faux fur items can be washed in warm water at temperatures up to 40 degrees with a spin speed of up to 800 rpm. For washing, take special detergents for wool;
- Suede hats are cleaned with a special brush, and the material is occasionally rubbed with fine salt. You can also steam suede for cleaning;
- A leather hat with earflaps can be cleaned with soapy water, and the shine can be restored using an onion cut in half. For more information on how and what to renew your skin, see here.
Before long-term storage, be sure to clean and dry your ushanka hat. Place the hat on a blank, stand or three-liter jar, or fill the hat with paper or newspaper. Place the product in a cool, clean, dark and dry place. However, do not wrap or pack the hat!
Brush your fur regularly. During long-term storage, once a month, remove the hat from the closet to ventilate. And how to properly store things in a closet, read the link https://vsepodomu.ru/garderob/kak-khranit-veschi-v-shkafu/.
Shoes
Soft fur coat boots are a great solution for cold days. The bottom comes from ordinary shoes, but the top is entirely made from sleeves or other parts of outerwear. You can also decorate any other street or indoor shoes with fur pompoms, making them original.
For those whose feet are constantly cold, fur insoles will come in handy, which can be placed face up in winter boots or boots. They are easy to make yourself:
- take a piece of cardboard larger than your foot;
- stand on the cardboard with your bare feet and trace each of them;
- place cardboard blanks on the fur elements and cut along them;
- Glue the fur onto the cardboard using glue.
What kind of fur is best to make a hat from?
The choice of fur is determined by a person’s personal preferences and financial capabilities. It is also worth considering the outerwear with which the headdress will be worn. The hat should match or emphasize the chosen image. So, a product made from fox skin will be very impressive and bright. Therefore, you need to understand in advance what it looks harmonious with.
On a note! The most in demand when sewing women's hats are mink, arctic fox and leopard. Products made from rabbit are considered budget products, while more elite products are made from lynx fur and other valuable animals.
Fur carpet
To create it you will need several old fur coats; for example, you can use your own and your child’s. The size of the carpet will depend on the amount of sewing material collected; you need to identify areas of fur coats without defects on the reverse side.
The process of creating a warm fur rug will look like this:
- The fur coat is laid out on the floor, and all unnecessary and damaged parts are removed from it using a scalpel or a utility knife.
- Squares or strips of equal length and width are cut from the cut suitable material. The pattern of these parts should be carried out along the seam so as not to damage the structure of the fur.
- The prepared fur pieces are turned over with their front side on the floor and laid out according to the parameters of the future product.
- All joining sides are sewn together with an overlock stitch, which is performed over the edge, while maintaining a uniform distance of 2-3 mm between stitches.
- To smooth the seams, they are sprayed with water and then left for 20 minutes.
Fur carpets are sewn square or rectangular, experienced craftsmen manage to make them oval, and some manage to create entire floor paintings from small fur parts.
Small pieces of fur can be used to create incredible pillows, handbags and backpacks. Such products will be especially useful, by the way, in winter. For them, you can use all the remaining trimmings after making other products.
A mink hat is one of the mandatory attributes that are present in a woman’s wardrobe and is used every winter every day. However, like any product, the end of its service life comes. So, a mink hat may lose its original appearance. What then to do with it? Today we will talk about what you can make from an old mink hat with your own hands. How to alter and remake it into a fashionable item at home, and what products can be made from it. We will also look at how to independently sew a product for a woman’s head from fur, which will be inexpensive, but will have an unusual and beautiful appearance.
Self stretching
Not every locality has people who know how to work professionally with leather. For this reason, it is important to know how to stretch a fur hat yourself using auxiliary means:
- select a pan, large jar or other round, hard object of the size to which you need to stretch the headdress;
- boil water in a kettle and hold the cap over the steam so that it warms up and becomes damp (steamed);
- Pull the headdress over the prepared pan and place it in a cool place to dry.
Do not dry a mink or any other fur hat near hot appliances. Let it dry slowly at a temperature of +20°...+25°, do not remove until it is completely dry. It will stretch perfectly in 2-3 days. In the same way, increase the circumference of hats with earflaps. In the army, a stack of hardcover books of a suitable format is used as a blank.
When increasing the size of your headdress at home, you need to know a sense of proportion. By stretching the leather more than required, it is unlikely to make it smaller, and there is a risk of tearing the lining, seams or fur. To prevent your headdress from dangling on your head or sliding down into your eyes, carefully select the size of the pad. To do this, measure its girth (circumference) with a centimeter and compare it with the girth of your head.
Fashion for mink hats
Before deciding what you can sew from an old mink hat with your own hands, let's talk in more detail about this accessory from a woman's wardrobe. During the Soviet Union, there was only one model of this headdress.
It was intended for middle-aged women and had one shade. Today the situation has changed dramatically.
Now you can find products of different colors and they are intended for all ages. So, you can find a mink hat on a little girl and a middle-aged woman.
Color
Many fashionistas are sure that mink products should only be in natural shades. It is worth considering that the headdress is matched to the outerwear in the appropriate color scheme and according to the color type of the face and hair. A wide range of shades of natural fur allows every fashionista to make the right choice. It’s also worth giving up your prejudices and taking a closer look at models with dyed fur. Only the model must belong to a well-known brand to avoid fakes. In this case, modern fashionistas have a truly huge scope for choosing accessories.
And yet, when choosing a mink hat by color, you should adhere to the basic recommendations of designers.
- Brown-haired women look great in products of deeper dark colors - all shades of black and brown. Walnut, mahogany and scanglow models are also suitable here. You can also choose colored versions of the hats, then you should take a closer look at the deep blue models.
- Blondes, of course, can afford contrasting colors - black and white. Also, girls with a northern type appearance should take a closer look at models in purple, blue and pink shades.
- For redheads, hats in warm brown shades are suitable, as well as models with golden fur, and accessories in yellow or green colors.
- Mink hats in mahogany or walnut colors look impressive on brunettes. Or it could be pastel-colored models. From headdress models, you should choose tinted items in burgundy, blue, red, and turquoise colors.
Whatever the hair color, it is important to note that their shade and fur color should not be identical. For example, a white mink hat looks great against the background of golden hair. Blondes should choose accessories in light gray tones.
Making your own mink hat
The cost of fur products is always higher than average. However, not every woman knows that you can sew a new one from an old mink hat with your own hands. At the same time, with a minimum of effort, you just need to have some skills. We will tell you how to make a new headdress with a minimum of effort.
We sew a hat ourselves:
- For work we will need pieces of mink fur. You can take them from an old hat, buy them at the market, or in a fur store. An excellent solution would be to use pieces of fur of different colors.
- The base for the hat can be a knitted item or an old sweater. We will tell you how to make a knitted base below.
- Pieces of fur must be sewn together. This action must be done very carefully so that stitches, seams and other imperfections are not visible.
- After you have sewn all the pieces together, you need to divide the fur into lines up to seven centimeters thick. This must be done along the marked lines from the wrong side using a sharp stationery knife to make the appropriate cuts.
- Let's take our base. You choose what it can be. Some people use an old knitted sweater with large loops for this.
- We carefully sew fur “tracks” onto the front side of the workpiece. At this stage, you can alternate colors, create volume and choose the order of patches when sewing.
Important! It is worth noting that first they sew on the bottom strip of fur, then the top, and only after that do they start on the middle part of the future hat.
- At this stage, we connect the extra loops using a hook.
- Let's move on to the very top of the cap. You need to carefully tie it up and then hide it. However, this method is not suitable for everyone, since not every woman knows how to knit. You can take a piece of leather of any shade and cover the top of the headdress.
- After that, we look through the entire product, correct all the shortcomings and advantages and enjoy the mink hat we made with our own hands.
Other methods of altering fur
If you are already thinking about what you can make from an old mink hat with your own hands, you should not throw away the product or give it to someone. We will tell you about knitting from fur “threads”. Didn't you know that you can knit with more than just yarn? Yes, imagine it!
Important! Canadian fashion designer Paula Lishman has made a real splash in the world of fashion and beauty. She began to knit from thin fur patches, creating a new revolution on the catwalk.
So, let's learn how to do this.
Making yarn from fur:
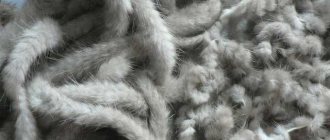
- At the initial stage, you need to prepare and create fur yarn. To do this, take an old hat, fur coat or sheepskin coat and, using a stationery knife, cut the fur product from the reverse side into strips no more than 5 mm thick.
Important! When cutting fur fabric into “threads,” it is best to do it in a spiral. In this case, the strip will be longer and it will be more convenient to knit in the future. However, you can do it as you wish or as the product allows.
- Before cutting fur threads from the fabric, you need to outline how you will cut on the reverse side with an ordinary gel pen. It will be better and smoother this way.
Important! It is worth separating the fur carefully, without using scissors under any circumstances; the fabric should be slightly stretched and lifted up.
- If your pieces of thread are very short, you can glue or sew them. To do this, you may need regular thread or monofilament, as well as special glue.
- It’s time to start making fur thread. To do this, you need to lower the workpiece into water and secure the base with an ordinary bracket. After this, twist the fur ribbon in a circle. In appearance, it should resemble winding a woolen thread on an ordinary spindle.
Important! Many people use a screwdriver, drill or other improvised method to speed up the process.
- You need to wind it in such a way that there are five turns per centimeter of thread. In this case, it is necessary to constantly wet the ribbon itself. After you have rolled it up, you need to dry it with an ordinary hairdryer. After performing this action, you will see how the fur suddenly became fluffy.
- Now you need to leave the tape until completely dry.
- After the thread has become completely dry, it is twisted into an ordinary ball, and you can start knitting.
Important! Mink fur is ideal for making fur thread, but other material can also be used.
Knitting with fur yarn
Knitting fur yarn has been gaining popularity in the last few years. This is one of the most common ways to make a mink hat with your own hands. To make fabric from fur threads, you do not need to have special skills, because the whole procedure is done in the same way as from ordinary yarn.
When knitting, thick knitting needles are used. Quite often, fur thread is supplemented with ordinary wool thread to match the fur. Mink stock is best suited for this action.
Important! Thin strips of fur are knitted mainly with knitting needles. Of course, you can do this with crochet, but you should take into account the high yarn consumption.
Why did the hat change in size?
As it turns out, it is temperature changes and air humidity that cause your favorite fur hat to become deformed in size and shape. Improper storage of cleaning equipment thrown on the mezzanine, repeated wetting and drying inappropriately has led to the fact that you are forced to look for measures to return the required volumes.
Even if you manage to stretch a fur hat by a couple of units of measuring tape, you will hardly be able to pull it back. Therefore, buying a hat in the cold is not a very good decision for you. Under the influence of frost, the fur decreases and a product of seemingly ideal volumes, after warming up to room temperature, will begin to dangle freely on the head.
- - three-liter jar
- — iron with steam function
- - towel
- - gauze
- - pins
- - vinegar
If a woolen hat has shrunk significantly, it is no longer possible to return it to its original appearance. Only in case of slight shrinkage can you try to stretch the product to its previous size. To do this, take an object shaped like a head (“pot-bellied” vase, lampshade, three-liter jar). Wet its outer surface with water and gently pull the shrunken cap
. Secure its edges so that it does not slip and lose its shape. Leave the product in this position until it is completely dry. For a more effective result, soak not only the jar, but also the hat itself in cold water.
You can try to make do with improvised means at home. The fur hat needs to be steamed or sprinkled with warm water, and then pulled to dry on a suitable form so that it stretches.
Select a saucepan or glass jar of suitable size. Steam the fur of the hat well over a boiling kettle and pull it onto the prepared container. After the hat dries, it should retain the resulting .
- How to sew a fur hat on a knitted base with your own hands
Very often in our lives it happens that the hat that fit us last season turned out to be hopelessly small this season. There can be many reasons for such changes:
hats made from artificial materials, such as
Very often in our lives it happens that what was just right for us in the past turns out to be hopelessly small in this one. There can be many reasons for such changes:
- woolen hats can shrink over the winter in humid air or if they are washed in too hot water;
- hats made of artificial materials, such as fleece, for example, are also very sensitive to the washing temperature - if you disturb it even a little, and instead of a hat you will get a gnome cap with no hope of recovery.
To prevent deformation, place it on a jar or pan, first cover this stand with a cloth. In the summer, you need to take the product out at least once a month, shake it, and take it out into the fresh air, this will prevent a stale smell from your hat.
Before the start of the wearing season, the fur needs to be “revitalized”. To do this, hold the headdress over the steam or leave it in the bathroom for a few minutes after you have taken a shower. Moisture will help the fur straighten out and take on its original appearance.
You can moisten the fur with a sponge dipped in water and vinegar, but keep in mind that the solution must be weak. After moistening, shake the product.
Try not to get perfume on the fur. Don't clean your fur with chemicals. If it needs cleaning or restoration, it is better to contact a specialist. Don’t be lazy and take care of your winter clothes, in return they will give you not only warmth and a good mood, but also a decent appearance.
After washing, your favorite sweater suddenly became much smaller. This happens with those things that contain natural wool, and when washed in hot water it shrinks significantly. Is it possible to somehow correct what happened and stretch the woolen sweater?
If this has already happened, soak it in cool water, then instead of twisting it, wrap it in a terry towel and press lightly to remove excess water. After this, carefully lay the item on a soft cloth and stretch it to the size you need. Let it dry like that. Repeat the stretching procedure periodically until completely dry.
But it’s better to worry about drying woolen items in advance. To do this, before washing, lay your favorite sweater on the fabric and mark its borders with pins. After rinsing in warm water with delicate products or shampoos in warm water, lay it on the surface and stretch it to the dimensions that you noted in advance. Secure with pins and let dry quietly. After the item has completely dried, shake it thoroughly.
In order for the hat to return to its previous size, sometimes it is enough to simply rinse it in water with vinegar mixed in it. Warm water is poured into a basin and two tablespoons of vinegar are added, after which everything is stirred. The product is lowered into the resulting solution, squeezed out and pulled onto a previously prepared object.
We tie fur threads onto a knitted base
Many housewives are wondering how to sew a mink hat from an old hat on a knitted base. This is very easy to do, especially if you have a mesh base. You can knit it yourself by crocheting or knitting. Can also be purchased at a craft store.
If you decide to decorate your hat and make it on a mesh base, then you need to use a hook and take a knitted piece in the same color scheme as the fur.
Important! The essence of this knitting is that you thread a fur ribbon through each hole. Hats that are knitted in this way amaze with their beauty and look no worse than those sold in expensive stores.
In any case, when deciding what you can make from an old mink hat with your own hands, you should consider various options, and only then think about throwing it away. Although we strongly advise you not to do this. Give new life to this headdress! If you make a scarf or a hat with fur trim from an arctic fox collar (photos and patterns are available on the Internet), such a modification will not be difficult. Create, experiment and you will definitely succeed!

