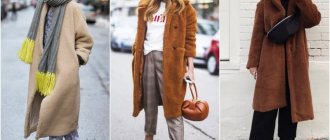
From early childhood, girls imitate their mothers: they wear high-heeled shoes and paint their lips with lipstick. When the baby is already 10 years old, you need to take into account that beautiful and fashionable clothes develop taste and neatness. A children's fur coat made of natural fur is not only fashionable and beautiful, but comfortable and practical.
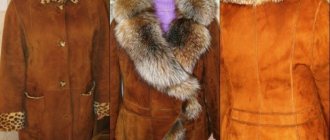
Beautiful peach coat
The advantages of natural fur
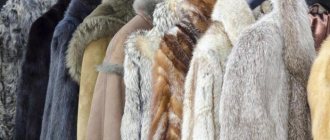
The advantage of products made from natural fur is that they are environmentally friendly and harmless to the child’s body, so they are much better than fur coats made from artificial fur. They are more beautiful to look at and more pleasant to the touch. The leather backing allows air to circulate, which means the body can breathe.
Natural fur
What you need to sew a fur coat with your own hands: master class
The first thing you need to do before starting the pattern is to actually buy the material for sewing the fur product.
Material
The textile industry today can provide a wide selection of the necessary materials, however, the choice is always yours:
- Natural fur is the most expensive material. Skins and their cutting are a separate art that will require skill, special knowledge and equipment;
- Faux fur (similar to natural fur) is sold in separate stores and is the best option for fashionistas who do not want to overpay for quality items. You can combine faux fur and natural patterns, for example, on a collar;
- An old fur coat to be recut is the most popular option for new fur. However, it is worth remembering that any fur has its own service life, and therefore all worn out places, abrasions and uneven seams must be eliminated when sewing a new product.
Natural new skins can be purchased in specialized stores or directly at a fur factory. However, as a rule, manufacturers have few natural skins available for sale, since all orders are previously agreed upon with regular customers - fur fashion studios. But it’s still worth trying to find such a production, because the price for such materials will be several times lower.
Tools
After identifying fur, you should pay attention to tools and materials, namely:
- accessories, depending on the planned model: buttons, leather ties, belts, hooks;
- lining material: simple satin - for classics, if for a warm winter - quilted lining from combined fabrics;
- lining tapes on a self-adhesive basis for gluing and insulating all seams;
- scissors;
- clothespins or pins for fixing the skin;
- pliers for fittings;
- ready-made patterns for the model;
- blade or scalpel;
- a hammer wrapped in soft cloth (to soften the seams);
- triangular special needles;
- thimble;
- metal comb brush;
- chalk or soap for marking.
Important ! It is best to order patterns from a studio. This way you will spend a little money on preparing ready-made patterns, but you will save time and protect yourself from unnecessary losses, both material and moral.
Patterns
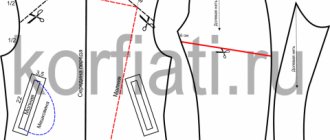
Before you begin the step-by-step work, you need to print out the finished patterns for your future fur masterpiece and transfer them to fabric patterns. https://yadi.sk/i/5MSBMcZ63R7qzN
Important ! The size of the patterns is your size, check all the details and parameters of the fur coat, or better yet, order a model of the pattern from the studio, and then work on it further.
After you have chosen the desired model and cut out patterns on the fabric, you can begin the main work:
- cut out all the individual component parts with a small margin of 1-2 cm along each edge;
- sew all the individual elements, follow the direction of fur growth so that the product looks harmonious (up, down);
- if it is natural fur, then it is necessary to first make a hole with special furrier’s tools, baste it, and then sew it. If you choose fur of artificial origin, then all manipulations are the same as with conventional jacket models;
- the seams are softened with a hammer;
- a special tape is glued at the seam;
- The lining is sewn on a base of quilted fabric or satin fabric.
After sewing the fur coat model, attach all the necessary accessories, comb the edges and especially the seams of the entire fur coat, and check them for strength.
What to look for when choosing
Usually, at the age of 10, a girl already has her own priorities in clothing, and therefore, before buying, you need to ask her what kind of fur coat she wants.
Stylish cut of a fur coat for girls
Quality and tailoring features
Some tips for those who are choosing such a product for a child for the first time:
Sew a fur coat
Hello! I would like to present to the most respected public my only (for now) doll Agrafena (Hanna - all year round from Gotz), and tell you how we sewed a test fur coat with her. I must tell you that sometimes it seems to me that Agrafena was replaced at the factory, and in fact she is Hannah - a glamorous party))), because, as it turned out, she simply loves glamor, rhinestones, glitter and pink color, in short, everything , which I personally don’t perceive at all in my clothes)))
One fall, I bought a children’s snood made of pink thin fur on a knitted base in Auchan for 79 rubles in order to sew an Agrafene fur coat from it and at the same time test my pattern for a Gotz coat with raglan sleeves. At home, in the bins, I found satin for lining. Agrafena, naturally, immediately grabbed it all: “Is this for me?” Class! Doesn't it really suit me?
- I want a long fur coat! - But there’s not enough fur, not enough! - Well, you’re smart, come up with something! Ok, you can make a fur coat with a frill, I’ve been wanting to try it for a long time. I rip the snood and get a cut of 40x60cm. Fur has a direction of pile, this complicates the task. I twist this way and that: “Grun, nothing’s working!” Maybe we can make it shorter? - No, make it better narrower, I’m not that fat! - Well, okay, just don’t complain later)), - I reduce the collar and the allowance for the fastener. Agrafena helps:
Cut:
Then she notices pieces of fur left after cutting: “Look, it’s snow!”
And he begins to joyfully throw them up: “It’s snowing!”
-Grunya, no, it’s not snow). Stop being a bully, look at yourself, you're all fluff! Grumbling that I won’t sew anything for her anymore, I clean her dress and comb the fluff out of her hair. - Forgive me, please, I won’t do this again!
Let's start sewing.)) I don't pretend to be a master class or author, just a few photos showing the order in which it is most convenient for me to assemble lined doll outerwear. I think that I didn’t invent the wheel here, I just came to this my own way. (I hope that I didn’t accidentally wander into someone else’s clearing)). I will be glad if this helps someone. Or maybe someone will criticize or share their experience))
First I sew the sleeves to the back and front, at the top and at the lining. (If the sleeve is set-in, then the shoulder sections are sewn down first):
I sew down the collar parts, the bottom is made of lining fabric, reinforced with an adhesive pad to reduce the thickness:
I put the collar between the fur and the lining, trying not to mix up the sides)), I sew down the neck seam:
Then I connect the bottom of the top sleeve with the bottom of the lining sleeve:
Next, I sew the side seams of the top and lining in one line:
Turn it inside out and get:
Then, again from the inside out, I connect the top to the lining along the edges and bottom, leaving an unsewn section of 8-10 cm at the bottom in the middle for turning, which I then sew manually with a blind seam. There are no photos here, I forgot to take them in the heat of work, but I hope I wrote it clearly.)) In the case of a frill, like ours, I first sew the frill with the lining along the side and bottom edges, turn it inside out, baste the top edges together, and gather it to the desired size length, I sew it to the bottom edge of the fur coat without affecting the lining, and then see above)))
And here is our result:
Of course, the fur coat is too narrow, it can barely fasten, (Agrafena says she will lose weight))) the collar is too small, the sleeves are short, but the frill is too fluffy. I took all the shortcomings into account when sewing the following models, but this is a topic for another topic))
Thank you for being with us!)
Pattern of a fur coat with a hood made of natural fur
A fur coat with a hood will keep you warm on a cold day. Although, sewing such a model can be considered a more complex job.
Basic sewing steps:
A fur coat made of natural or artificial material, made with your own hands using ready-made patterns, will cost several times less than the factory version. And it will fit perfectly according to your figure, as it is sewn according to your own parameters.
We sew a short fur coat from faux fur
For sewing you need 2 meters of fur material (according to your taste and color) and the same amount of fabric for the lining. Main stages of work:
Pattern of a fur coat with a stand-up collar
The model is of medium length, slightly widened towards the bottom. Both natural and faux fur can be used for sewing. In total, you need about 2.5 meters of base and lining material, fittings, and decorative elements (if desired).
Main stages of work:
