- June 22, 2019
- Needlework
- Afanasyev Yuri
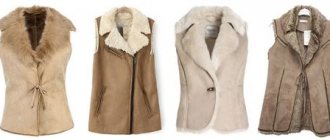
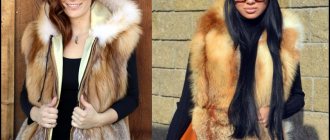
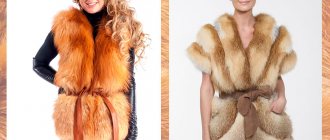
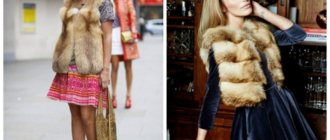
Fur vests have become very popular in recent years. Buying such a thing is quite expensive, so the best option is to sew it yourself. Is this a difficult task and how to sew a fur vest with your own hands?
To begin with, it is worth noting that sewing such a thing is not difficult, because it does not have pockets, sleeves or intricate fastener treatments. However, the job requires good sewing skills.
This article provides two basic options for sewing:
- From scratch, using a fur cut.
- From a finished old fur coat or pieces of fur.
We will also talk about how to sew a fur vest for a girl and how to make it to order.
New life for an old fur coat
There is the easiest option. You can sew a fur vest from an old fur coat. Old clothes themselves have long gone out of fashion, but they can help recreate a new stylish look. Perhaps there are a lot of unnecessary pieces of fur in the house that you have been wanting to throw away for a long time.
As for the pattern of a vest from pieces of fur, you don’t need to spend a lot of time on it. It is created on the basis of a sleeveless shoulder product. Now for instructions explaining how to get a fur vest in twelve easy steps:
- First you need to rip apart the fur coat.
- Then divide it into parts.
- Choose those that are least worn.
- Draw strips of two centimeters or more on the back of the fur.
- Have a scalpel handy. Trim the lines along the marked areas.
- Take pieces of finished fur and determine the direction of the pile.
- If it is difficult to understand the direction, then you can slightly wet the fur.
- It is necessary to measure the height of the product.
- Sew all the pieces of fur to each other in accordance with the given height.
- Start sewing the fur to the base of the product. Considering that the pieces turned out to be narrow, you need to sew on several rows. And if you manage to cut them into wider pieces, then there will be correspondingly fewer rows.
- You should start sewing from the front of the product and move towards the back.
- After this, all that remains is to comb the fur. This completes the vest made from pieces of old fur.
How to sew a children's faux fur vest for a girl: models, pattern
Girls are big fashionistas. They demand a dress like their sister’s, or a fur coat like their mother’s. If you have some free time, sew a beautiful vest for your daughter from any faux fur.
How to sew a fashionable faux fur vest for a girl - models, pattern:
An interesting model of a children's vest - in gray for a little princess, and in black for a robber.
How to sew a children's faux fur vest for a girl: models, pattern
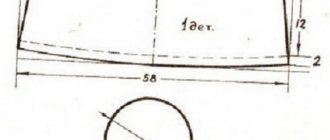
The pattern is done quickly. Make it first on a large sheet of paper, then cut it out and transfer it to the fur. Cut out the fur back and shelves and sew. Your daughter will definitely like this thing - comfortable and beautiful.
How to sew a children's faux fur vest for a girl: pattern
Ingenious use of unwanted fur pieces
There is another method of sewing a fur vest using a whole fur coat, without cutting it into small pieces. This is suitable mainly for those girls whose fur coat is in good condition.
In this case, the pattern is also quite simple - it consists of only two shelves and a back. So, again the step-by-step sewing process:
- First you need to open the seams.
- Then divide the fur coat into parts.
- The back is created from two parts of fabric. They should be sewn to each other using a sewing machine.
- From the upper part of the back, from the center, put 6 centimeters on both sides, and 2.5 centimeters at the bottom. These marks should be connected to create a beautiful neckline.
- Then measure 3 centimeters from the right and left sides of the back and attach to the neckline of the collar. This is done in order to get a smooth shoulder line.
- After this, three parts of the fur material must be placed on the lining and cut with allowances of 2 centimeters. On the shelves you should connect the threads along the line of the shoulder and the lining. It is important to remember that they should be shorter than those in front.
- Now you can connect the front and rear shelves. The outer edges of the lining and shelves must be stitched, not forgetting to put a piece of leatherette underneath. The same is done with the front of the vest, on both sides.
- All that remains is to sew on the fasteners at the waist, and the fur vest from an old fur coat is ready.
Having sewn a fur vest, you can wear it in any cool weather. It is universal in combination with any clothing. Many women driving especially loved this vest. It is very practical in everyday life.
What to combine with a sleeveless vest
The vest is sewn, but how and with what to wear it? We'll talk about this below;)
The finished vest can be supplemented with any sewing accessories: matching buttons, hooks, and a zipper. In addition, it can be worn without fasteners, simply combining it with a belt that suits your style... or completely open - a matter of your taste and personal preference.
The vest can be combined with skirts and jeans. Over a floor-length dress, such a detail of a woman’s wardrobe looks simply luxurious! However, most often sleeveless vests are worn over knee socks, sweaters, cardigans or leather jackets.
It is important that the clothes are correctly combined with the color of the fur. Since it itself is a bright accent of the image, give preference to muted base shades.
How to care for fur
If you want your fur product to serve you as long as possible, you should follow five basic rules.
- The product must be stored strictly in an upright position, away from direct sunlight and heating devices. Use hangers with wide hangers!
- Hairspray, cigarette smoke and perfume can worsen the appearance of the pile, so, accordingly, you should avoid getting them on the fur product.
- It should be remembered that items made from natural fur can retain accumulated odors for a long time (and not only pleasant ones!).
- If the fur gets wet, you should not use a hairdryer or heater - the vest should dry naturally.
- Dirt on the fur is removed using a sponge with a mixture of salt and ammonia (3:1).
Required Tools
And of course, what kind of sewing can be done without the necessary tools and accessories. Here is a list of what will be useful in your work:
- Skins.
- Stationery knife.
- Wooden plank.
- Pencil or soap for marks.
- Small nails.
- Comb.
- Needle and thread to match the color of the fur.
- Tracing paper.
- Buttons.
- Hooks.
- Lock.
- Hammer.
This is practically all that is needed during the entire work process.
Sew a vest in 10 steps
Looking ahead, I would like to note that sewing begins with creating a pattern with your own hands. You can sew a fur vest in ten steps:
- First you need to measure the circumference of your neck, shoulders, hips, arms and waist.
- The pattern can be chosen from a stylish magazine. Here is an example of a pattern. Back: waist circumference ¼, chest circumference ¼, shoulder width ½ more than chest circumference. Shelf: shoulder width is ½ more than arm circumference.
- The pattern is prepared on tracing paper, then the parts are cut out from the fabric.
- Then the inside of the vest is sewn in accordance with the measurements taken. The advantage of this material is that all mistakes will be hidden thanks to the fluffy fur. So you don't have to worry about some of the seams showing on the vest. The main thing is that it does not sit too tightly.
- The skin on the back of the fur should be slightly soaked to make it easier to work with.
- After this, you need to nail the material to a wooden board. It is advisable to not hammer it too tightly.
- Cut out the required material for sewing using a ready-made pattern and dimensions.
- After this, the fur is sewn on a furrier's machine.
- When stitching, it is important to remember not to ruin the fur.
- It's time to move on to the lining. It needs to be stitched on a regular machine and at the end run over it with an iron.
- After this, you can turn the product inside out, but be careful not to damage the fur.
- All that remains is to iron the inside and seams of the product again. So, the fur vest is ready.
Another reminder: if the skin is not yet completely dry, then under no circumstances should you dry it artificially. It should dry naturally. Otherwise there is a risk of damage to the fur. The appearance of such a vest will be unattractive. You can dry it on the balcony or outside.
Stretch the details
You can calculate the pattern on paper, but with the help of numbers it is impossible to accurately take into account all the features of the figure; even an experienced tailor adjusts fur products during fitting. Before cutting the skins, you need to stretch the fur, especially the parts that you will connect with a furrier's stitch from different pieces.
To do this, lightly moisten the leather skin with water. After it is moistened, secure it to a wooden surface with slight tension, secure the edges with small postage nails or pushpins, and leave the stretched fur to dry at room temperature for a day.
Now you can transfer the pattern and cut out the details of the future vest with a knife.
Fur vest for girls
These vests are popular not only among adult women, but also among girls who like to imitate their mothers. And it should be noted that such vests are no less suitable for girls.
The main thing is that they are very practical in cold weather. Plus they look stylish. But how to sew a fur vest for a girl? It's not that difficult to do. Sewing fur vests occurs in the same way as described above. Just count on the small size. That is, adjust the same pattern to the measurements of the girl’s waist, shoulders, arms and neck.
How to sew a long faux fur vest for women: models, pattern
An elongated vest will always keep you warm. If you work in an office where it is cool in winter and you have to sit on a wooden chair all day, then in an elongated vest you will not freeze and will feel comfortable.
How to sew an elongated vest made of faux fur for women - models, pattern:
Beautiful faux fur vest with a fox look. Comfortable and warm, light and beautiful.
How to sew a long faux fur vest for women: models, pattern
You can cut a fitted model, as in the picture below. But you can sew a straight cut product, as in the photo. Just don't cut in the waist.
How to sew a long faux fur vest for women: pattern
Vest to order
If you manage to sew yourself a vest, and it has a marketable appearance, then you can think about starting to sew a custom-made fur vest. To do this you need:
- Have good sewing skills.
- Have the necessary tools.
- Work confidently and accurately.
Did you manage to create such a vest for yourself? This already indicates good sewing skills.
In order to find those who want to have such vests, you just need to inform your family, friends and acquaintances about your goals. You can also post your copy on social networks. You can create a separate page or even a personal website. Another option is to post the video on YouTube. This is one of the best methods because people see the work process and they develop a certain degree of trust.
Such a vest can be sold for quite decent money. For example, if you sew a fur vest to order from natural fur, then most likely it will be bought for an amount in the range of 10–15 thousand rubles.
The main thing is to put your love and hard work into your work. In this case, the result will be of high quality, and clients will be satisfied.
