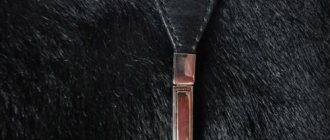
Who said that cozy and warm fur products are only meant to be worn in winter?
The ideal solution for those women who do not want to part with this luxury in the mid-season is to sew a fur vest with your own hands! Such a cape can be safely thrown over a dress - it will not spoil the sophisticated look on a cool evening. Since a sleeveless vest is considered a universal part of a woman’s wardrobe, it will go well with trousers, jeans, and even skirts, you just need to place the right accents and choose stylish accessories! Today we will show you what a fur vest pattern can be and offer several options for sewing it. Following our recommendations, you can sew a fur vest with your own hands. It will look no worse than something purchased in a boutique, and will cost you several times cheaper;)
What kind of fur is suitable for sewing a vest?
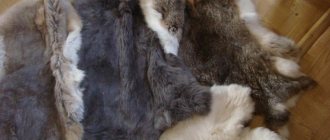
Working with fur is by no means easy - it is a rather complex and painstaking process, so if this is your first time taking on such work, be prepared to spend a lot of time sewing. We advise beginners to remake a vest from an old fur coat - it’s much simpler and cheaper, however, there are some nuances here: simply cutting off the sleeves and shortening it is not an option at all!
Such a product will not look high-quality, since when wearing a fur coat, the collar and shoulders wear out a lot. That is why the fur coat will have to be disassembled into separate parts, then select the areas where the fur is best preserved, and then correctly join them on the pattern, making sure that the pile lies in one direction - strictly from top to bottom.
If you decide to purchase skins for a sleeveless vest and have never sewn from fur before, it may make sense to contact a atelier so as not to spoil expensive materials.
We advise you to give preference to natural fur, as it is much more beautiful, elegant and warmer than synthetic fur. In addition, faux fur vests quickly lose their appearance and cannot be reconstructed. In any case, we leave the choice to you;)
Construction of the sleeve
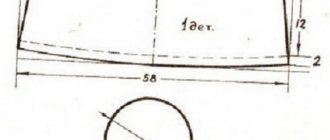
A fur coat pattern made from faux mink or other fur should have a sleeve with a low edge. The construction of such a drawing can be based on the armhole or can be built separately on the triangle, taking into account the length of the cut of the base armhole. A more accurate way is to build along the armhole.
For it, you should cut out the cut details developed in the drawing, combine the shoulder seams and transfer the main lines of the armhole to a separate sheet.
Next, measure the circumference of your upper arm and add a few centimeters for a looser fit. After this value is transferred to the drawing, it should pass along the chest line.
You should also determine the middle of the armhole cuts along the front and back flanges. The sleeve cap is drawn 1 cm above the armhole line at the top, then strictly along the cuts to the set midpoints, and then rounded and tapered to the base on the chest line, connecting with the extreme points corresponding to the segment defining the circumference of the upper arm.
How to sew a fur vest with your own hands: mini master class
If you have reached this stage, it means that you have already made an informed decision - to wear a sleeveless vest! We praise you for your courage and offer you a simplified master class;)
We sew a fur vest with our own hands - a list of necessary tools and materials:
- fur skins (fox, rabbit);
- furrier's knife (you can replace it with a stationery knife or blades);
- a large wooden board (on which we will stretch the skins);
- buttons or stapler for upholstery of upholstered furniture with staples;
- sharpened pencil or black gel pen;
- centimeter;
- wooden hammer;
- comb;
- threads to match the fur;
- needle for sewing fur products;
- lining fabric (any, from satin to knitted);
- accessories to choose from - buttons, clasps or hooks for fastening the finished product;
- tracing paper or any other paper suitable for creating a pattern.
DIY fur vest: how to make a pattern
First, we need to take basic measurements: we measure the circumference of the chest, waist, neck, and the width of the shoulders. Some vest models may also require forearm girth.
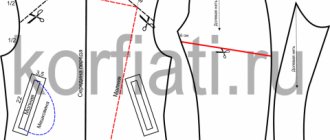
Next, choose a fur vest pattern on the Internet or in a magazine. Below we offer you three options for sleeveless vests. They are not difficult to construct, and fur products sewn on them look good when finished.
The pattern of a fur vest should be made on tracing paper. When cutting out parts, do not forget to leave, depending on the thickness of the fur and the quality of the skin, 1-2 cm of seam allowance.
Using the pattern, you first need to sew the inside of the vest and try it on yourself. The lining should sit slightly loose.
Next we cut out the fur parts.
It is extremely important to do this with a sharp knife, slowly, moving the fur to the side so as not to cut it off too.
We remind you that the fur should be located strictly in one direction - from top to bottom. This point must be taken into account when transferring the pattern from tracing paper to the material.
In addition, if the fur is unevenly colored, we recommend carefully selecting the skins, trying to match the spots as clearly as possible at the junction of the two skins. It is highly advisable to fasten the edges of the parts with a special adhesive tape - this simple trick will protect the seam from stretching during wear.
Practical advice
The pattern of a fur coat (short fur coat) with a hood must have an allowance for a loose fit, otherwise the product will be uncomfortable and will hinder movement when worn. Some craftswomen cut off the pile at the joints to make the seams softer. It is better to do this after stitching, after the curled pile has been pulled out with a thin crochet hook.
Such a voluminous work can be done by a diligent craftswoman. A little perseverance and you will end up with a chic fur coat or jacket. The ideas, patterns and stages of work presented in this article will help you navigate and break down the manufacturing process into stages. And the result will be a chic new product of your own production.
Step-by-step sewing of women's fur vests
Stage one
Before we start working with natural fur, we stretch it on a wooden board. To do this, first lightly moisten the inside (the skin, the back side of the fur) with water, then stretch the skin along the board and nail it with tiny nails or a stapler for upholstery of upholstered furniture. Let the skins dry thoroughly and only then proceed to cutting the fur: pin the pattern to it using sewing pins and make markings. At this stage, it is extremely important to remember the rule: measure seven times, cut once. There is no room for error ;)
Stage two
Using a furrier's knife (as a substitute, you can use a well-sharpened kitchen knife or blade, but not scissors!), cut out all the details of the sleeveless vest, taking into account seam allowances. We cut with short, sharp movements, ideally while hanging, so as not to damage the fluffy fur. We recommend practicing a little on scraps so as not to spoil the high-quality skins.
We sew the fur manually using a special furrier's stitch or use a furrier's machine.
Before we start sewing, we fold the pieces and make sure that they match in color and in the direction of the pile. If one of the skins has a little longer fur, try moving it up a little to hide the difference.
This double-piercing technique firmly connects the skins to each other, so the use of super-strong sewing threads is not necessary.
During stitching, be careful not to allow any individual hairs to get caught in or protrude from the seam. If such an oversight occurs, carefully pull them out with a needle onto the front side of the product.
Stage three
We sew the lining on a regular sewing machine, then iron it thoroughly.
The seams formed at the junction of the fur skins are thoroughly nailed with a hammer or pressed with the back of the tailor's scissors - in this way, we not only soften them, but also smooth them out.
We fold the fur blank of the vest and the lining face to face and sew it together, leaving a gap on the back sufficient to turn the product right side out.
Very carefully, slowly, we turn out the almost finished sleeveless vest, trying not to damage both the lining fabric and the fur itself. Next, carefully sew up the remaining hole on the back using hidden stitches.
We smooth the seams on the fur, now located under the lining, with our hands again. If you did everything correctly, the joints on the sides and shoulders will be almost invisible.
Now we go through the outer joints - if individual fibers are stitched between the parts, carefully remove them using a needle, awl or crochet hook.
Assembly steps and lining design
The lining fabric is cut according to the same patterns, excluding the size of the edges from the details. Assembling the product should begin with stitching the shoulder seams, then sew on the sleeves, hood and close the side sections. Next comes work with pick-ups and zippers. The lining is assembled in the same order, the only thing is that the seam in one sleeve is left open. The lining is sewn to the lining and, turning the product through the sleeve, the lower section of the base and lining is sewn. To stabilize, use non-woven fabric and hand-baste the fold so that the fold holds well.
How to sew a fur vest from scraps
List of necessary tools and materials for making a fur vest:
- several fur skins (for sizes 42 to 46 we needed two steppe foxes);
- a stationery knife, a sharp kitchen knife, blades or, better yet, a special furrier's knife;
- large wooden board for stretching fur;
- gel pen or pencil for marking;
- small nails or stapler for upholstery;
- 5-7 skeins of yarn for knitting the frame of a sleeveless vest (42-46 rubles);
- crochet hook No. 3;
- sewing threads to match the fur;
- needle for sewing fur products;
- salt;
- water;
- a little glycerin;
- potassium alum;
- spray bottle or spray bottle;
- measuring cup;
- kitchen scales (minimum value – 0.1 kg);
- hammer;
- pliers or wire cutters for pulling out nails;
- comb or brush for combing fur;
- sewing machine;
- accessories (optional – buttons, zipper, hooks);
- fabric for lining if you plan to sew it on later.
How to sew a fur vest on a knitted base: step-by-step master class
Preparing the skins
Stage one
The sleeveless vest that we are about to sew will be suitable even for those who have only recently begun to master sewing. The only thing that will stop you during the work process is knitting the frame of the product, since this will take quite a lot of time. Don't be upset if you don't know how to crochet at all - the pattern is simple and easy to remember.
For the master class, we used two new fox skins, but this is not at all necessary - from old, but good-looking fur, vests are no worse. The only thing you need to pay attention to in this case is the dressing of the skin. Check to see if the fur is fraying, if the inner skin (skin, back side of the fur) is strong enough, and if there are any holes in it.
Now let’s conduct a mini-lesson on the “topography” of skins.
In the picture, number 1 indicates the neck, 2 – paws, 3 – ridge, 4 – tummy, 5 – sides, 6 – rump, 7 – tail.
Before starting work, we strongly recommend that you put your clothes and everything unnecessary in the closet, because even with very careful work, fur will be everywhere :)
If the skins are dressed with stocking, as in our case, we turn them inside out with the fur part inside and mark the middle line along the tummy and paws with a pen, like this:
Then we cut the flesh as carefully as possible, holding the skin suspended and trying not to touch the hairs. You cannot cut fur with scissors, as it is very easy to damage it during the process. The tail needs to be cut off - we won’t need it.
Stage two
Now we need to transfer the ridge line to the skin using sewing pins: we pierce them from the fur side into the very middle of the ridge, and mark the puncture site on the skin with a gel pen. After going over the entire skin, use a pen to connect the points on the skin into one straight line. This is done in order to preserve the fur pattern and avoid distortions in the finished product.
Those who are going to sew from an old fur coat, hat or collars can skip further steps.
If you are sewing a product from new skin, you will need to prepare a special solution for greasing.
For one liter of water you will need:
- twenty grams of glycerin;
- twenty grams of salt;
- three grams of potassium alum.
In our case, 100 grams of water was enough, but we recommend preparing a little more, just in case.
So, dilute alum, salt and glycerin in hot, but not boiling water, mix well and wait a little for the liquid to cool (check with your finger - if it’s not hot, then you can continue). Pour the liquid into a spray bottle and spray the skins with it. We throw out the rest - we won't need it anymore.
Stage three
Next, we need to fold the skins skin to skin and leave them in this position for half an hour to an hour for impregnation.
While the fur is soaking, we prepare small nails or a furniture stapler with staples, a hammer and a large wooden board.
The skin soaked in the solution we prepared becomes very elastic and you might think that a little more and it will tear, but if the skin was well-cured, this will not happen.
Next is editing the fur. We stretch it in length and width, leveling it as much as possible and slightly stretching it, and nail it in parallel with nails or a stapler to the board.
Important! Place the skin fur side down on the board!
We start attaching with the rump in the area of the ridge and hind legs, then we slightly pull the skin and attach its upper part (neck), avoiding folds.
Important! During the work, we carefully ensure that the ridge line remains straight!
Now carefully pull the sides, starting from the lower paws and ending with the upper ones.
To speed up the process, you can stuff two skins onto the board (on both sides of the board). We leave them until the mesh is completely dry.
Then we remove the skins from the board and turn them over with the fur facing up. Wet a brush or comb with water and thoroughly comb the skins from top to bottom, fluffing the pile. We wait for it to dry completely.
Stage four
At this stage we need to determine the width of the fur strips. If the pile is thick enough and voluminous, and the skin is well-made and durable, you can make strips of 5 mm each. If you are afraid that the amount of fur will not be enough, slightly reduce the width of the strip. Most often, stripes ranging from four to eight millimeters wide are cut into women’s vests of this model.
Now we begin to line the skins from bottom to top, making sure to number each strip.
Next, we should, in theory, cut the skin into strips, but, nevertheless, we advise doing this only after we have knitted the base of the future sleeveless vest.
If you want to cut strips now, you can go two ways.
The first is to cut the strips in order, while laying out the even and odd rows in two opposite directions. This is how we get identical product shelves.
The second, in our opinion, is more convenient - we leave a small piece uncut on each strip, as shown in the photo. We recommend cutting as many strips as you plan to sew today. Since the work is quite long and painstaking, it can be divided into several stages.
That's it, the work with the fur is finished.
Knitting and assembling a vest
Stage one
We prepare the pre-selected pattern. At the beginning of the lesson, we offered three options to choose from, but you can find another one in the same Burda magazine or on the Internet.
Important! The pattern should be for sewing a vest, not for knitting a warp!
We transfer the pattern to tracing paper and determine the length of the product. Having adjusted all the parameters, we cut out the paper blank.
Let's start knitting the base of the sleeveless vest. To do this, we will need a hook No. 3 and yarn of a suitable thickness of 5-7 skeins, depending on the desired size of the product.
Important! If you are not sure about the correct construction of the pattern, we recommend that you first sew a vest from it from any fabric and try it on over the clothes. If it fits well, you can start knitting; if not, you will have to slightly adjust the pattern and adjust it to your figure. We advise you to take into account that the vest should fit loosely, with a slight fit to your figure. Let's check once again whether the width is enough and whether it is worth lengthening the armhole.
Stage two
Let's move on to crocheting.
The basic design of a sleeveless vest for a woman is extremely simple.
First row: knit completely with double crochets.
Second row: *one double crochet, one chain stitch*, repeat from * to *.
We knit the base, alternating the first and second rows.
Before starting the main work, we recommend knitting a small sample in order to calculate the required number of loops for the shelves and back.
This sleeveless vest is designed for a fairly warm autumn or spring, since it can be blown out due to the holes formed by the air loops. If you want to sew a warmer vest, we advise you to knit the entire base with double crochets or insulate it with padding polyester.
We knit the shelves and the back, thoroughly steam the parts with a hot iron, wash away the seams and try on the vest to avoid troubles :)
If you don’t know how or don’t want to crochet the base, you can replace it with knitwear suitable for this model. In addition to color, pay attention to the knitwear pattern - it should have clear horizontal stripes or embossing. This clever trick will help you sew fur strips evenly;)
Stage three
We continue to work.
Using a contrasting thread, we mark on the shelves (we do not touch the back yet) the line on which the spine of the skin will be located.
Next, we begin to sew on the fur strips. We remember that even and odd rows are intended for different shelves.
At this stage there are two options.
The first is to sew on the stripes using a sewing machine, the seam is a zigzag with a wide step.
Before sewing the strip, smooth the pile down, then it will not fall under the needle and the strip will be sewn on easily.
The second option is a little more complicated - we sew the stripes by hand. There are several seam options: over the edge, covering the entire width of the strip, zigzag or any other convenient method.
It is most convenient to sew two stripes at the same time, cutting off the end of the next strip of fur before each stripe. This way we avoid confusion and work can be postponed at any time.
When cutting strips, do not forget to change the blades and sharpen the knife in time - they quickly become unusable.
The photo below shows a skin with an uncut edge on the left, and two knitted shelves on the right.
We sew stripes with fur only on rows consisting of double crochets; we skip rows with air loops. The direction of movement is from bottom to top. After each stitched row, carefully comb the fur.
Stage four
When sewing strips, we carefully ensure that the direction of the pile is always the same - from top to bottom. Don’t forget about the numbering of stripes: we use even ones for one shelf, odd ones for another. Don't forget about the ridge - it must be smooth.
A little advice for those who want to make their work a little easier: transfer the ridge line outlined earlier on the core to the upper part of the core (cut/end), as shown in the photo below.
Before sewing, you need to connect this point to the ridge line using a safety pin.
When sewing on the stripes, leave 1 cm unstitched at the side seam of the vest. While stitching, hold the fur with your hand.
The shelves will take approximately 4 hours in total. Here's what you get in the end:
If you don’t have enough stripe width or the edge looks bald, you need to add a stripe by picking up a piece of fur from the scraps. We recommend placing the extension slightly below the main strip.
Next, we process the shelves from the inside out: here you need to secure the threads and process the armhole - to do this, we bend the fur strip inside and manually sew it to the knitted base of the vest by about one centimeter, cutting off the excess. The result is in the photo below. The reverse side does not require lining and looks neat.
Stage five
It's the back's turn.
Here everything turned out to be not so simple - the width of the skin was not enough for the width of the back. If we continued sewing as originally intended, we would have to add stripes (this is the reason why many vests have leather side inserts).
Having thought and calculated a little, we decide to sew the stripes in the same way as the shelves, that is, with two ridge lines, since if one skin was enough for us for two shelves, it will be enough for the back.
We mark the back with three lines with a contrasting thread, like this:
Next, we sew strips from another fox skin in the same way as on the shelves, that is, even ones on one side, odd ones on the other. The strips need to be connected in the center of the back, cutting off all excess. Sew the strips end to end or slightly overlapping. As with the shelves, we retreat about a centimeter from the edge and leave the same amount unfinished. You will get something like this:
We chop off the parts of the product with sewing pins in three places. Where there is not enough fur, we add scraps. This is what the already sewn back looks like:
All that remains is to process the inside in the same way as the shelves. Voila!
Lyrical digression
Now we need to rest a little, and then we will proceed to the final part of this master class, from which we will learn how to assemble a sleeveless vest and make a belt for it.
There are a lot of scraps left from the fox skins. The photo below does not show tails and legs, which can also be used.
PS If you sew not from a fox, but from a used raccoon, you are in luck :)
Sewing from scraps of raccoon fur is much easier and faster, since the skins do not require adjustment along the spine. Be sure to take into account the condition of the fur—bald patches and bald spots are clearly visible in the photo. And when working with dark shades of fur, a problem may arise - the light edges of the fur, which can only be painted over.
We assume that sewing a vest from silver fox is much simpler - you will not need to adjust the ridge line, and, accordingly, you will avoid all other processes associated with it.
Sew a vest: final assembly
Stage one
Now we need to sew the sides of the vest. This is done manually using the thread we used to knit the base of the product. Like this:
Here you need to make sure that the fur strips do not get under the thread. Don't forget to check if the rows are aligned correctly!
Next, turn the sleeveless vest over to the front side. This is what it should look like:
Now we need to sew the fur strips together. This is done manually (when the length adjustment is completed, all excess must be cut off). We advise you to start working from the top and gradually move down, since in this situation the fur will interfere less.
We take a thread of medium length - this way there is less chance of getting the pile tangled in it. We don’t cut the thread, we move from one row to another inside the columns.
We thoroughly comb the pile after each sewn row, carefully moving it upward.
Thus, we sew until we connect all the rows.
So the first side is complete:
We repeat the same thing for the second shelf.
Next we sew the vest at the shoulders:
Stage two
Having completed the shoulders, we turn the sleeveless shirt over. We carefully look through all the seams and inspect whether the fur is laid correctly. We recommend trying on the product and inspecting it for yourself - this way any flaw will be noticeable. If something goes wrong, you can slightly trim and sew the strip of fur again so that the joints of the back and the front are invisible.
If you are satisfied with everything, we proceed to processing the neckline - according to the same principle as the armholes. Next are the front sections of the shelves (as usual, they need to be sewn to the wrong side of the product).
We put the product on ourselves again. Unfortunately, the base of the vest is a little visible in some places, pay attention to the photo:
To disguise bald spots, you need to cut off strips of fur of a suitable color and sew them on by hand.
Now let's decide on the clasp. These could be buttons, zippers or hooks - we recommend choosing the latter option as the simplest of those proposed. We recommend using ten hooks No. 3, sew them on as shown in the photo.
If desired, you can cut out the lining using exactly the same pattern, sew it at the sides and along the shoulders, press the seams and process it using an overlocker. We sew the finished lining by hand, using blind stitches.
You can pick up a belt in a store or sew it yourself. Black leather and less practical, but no less beautiful suede go well with fur.
That's all, put on a vest and go out into the world!;)
Pattern of a fur coat with a stand-up collar
The model is of medium length, slightly widened towards the bottom. Both natural and faux fur can be used for sewing. In total, you need about 2.5 meters of base and lining material, fittings, and decorative elements (if desired).
Attention ! All parts of the top must have the same pile direction. Paired parts should mirror the pattern. When working with faux fur, we cut only the woven part; when working with natural fur, we cut the inner part. We don't touch the pile.
Main stages of work:
- Cut out 2 shelves, back, collar, 2 sleeve parts;
- Duplicate the details for selection. In this case, the length of the hem at the bottom increases by 6-10 cm;
- According to the markings, cut the shelves into 2 parts. The upper part is cut separately;
Important ! Pay attention to the allowances: shoulder, side, vertical seams of the sleeve, at the stand - 1 cm, at the bottom of the sleeve and fur coat - 4 cm.
- The layout of the patterns when working with faux fur is slightly different.
- We connect the upper shoulder seam: the shelves and the back of the back;
- We sew in the sleeves and sew the remaining parts;
- We form the lining according to the pattern;
- We connect the parts, install the fittings, turn the fur coat inside out and sew the bottom.
How to sew a stylish vest from rabbit fur
Have you been dreaming of a vest made of soft natural fur for a long time? Have you tried on a couple of dozen of them, but all of them are not the same? We understand you well, because it’s really rare that three “I want” coincide at once: style, color and, most importantly, the price of the product. It doesn’t matter if you find it difficult to please yourself, because today you can sew a vest yourself - exactly the color and style you wanted, and it’s also several times cheaper than in the store! Don't worry, it's not as scary as it seems!
List of necessary tools and materials for making a fur vest:
- three or four black rabbit skins;
- a piece of black velor (we use an old velor skirt);
- fabric for lining;
- several hooks or buttons for fastening;
- blade;
- scissors;
- pencil;
- tracing paper for patterns;
- helium pen or chalk;
- T-shirt:)
Why, you ask, do you need a T-shirt? This is a little trick for those who don’t want to bother with creating a pattern. We place it on velor fabric and outline it with a margin.
How to sew a vest: step-by-step master class
Stage one
So, in fact, we already have a pattern, but... The next photo clearly shows that the front shelf of the workpiece is different from the back: on the first, the neckline and armhole are cut out much deeper. The front shelf is located on the right side in the photo, the back is on the left.
It’s very easy to make a peplum for a sleeveless vest from the top of a velor skirt: you just need to cut off the elastic and cut the front in half. The sides were still initially tailored to fit the figure.
Next we need to cut out the front flange for the fastener. The plank is essentially two strips, 6 cm wide, the length corresponds to the length of the shelf.
We repeat the blanks of the front shelf, back and peplum on the fabric for the lining.
Then we make facings for the armholes from the remnants of velor. The easiest way to do this is after cutting out the front shelf and back.
We trace the facings with a pencil or gel pen on the lining adhesive fabric and glue them together with the base fabric, stroking the blanks with an iron.
We sew the seams on the shoulders of the workpiece, retreating a centimeter from the cut, using double stitches.
Next, at a distance of 7 mm from the cut, sew on the facing.
We bend it, as shown in the photo below, and adjust it to the seam on the front side of the vest, retreating 1 mm from the stitches connecting the armhole and facing.
Stage two
The next thing we need to do is sew the seams on the sides. Next, we sew out the facing, bending it to the wrong side of the vest as follows:
We glue the strip for the buttons for greater rigidity (we use an adhesive pad on one of the sides). Bend it in half lengthwise.
We attach it to the shelf on both sides.
Next up is the stand-up collar. We cut it out from two blanks, between which we make a gasket. The photo below shows the already sewn collar from the wrong side.
Then we baste the collar and basque and sew them to the vest.
Let's start cutting out the skins. We will need at least three - one for the back, one for the front of the product, and one more for the collar and shoulders.
We apply the fur to the back of the vest and mark with a chalk or pen what needs to be cut off. We cut the fur with a sharp blade along the wrong side.
We cut the next skin vertically into two equal parts and baste the fur over the front part of the sleeveless vest. We sew the fur to the base by hand or on a sewing machine, using a zigzag stitch along the entire perimeter of the skin. While working, do not forget to move the fur away from the edge and try to stitch along the pile, and not across it.
Stage three
Now it's time to start lining the future vest. We stitch it along the seams and sew it to the base fabric in the following sequence: fastener-strap, armholes, hem.
Here's what you get in the end:
Lastly, we sew the lining to the stand-up collar.
We sew the third skin onto the shoulders, and add a fur strip to the collar.
We cut the edges of the edge that hang from the shoulders, as shown in the photo. It turns out quite original and unusual :)
We sew on the buttons as simply as possible: we make a hinged loop and select the button to match the color of the fur.
Sewing such a vest will only take a couple of evenings, but what a result!
How to choose a quality case
Covers made of cotton, velvet and spunbond
The first thing you should pay attention to is the size. The fur coat should be placed freely in it, without folds or bends of the fur. See how the side insert is made. The longer the fur, the wider it should be. The length should also correspond to the length of the fur item and even slightly exceed it. There should be 10 to 15 cm of free space at the bottom, so it is better to purchase a long cover. Standard length available:
Read more: DIY chair headrest
It is important that the anti-moth cover is made from natural fabric. Give preference to cotton or linen. They will provide maximum air access, but at the same time the fabrics are dense enough to make the product dense and durable. Sometimes non-woven polypropylene material is used, which also allows free air circulation. The classic color is black or brown, for white fur – blue.
The zipper must be sewn along the entire length. Manufacturers of cases provide special reinforcement to provide protection against ruptures, which most often occur in the lightning area.
DIY faux fur vest
Previously, we have already looked at how craftswomen sew vests from natural fur, but what if you want to save even more (or perhaps you don’t wear fur) and sew this wardrobe item from artificial material? In fact, the process is not much different, so we offer you a quick master class on sewing a stylish white faux fur vest;)
First, let's clarify the situation a little.
Yes, sewing from faux fur is much easier than from natural fur, but you shouldn’t trust comments on the Internet like “there’s nothing complicated here” and “such fur hides all the “jambs” of sewing.”
Synthetic fur has certain properties, like any other material, but even thick and long pile is not able to hide all the flaws. If you are just starting to sew, we advise you to first cut out and make another fur item - a boa, hat or collar, and if you like the process, feel free to take on sewing a vest or even a fur coat!
List of necessary tools and materials for making a fur vest:
- a piece of synthetic fur (the length should be equal to the desired length of the product plus a couple of centimeters);
- lining fabric;
- sewing threads;
- hooks for fastening the product (snaps, buttons or even a zipper are suitable replacements).
Sewing a faux fur vest: step-by-step master class
Stage one
In this tutorial, two types of fur are used for sewing: longer and shorter, so first we sew the bottom of long-pile fur to the top of the back and front.
The photo below shows a pattern for a combined faux fur vest:
Next, we sew the vest along the shoulders: both with fur and with lining.
Next we need to baste (or pin the lining to the vest face to face).
Now let's sew the stitches. First, along the lower edge of the details of the front part of the vest, then along the sides, after that we sew along the neck edge, go further along the lower edge of the back and finish by walking along the armhole edges.
Important! The side seams remain open!
Stage two
The main work is almost complete - turn the product right side out.
We pull the parts of the front part through the shoulder tunnels back to the back and pull them further through the open cuts on the side of the product.
The next thing we need to do is to sweep the side cuts on the vest and lining with one row of stitches, leaving an open area in one of them for turning the workpiece inside out.
It is through this that we now turn our vest inside out and straighten it. Having folded the sections, we sew the open cut close to the seam using a machine or sew it by hand with a blind seam.
That's it, the sleeveless vest is almost ready! All that remains is to sew on the buttons or hooks. A vest without fasteners also looks very nice;) In the latter case, we recommend sewing or choosing a belt.
If desired, you can add a removable long-pile fur collar.
That's it, the job is complete!
What to combine with a sleeveless vest
The vest is sewn, but how and with what to wear it? We'll talk about this below;)
The finished vest can be supplemented with any sewing accessories: matching buttons, hooks, and a zipper. In addition, it can be worn without fasteners, simply combining it with a belt that suits your style... or completely open - a matter of your taste and personal preference.
The vest can be combined with skirts and jeans. Over a floor-length dress, such a detail of a woman’s wardrobe looks simply luxurious! However, most often sleeveless vests are worn over knee socks, sweaters, cardigans or leather jackets.
It is important that the clothes are correctly combined with the color of the fur. Since it itself is a bright accent of the image, give preference to muted base shades.
How to care for fur
If you want your fur product to serve you as long as possible, you should follow five basic rules.
- The product must be stored strictly in an upright position, away from direct sunlight and heating devices. Use hangers with wide hangers!
- Hairspray, cigarette smoke and perfume can worsen the appearance of the pile, so, accordingly, you should avoid getting them on the fur product.
- It should be remembered that items made from natural fur can retain accumulated odors for a long time (and not only pleasant ones!).
- If the fur gets wet, you should not use a hairdryer or heater - the vest should dry naturally.
- Dirt on the fur is removed using a sponge with a mixture of salt and ammonia (3:1).
