Furs and products made from them have always been considered items of luxury and prosperity. At all times, a woman wrapped in a fur coat or coat was, in most cases, considered by the public to be a member of the upper strata of the population, with high incomes and noble origins.
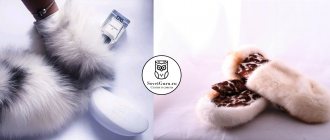
Today, various fur accessories are again at the peak of popularity. Firstly, they perfectly fulfill their main purpose - they keep you warm in the cold, and, secondly, they give charm and presentability to a woman’s image. Nowadays, one of the most exquisite fur products is the boa, without which the wardrobe of no socialite fashionista is complete.
Where did the boa come from?
If we start from the very beginning, we can remember that furs were the first clothing of primitive people. Of course, in those days no one knew the word “boa,” but the fact remains that the habit of insulating ourselves with the skins of animals caught in hunting came to us precisely from ancient times.
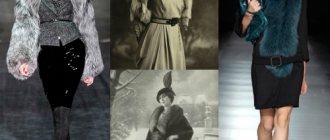
In fact, the boa (photos of the very first models can be seen below) began to manifest itself as a separate accessory back in the Renaissance. Then they were worn by both men and women, but only from the nobility.
In general, the word “boa” is a French term derived from “gorge” and translated into Russian meaning “neck” or “throat”. However, the French themselves are more inclined to call these fur accessories “boas”.
The beginning of the 19th century was a period of active introduction of fur boas into secular fashion. This happened at the instigation of Parisian women, known to everyone for their love of bohemian and aristocratic items. At the same time, such an accessory could not be found on young girls - a boa made of the fur of valuable breeds of animals (ermine, sable, arctic fox) was considered the prerogative of exclusively adult married ladies.
The products were decorated with beads, crystals, and pearls. Most models were a fully tanned hide with a tail, head and paws. Even the teeth and claws were left, but the eyes were replaced with valuable stones. Such boas were incredibly expensive, and in some families they were even passed down from grandmothers to daughters and granddaughters, or even kept as an heirloom.
In Russia, boas were more or less often seen on the streets in the 1920s. They began to be sewn from various furs of slightly lesser value and worn instead of a collar on a coat. However, not everyone could afford this accessory.
In the post-war period, boas were forgotten for a long time. No, they didn’t stop wearing them, but they became something like a kind of archaism, a relic of the past, from pre-revolutionary times. And only in the early 2000s. Accessories already familiar to us have reappeared on world catwalks. Now the boa is a real hit, equated to a classic.
Fur boa: instructions for use.
Do you love natural furs as much as I do? I love wearing fur, I love sewing various products from fur.
I propose to talk about an important accessory these days - a fur boa.
The boa continues its triumphal march, which began in the Renaissance. The modern type of cape can be made from various types of fur, and it perfectly decorates both regular and evening wear, adding sophistication and elegance to the overall look.
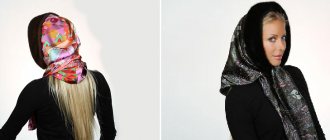
Depending on what kind of fur your boa is made from (arctic fox, fox, rabbit, mink, sable, raccoon, silver fox), make sure that the overall palette of the ensemble remains harmonious and natural. A spectacular and stylish boa made of natural fur goes perfectly with a little black dress. In this case, choose a brightly colored boa; it can be white, red, emerald green or lilac, but not gray. The boa is a completely self-sufficient accessory. Therefore, if you are wearing a boa, do not add jewelry to your look: chains, beads, necklaces. Together with a boa, they can look tasteless and pretentious. If you are a fan of an attractive retro style, then complement the wide boa with long, tight-fitting gloves. Use a boa in a classic way - wear it with a leather or wool coat, a puffy jacket or with evening dresses of various styles. A boa looks trendy when worn over a turtleneck, sweater, knitted dress, tunic, or in an office version with a jacket. Wear a boa made of solid fur with paws, head and tail as a cape over one or both shoulders. If the boa is sewn like a long scarf, then tie it with a bow or wrap it around your neck, tucking the edge under the collar of your outerwear (collar). The main thing is to be creative and don’t stop at just one option. You should store your fur boa in a cool, dark place. The best way to store fur is in a mothproof case. For better protection, you can put a moth plate in the case.
Fur is ideal for cold, dry weather. Avoid using your fur boa in heavy rain. If caught in light rain, it will not harm the fur; you can simply shake out the wet fur and hang it to dry. Avoid using heat and do not comb the lint.
And in conclusion. A variety of styles and models allows you to choose the option of a boa with clasps, satin ribbons, etc. This makes it possible to make the right choice based on your own taste. Remember that a boa is an expensive and stylish accessory that allows you to recreate the elite look of a Diva. Be stylish and beautiful!
What are boas made of?
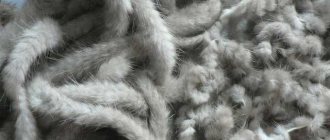
As mentioned, a typical boa is made from fur. The skins of fox, mink, chinchilla, raccoon, arctic fox, sable, and rabbit are suitable for these purposes. Also in stores you can often find products made from faux fur, which is not much different from the real thing. Down and feather boas look quite original. The raw material for them is swan fluff or marabou fluff.
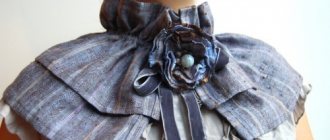
Anything can be used to decorate an accessory: lace, ribbons, silk, brooches, pompoms, tassels. And the variety of shades can be completely baffling: modern methods of fur dyeing make it possible to obtain almost the entire spectrum - from warm to cold colors.
The modern boa, the photo of which is presented in this article, today is a completely self-sufficient accessory that does not require additions and at the same time can transform any outfit.
What to wear with a boa?
Everyone knows that fashion is capricious and extremely changeable. Therefore, if previously boas were worn exclusively with elegant things and outerwear, now these accessories can be combined with everyday things.
Wedding and long evening dresses, complemented by a boa, are a classic. If a woman has only classic, strictly cut dresses in her wardrobe, then it is also appropriate to complement them with a fur scarf, instantly turning them into a festive and elegant outfit.
A boa is a universal attribute these days, equally suitable for a classic coat, a down jacket, or a jacket. The main thing is that there is no fur in the decoration of the outerwear, whether it matches the boa or not is not important.
This accessory can be complemented with knitted jumpers, dresses, sweaters, and tunics. Jeans, trousers, skirts are also possible. Under no circumstances should you wear a boa with sportswear and shoes.
As for jewelry and costume jewelry, they are acceptable in festive and evening combinations. On a weekday in the office, pearl beads or even a gold chain coupled with a fur stole will look too pretentious.
It is desirable that the fur contrasts with the hair color. However, this does not prohibit at the same time choosing a boa to match the clothes.
Master class on felting “Boa”
Elena Kryukova
Master class on felting “Boa”
Wet felting[ b]
is a great hobby that can add variety to your wardrobe.
I offer you a master class on making a boa (scarf). To do this, you will need wool (fine merino), preferably three colors, if you are making a color transition. The amount of wool is 100-120 grams.
First you need to prepare your workplace. The table should be covered with bubble wrap and a soap solution should be prepared (2-3 tbsp/l of water). I use a spray bottle to apply the soap solution evenly.
We start laying out the wool like this:
1. First, take light wool and lay out a strip in one skein to the required length. Then we begin to lay out skeins of darker wool (about the same length) from the central strip to the edges, making a semicircle;
2. then take darker wool and lay out the skeins slightly off center (about 1/3)
3. Lay out the darkest wool last next to the offset. Wet it with soapy water and turn it over.
4. Repeat the layout from the beginning. Using light wool, we lay out the central strip in two rows of thin skeins. Then the first row from the center is also light. The second row is average, and the third is the darkest.
5. I suggest decorating the boa with a contrasting flower, which is done as follows:
A. From the darkest wool for the flower we make 6 loops (droplets), and arrange them in the shape of a flower.
B. we do the same thing from wool of two lighter colors, slightly reducing each subsequent one and put it in sulfur
inca of each petal.
B. make the middle of the flower contrasting (yellow, similarly we fold small petals from yellow and orange wool. I supplemented the middle with yellow threads from a sari and laid out green leaves in the same way as the petals, which I made from the same wool as the boa ( they will visually connect the flower with the background of the boa and change the texture around the flower).
6. Wet the flower with soapy water, cover it with a bubble wrap and roll it with a rolling pin (about 15 minutes) on both sides. If you felt the flower too much, it will be difficult to felt it onto the boa.
7. Place the half-felted flower on the boa and begin felting it all together.
8. You can felt the ties (after placing their ends under the flower, on one side, and putting light wool on them, hiding the ends, on the other side). The ties should already be felted before starting work.
9. When all the nuances are taken into account (a “pimply pad” is placed under the ties to prevent them from falling off with the boa, cover the top with a pimple and begin felting with a rolling pin on both sides until the wool sticks to your hands. Then add it manually. I first felt like this: with light movements I iron from the center to the edges, then as it falls, I increase the pressure.
10. When the boa is almost felted (the surface becomes lumpy), I put it in a basin, add a soap solution and begin felting with “erasing” movements. If you want a wavy edge, then these movements should be more intense along the edge.
11. Now my boa is ready, I decided to cut off the ties (next time I will make them wider, leaving only the corners on both sides. The wool has shrunk 30%, as I expected.
If you are going to felt for the first time, take a look at my previous master classes, perhaps there I went into more detail on some of the nuances. Thank you for your attention, good luck with your work!
How to make a boa yourself?
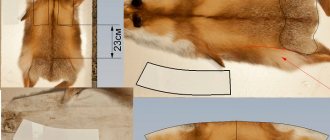
If you have unclaimed fur or skin at home, then there is nothing easier than sewing a stylish accessory yourself. A self-made boa can also serve as a wonderful birthday gift for a relative or beloved friend. In addition to fur, you will also need lining fabric and matching threads, needles and scissors.
Cut a rectangular strip from the skin or sew pieces of fur together. Cut the lining fabric to fit the boa, leaving seam allowances. Place the lining and fur right sides together and sew, leaving an open area at one end. Turn the boa inside out and sew the remaining part with a blind stitch. The accessory is ready. If desired, you can add ribbons for tying or a clasp.
