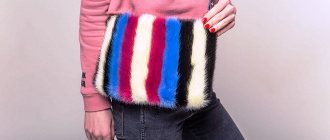
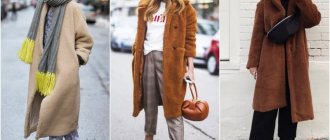
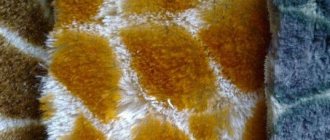
Anyone who follows the fashion world has probably already noticed the almost universal craze among designers for faux fur. A huge variety of textile materials imitating natural fur has covered both the mass market and famous fashion houses. Clothes made from synthetic materials no longer look at all like shabby Cheburashkas, because if you wish, with the help of modern technologies you can completely recreate the texture and tactile qualities of any fur. From the photo in the popular gloss we see colorful, soft, light, ethical and environmentally friendly products with fluffy pile, while the range of current models is almost unlimited. You can choose any colors and styles, and be sure that the image with such models will definitely be spectacular.
Seamstresses and needlewomen who are capable of independently making a trendy, well-fitting product should not be afraid to work with faux fur on a knitted basis. Of course, cutting and sewing such a dense material is significantly different from working with conventional knitwear, but a little effort and a generous portion of important knowledge that we will share in this article will help you cope with this task.
What do you need to sew a fur coat with your own hands?
The main thing is the material for work:
- Natural fur can be purchased in specialized stores or from hunters in the form of individual skins. Working with this material requires certain specialized knowledge and is one of the most difficult areas in sewing.
- Faux fur can be found in almost any fabric store. Working with it is much easier than with its natural analogue. This material is much cheaper in price, and it is not so scary to spoil it; it is sold in the form of a single piece, like regular fabric.
- Old fur fabrics, for example in the form of a fur coat and vest, which can be converted into a new fur coat. In this case, you need to understand that if there are abrasions and unsightly places on the material, they will have to be removed.
- Lining material. Satin or satin is often used as a lining for a fur coat; they are usually inexpensive. The product is given a rich look due to its smooth shiny surface, and these materials are very wear-resistant and retain their shape well during use.
In addition to the material itself, to create a fur coat with your own hands you will need the following equipment:
- Tailor's sharpened scissors or furrier's knife, the second option is preferable when working with natural fur.
- Clothespins are also needed for working with natural fur.
- Hammer with a soft silicone head or wrapped in cloth.
- Chalk, soap or gel ballpoint pen in a bright color.
- Metal long ruler.
- Safety pins.
- Small nails (when working with natural fur).
- Tape measure.
- A punch for installing accessories and attachments for it.
- Furrier's needles for machines, having three edges or gypsy needles.
- Comb.
- Thimble.
- The fittings are decorative and functional.
This is interesting: Felt Mask Pattern
What are the advantages of a sewn fur coat?
Sewing a faux fur coat is easy. Especially if you have the skills to create outerwear and work with patterns. Working with natural furs is much more difficult. What are the benefits of sewing yourself?
- Artificial material is easy to process.
- Low cost. Thanks to this, you can sew your own fur coats often without fear of special costs. Look different and fashionable every season.
- Creating your own model. Many ladies cannot choose outerwear for themselves due to the characteristics of their figure, size, etc. Self-tailoring is the ideal option: fit, size, style - everything is created with an individual approach.
Faux fur coat
Finding a template and taking measurements
The first step is to create a fur coat pattern made from natural fur. Or search for a pattern for a pattern in open sources, for example, in fashion magazines. In order for the pattern of a fur coat made of natural fur to be successful and the product to fit well, focus on the outerwear you already have, for example, a jacket or coat.
To ensure that your future fur coat suits your body type, find out the following parameters:
- chest height;
- waist and chest circumference;
- shoulder and back length.
There will be a table where you got the pattern from - choose the appropriate size. To cut out all the parts evenly, transfer them to paper. When you start cutting, do not forget to mark the places where joining and stitching will subsequently take place.
How to connect fur parts? It's easy to do!
1) The stitch on a sewing machine (regular, not furrier’s) is laid in the direction of the pile (from top to bottom). Perpendicular to the stitching, the parts can be joined with long pins, manually, to avoid displacement.
2) If you plan to sew pieces with long pile, use scissors to tuck it inside. Then sew the parts to each other, and at the end, remove the lint from the front side with a darning needle and fluff the lint.
3) How are allowances processed? The pile on the allowances of the parts must be cut off; to do this, straighten the allowances in different directions. The edges of the lint-free allowances must be sewn to the product from the inside out using an over-the-edge seam. Processing the bottom of faux fur products can be done manually using cross stitches. There is no need to iron the folded bottom edge. It is better to process the edges of products made of thick, long-pile fur by machine - trim them with a facing made of lining material.
LiveInternetLiveInternet
Quote from message ksenija_82
Read in full In your quotation book or community!
We sew a fur coat from faux fur.
I love fur, even faux fur! Nowadays there are many types of fur that are practically indistinguishable from natural fur. And under a fox, and under a raccoon, and under a mink. I couldn't resist it - at a trot. It even feels natural to the touch. Unlike natural fur coats, faux fur items are easy to sew yourself. They are inexpensive and you won't have to wear them for decades. Girls with any figure will be able to choose the right faux fur for themselves. Stately girls are better off choosing short-haired ones. Nowadays faux fur is made on a knitted basis. Products made from it are light and comfortable, although they are blown by the wind. My friend bought a ready-made faux fur coat lined with padding polyester. He says it still blows. I like it warmer. For the lining I took another faux fur - simpler and cheaper. I will make a complete shelf and back out of it, and put the sleeves on a lining with padding polyester.
I make patterns myself, and for beginners I recommend taking any suitable ready-made outerwear pattern. Choose a simple model with a minimum of details. All the same, they are not visible on the fur, and sewing is much more difficult. Be sure to measure the re-shot pattern along the chest and hips. The increase in fit should be at least 18 cm across the chest and 14 cm across the hips. It all depends on how bulky the clothes you plan to wear under your fur coat. Choose a simpler pattern - without darts on the chest and waist. Moreover, belts are in fashion now. It is more important to choose the right length and volume of the fur coat at hip level. Thin girls can afford any volume, but for statuesque girls, I recommend making them semi-fitting. Closer to the body, in short. The length of the coat should not end at the widest point of the hips. Either higher or lower. Please note that faux fur is cut in one layer, so complete the pattern pieces provided with a fold. Ideally, let there be as many pattern pieces as needed: 2 front pieces, 2 sleeves, 2 hood pieces. This makes it more convenient to lay out the fabric to take into account all the increases and allowances. Make a layout before purchasing fur to calculate the consumption. Consider, if any, hem, hem and sleeve, pockets, cuffs and hood. Pay attention to the direction of the pile. If the pile is directed in one direction, then all parts should be laid out in one direction. Look at the fur from different angles - the direction of the pile may not be obvious. We will cut with a blade. I tried both a stationery knife and a special knife for leather - it didn’t cut. You can cut with scissors, carefully trimming the fabric so as not to touch the pile.
Everything is covered in wool! Even sandwiches the morning after cutting. We continue making faux fur coats. Start here. To my great regret, it was not possible to use fur as a lining. The thickness of the fur coat was incredible. During the fitting, I looked like a hut on chicken legs. The next day I had to go out and buy a regular lining and wool. Now in our city only one type of sherstepon is sold - thick three-layer, plump like padding polyester. It is quite likely that even with such a lining I will look like a hut (I don’t try it on anymore, so as not to be upset). I remember that previously there was a thinner wool wool on sale, like batting, only lighter. Get to the point! After cutting and fitting the fur, we make the necessary adjustments. I had to reduce the width of the product a couple of times around the chest and hips. I left the sleeve width and armhole depth the same. Don't rush to cut off too much at once. It’s better to sew it in about a centimeter and a half and try it on. If the lining is quilted, be sure to try it on together with the lining. Transfer all changes in the cut of the upper part of the fur coat to the pattern. And according to the pattern, trim the lining. Since I’m unlikely to wash my fur coat, I simply ironed the lining (decatting). We fold the lining in half, pin the patterns, trace along the contour of the pattern, and draw allowances for the seams. I usually add 1.5 cm, and 4 cm for the hem.
Now the quilting process: 1. Draw out the cut details that we will quilt. Note that the more frequent the stitch lines, the stiffer the finished piece will be. 2. Place the cut parts on the wool. We often pin details along the contour and stitch lines with tailor's pins.
3. Cut with allowances along the contour of the part of 2.5–3 cm.
4. We adjust the cut on the sherstepon along the contour, retreating 0.5 cm from the edge. Stitch length is maximum.
5. Carefully trim off the excess insulation.
6. Quilt the cut details along the drawn lines, holding, stretching and, at the same time, moving the fabric under the foot.
7. Remove the pins. Assembling the lining: sew the shoulder seams, side seams and the middle sleeve seam. We sew the sleeve into the armhole. Whoops!
I forgot to say that in the middle seam of the sleeve it is necessary to leave 20 cm unsewn; through this hole we will turn the fur coat inside out. Now we change the needle to No. 90, and the threads to No. 40 (when sewing the lining, we used a needle No. 70 and polyester thread No. 60). We assemble the top according to the same scheme: 1. Sew the shoulder seams. 2. Sew the sleeve into the armhole. 3. Sew the side seam of the top and, at the same time, the middle seam of the sleeve. When pinching, sweeping and grinding the seams on fur parts, carefully tuck the pile inward. I do this with scissors.
The bottom of my sleeve is decorated with a cuff made of knitted elastic. The collar is also made from it. Therefore, the next step is to sew on the knitted cuffs (already sewn along the middle seam) and the collar.
Next, check the length of the sleeves of the top and the lining. They must be equal. We insert the lining into place and check by holding it or attaching it in the shoulder area. Now we will connect the top with the lining. Be careful and attentive. 1. Sew the lining to the collar on the other side. 2. Turn both the top and the lining inside out. In order not to turn the sleeves over, we apply the top and lining with the shoulder seams and sleeves facing each other,
We cut off the bottom of the top sleeve and the lining along the middle seam face to face.
This is the result:
3. Check the length of the lining and the fur part at the bottom. Since I have a fur coat with a zipper, the lining is 4 cm shorter than the top. We sew the bottom of the parts face to face. 4. We check that the lengths of all seams match: we apply shoulder, side, and middle seams to each other. 5. Pin, baste and stitch the zipper to one side of the top. We begin to sew the zipper, stepping back 4 cm from the bottom. 6. Fasten the second part of the zipper to the already sewn part. We mark control points on it with chalk. This could be a line of a yoke or a belt. For me this is the sewing line for the collar. 7. We pin the second part of the zipper along the control points and between them, baste, and grind. 8. Pin the middle seam of the front lining to the zipper, matching the control points, and basting.
Sew along the top of the product, along the already laid seam, using a zipper foot. I have a zipper from top to bottom. We'll do the final finishing of the fur coat next time. Please, if there are any ambiguities or questions, ask in the comments. I'll be happy to answer.
Let's finish working on our fur coat. To make the lining one piece with the top: 1. Sew together the seam allowances for the collar of the top and the lining. Straight from zipper to zipper. Ideally, as if “iron” - unfolded, so that the seam is thinner. The fabric is thick, I sewed it by hand. 2. Sew the cuff seam allowances. 3. Sew the seam allowance on the sleeve of the top and lining in the shoulder area. It is more convenient to do this using a lining ribbon 5-6 cm long. We do the same in the side seam area.
4. Attach the hem of the bottom of the fur coat by hand in the area of the side seams. The fur cannot be pulled out through the sleeve due to its thickness. I ripped the seam between the fur and the lining along the bottom (35 cm between the side seams), turned the fur coat onto my face, then pulled the bottom through the unstitched area of the sleeve and stitched it. Now we attach, to be sure, the hem of the bottom also in the middle area. 5. Sew up the hole left in the sleeve right at the top.
The fur coat is ready! Please, if anything is unclear, write to me in the comments. I will be happy to help you!
We sew a short fur coat from faux fur
For sewing you need 2 meters of fur material (according to your taste and color) and the same amount of fabric for the lining. Main stages of work:
- We form a pattern and cut the fabric according to the design;
- We cut out two shelves, a back and sleeves;
- We connect the back and front shelves by forming a shoulder seam;
- We fix the sleeves with pins and carefully sew them in;
- We make side seams along the body and seams at the bottom of the sleeve;
- We duplicate the process with lining fabric;
- We sew the seams of the main and lining material around the neck, front and central parts of the fur coat;
Important ! At this stage, leave the lower part unstitched, then turn the fur coat inside out and finish the job.
- We sew the sleeves with an allowance of 2-2.5 cm;
- The fur coat is ready.
Attention ! If desired, you can install fittings at the stage of connecting the base material with the lining.
Step-by-step launch instructions
- Registration of individual entrepreneurs. To conduct any activity in Russia, you must register an individual entrepreneur with the tax authority. It will take approximately two weeks, the cost will be 800 rubles.
- Purchase of equipment and fur . You can order the necessary goods in advance. This will save time and get the finished product faster.
- Sewing . On average, it takes a professional a couple of days to make one faux fur coat. To begin, make one or two models of each option.
- Implementation. It is best to contact small private luxury salons that will take the goods for sale. It is also recommended to actively promote your brand on social networks. This will give you the opportunity to save on commissions.
Pattern of a fur coat with a stand-up collar
The model is of medium length, slightly widened towards the bottom. Both natural and faux fur can be used for sewing. In total, you need about 2.5 meters of base and lining material, fittings, and decorative elements (if desired).
Attention ! All parts of the top must have the same pile direction. Paired parts should mirror the pattern. When working with faux fur, we cut only the woven part; when working with natural fur, we cut the inner part. We don't touch the pile.
Main stages of work:
- Cut out 2 shelves, back, collar, 2 sleeve parts;
- Duplicate the details for selection. In this case, the length of the hem at the bottom increases by 6-10 cm;
- According to the markings, cut the shelves into 2 parts. The upper part is cut separately;
Important ! Pay attention to the allowances: shoulder, side, vertical seams of the sleeve, at the stand - 1 cm, at the bottom of the sleeve and fur coat - 4 cm.
- The layout of the patterns when working with faux fur is slightly different.
- We connect the upper shoulder seam: the shelves and the back of the back;
- We sew in the sleeves and sew the remaining parts;
- We form the lining according to the pattern;
- We connect the parts, install the fittings, turn the fur coat inside out and sew the bottom.
This is interesting: Pattern of a fur coat or fur coat
How to calculate the required footage for a fur coat?
To understand how much material is needed to sew a fur coat, you need to decide on its style - will it be a fur coat to the knee or below, or maybe a flared sheepskin coat?
To calculate the footage for the manufacture of a product, the following parameters must be taken into account:
- The length of the product, which is determined from the top shoulder point to the preferred length.
- The length of the sleeve is also determined from the top point of the shoulder to the desired length.
- Product style. For example, if a fur coat is planned to have a straight or slightly flared silhouette, with a size of 42-48 and a canvas width of approximately 150 cm, then one length of the product will be enough. For sizes starting from 50, two lengths are taken. For a fur coat with a large flare or wrap, two lengths are needed, regardless of size.
- For all decorative and structural elements, such as a hood, collar, belt, approximately 0.5 to 0.8 m of material is required, depending on the size of the elements. The linings in fur coats are made quite rarely, but sometimes they are still made of suede or leather, or a one-piece lining is made. Most often, the lining goes to the very edge of the product, while the fur is tucked inward. Elements such as a patch pocket are cut out from the remnants of the main material.
- Allowances for processing seams, and, in rare cases, for shrinkage of the fabric, range from 10 to 20 cm.
- If the product is planned from different types of fur, then for each of the parts the footage will be calculated separately; for this it is necessary to take the height of these parts.
- The lining footage is calculated based on the length of the product plus the length of the sleeve.
About the technology of sewing a fur coat or sheepskin coat using a pattern
Sewing fur products begins with preparing the pattern. For sewing, you can use a ready-made pattern for a fur coat or sheepskin coat, or you can borrow a drawing from the Internet. But it’s not difficult to make a pattern yourself.
Basic Rules:
- Each cut piece must match in the direction of the pile.
- Parts of each part must be mirrored;
- Symmetrical design in detail is required;
- Only the base of the fur is subject to cutting (the pile is not cut).
Cutting a fur coat begins with modeling the back (1 part) and the shelves (2 parts). A sleeve pattern is created (they can be single-seam, straight or flared). And then the collar or hood is cut out. A collar pattern, for example, for a mink coat is not difficult to construct. The hood will require diligence.
You may be interested in this: Patterning and sewing beautiful clothes for small dogs
About sewing a children's fur coat
The material from which fur coats for children are made is inexpensive fur, in the shape of a rabbit, squirrel or cowtail. Sewing a small fur coat is not a painstaking and time-consuming process. Of course, there are features. For example, the width of the sleeves - they should be tailored taking into account the child’s mobility. But the width is normal, not “flying”, so that the baby does not freeze. The length is also averaged.
The pattern is initially made from thick fabric and is pre-basted. The “preliminary model” is tried on the child. And only taking into account the shortcomings and their corrections can the pattern be transferred to fur fabric. It should be noted that higher quality fur is used to sew sleeves and collars. Seam allowance is allowed at least 0.4 mm. You should leave up to 2-3 cm for the hem. Next, the process of sewing the product, which includes:
- sewing fasteners;
- stitching of side seams;
- lining hem;
- sewing shoulder seams;
- sewing on the finished collar;
- sewing in sleeves (together with lining).
A wonderful fur coat for the baby is ready. It's safe to say that your baby will be warm in winter.
How to buy a beautiful fur coat, an original down jacket that fits your figure, with savings of up to 40%?
Sew it yourself! To do this, just use detailed full-size patterns from the GRASSER online store.
We offer you to buy patterns of fur coats and down jackets at an affordable price:
- fashionable original models - they are developed by our craftsmen, inspired by the latest fashion shows and collections of the world's leading designers;
- from simple to complex levels of sewing - both experienced craftswomen and novice needlewomen will find patterns for themselves;
- for the entire popular size range - from size 38 to 54 - and the main height groups;
- with detailed descriptions that will help you sew a quality item and learn the techniques of professional tailoring.
Preparing the skins
This is perhaps the most important stage in cutting a fur coat from natural fur. Its further quality directly depends on the preparation of materials. Be as careful as possible.
Cut the skin using a furrier's knife. Try not to damage the pile. Carefully get rid of everything unnecessary: head, paws and tail. Then the defective areas of the flesh and pile are eliminated. Leave two to four centimeters as reserve for the hem areas.
The skins are laid skin side down for about an hour. Before this, they are carefully moistened so that water does not get on the fur. Next, they are turned over, stretched flat, and the edges are secured with thin nails or staples.
After the skins have dried, they are placed on the pattern. All fibers should be directed in one direction, and fur shades should be combined with each other. The skins are pricked and then the excess is cut off from the skin.
Recommendations for cutting
If everything is clear with the patterns and they are made correctly, you can start cutting out the parts. Accuracy is also important here. The material should be laid out fur side down on a dry, flat surface. The fabric should be laid out in one layer. It is better to make extensions on parts with bends.
Fur coat pattern
Unfold several elements:
- Back: solid or made of two composite shelves;
- two front shelves;
- two sleeves;
- two parts of a hood or gate;
- two cuffs (if provided).
Each pattern is pinned to the fabric and outlined with tailor's chalk. Taking into account the necessary allowances. Then the parts are carefully cut out along the contour. The scissors must be sharp, otherwise you can damage the fur. You must cut strictly in the direction of the pile.
How to choose a quality case
Covers made of cotton, velvet and spunbond
The first thing you should pay attention to is the size. The fur coat should be placed freely in it, without folds or bends of the fur. See how the side insert is made. The longer the fur, the wider it should be. The length should also correspond to the length of the fur item and even slightly exceed it. There should be 10 to 15 cm of free space at the bottom, so it is better to purchase a long cover. Standard length available:
Read more: DIY chair headrest
It is important that the anti-moth cover is made from natural fabric. Give preference to cotton or linen. They will provide maximum air access, but at the same time the fabrics are dense enough to make the product dense and durable. Sometimes non-woven polypropylene material is used, which also allows free air circulation. The classic color is black or brown, for white fur – blue.
The zipper must be sewn along the entire length. Manufacturers of cases provide special reinforcement to provide protection against ruptures, which most often occur in the lightning area.
Prices and stores
If you don’t have the time or desire to sew yourself, you can choose a stylish model in one of the many stores. We have specially made a small selection with a large assortment of fur coats.
| Shop: | Prices: | Website: | For what type of fur: | Colors: | Dimensions: |
| Only Mi | 14 000 — 30 000 | only-me.ru | Karakul, Lama, Fox, Mouton, Mink, Chinchilla | burgundy, yellow, brown, blue, white, purple, black, pink, gray, colored | 42 — 62 |
| Anse | 10 900 — 22 900 | anse-shop.ru | |||
| Fur Factory | 11 000 — 14 000 | eco-furs.ru | |||
| Fur Eco | 10 600 — 15 000 | mex-eco.ru | |||
| Eco fur coat | 8 500 — 16 500 | ekoshubka.ru | |||
| Eco fur | 9 900 — 18 000 | ivmeh.ru | |||
| Eco Fashion | 4 800 — 14 000 | ef-shop.ru | |||
| Artfur | 6 780 — 9 720 | artfur.com | |||
| Woolplus | 5 900 — 13 450 | woolplus.rf | |||
| Eco-fur coats | 10 500 — 19 500 | ecofur coats.rf | |||
| Damine | 6 500 — 22 500 | damine.ru |
Excellent 0
