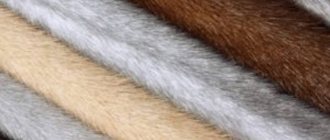
Home→Fashion→Faux fur collar pattern. Collars, stoles, fur boas
One of the most popular accessories for the winter season is a removable fur collar. Moreover, you can sew it from faux fur of a variety of colors and textures, and wear it not only with outerwear!
A lined faux fur collar is ideal for everyday ensembles - sewing it yourself with our master class will not be difficult.
It is better to decorate an evening or cocktail dress with a collar made of natural fur, albeit small.
To prefer long- or short-pile fur, plain or “predatory” lining depends on your style and image.
YOU WILL NEED:
✽ Faux fur (40x20 cm), ✽ Lining fabric (40x20 cm), ✽ Ribbon 60 cm long, ✽ Paper pattern, ✽ Ruler, ✽ Pencil, ✽ Marker, ✽ Scissors, ✽ Cutter, ✽ Tailor's pins, ✽ Needle and thread for sewing
WHEN SEWING A REMOVABLE COLLAR, PAY PROPER ATTENTION TO THE LINING OF THE COLLAR.
STEP 1
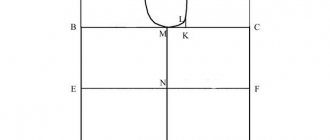
At a distance of 9 cm below the top line of the collar, draw a parallel line. Set aside 2.5 cm from the mid-front line along the bottom edge and connect this point to the end of the dotted line.
Transfer the contours of the pattern to the wrong side of the fur and cut it out. In this case, cut only the woven base without touching the pile!
Cut out the lining and stitch it to the fur. Before this, pin ribbon ties to the upper corners. Attention: fold the fibers at the seam allowances inward.
The removable fur collar has become popular again. And, as it turned out, in our weather it is a very convenient thing. And the good thing is that you can make it yourself, and a little creativity will make your outfit unique. Watch the step-by-step instructions and do it!
Uncover
Advice
: when you baste and stitch, tuck the fur fibers that come out with a needle inside.
- You can cut the fur with a rotary cutter, scalpel or razor blade.
- Before stitching, connect the parts with pins with plastic heads, positioning them
- perpendicularly, and not along the stitching line, to prevent the parts being sewn from shifting.
- Carefully pull any lint caught in the seam with a needle onto the front side of the fur.
Wedding capes for the bride
An indispensable attribute for a bride during the cold weather season are wedding capes, because not all celebrations can take place in the summer; the bulk of them fall in the fall. Such capes, created using warm materials, ideally complement the wedding attire of the future wife. Capes fit so well into wedding fashion that they began to be made using lighter materials and worn in warm weather. They demonstrate the nobility, grace, and beauty of the bride, emphasizing her modesty and purity. The main thing in choosing it is to choose the fabric and style that matches the dress.
Detachable collar with scarf
Look how beautiful it looks with a scarf! In an instant you will create an amazing image, and most importantly, you will be very comfortable.
How to make this product with a scarf? Watch the video first
First you need to sew belt loops on the wrong side of the collar. Then fold the scarf into a “tie”.
Then pull it through the belt loops on the wrong side. And that’s it, the fashion accessory is ready.
Dear women. Be sure to sew yourself a removable fur collar, this fashionable thing.
We sew a collar.
A sewn collar, no matter how well it is cut and connected correctly, always has a somewhat irregular shape.
To level the surface of the collar and obtain the exact shape of the collar, it must be “tightened” according to the pattern on a wooden board. If the fur is expensive, then before straightening it is necessary to sew a braid along the edge (ridge) of the collar in order to 1) not spoil the fur with nails; 2) do not subsequently cut off the ridge, the best part of the skin, when trimming according to the finishing pattern. Next, when finishing the collar, the braid is either paired or left for later use when sewing the collar. The next stage is moistening (see Moistening and curing). Then, using chalk on the board, we outline the contour of the pattern with a small allowance along the entire contour (0.5 - 1 cm), the so-called “working” pattern. We lay the moistened and cured collar cut on it. Usually - hairline down. But, if the fur is expensive and beautiful, so as not to wrinkle it again, they are laid with the hair up. We secure the collar to the shield with nails, trying to align it exactly with the pattern. If excess is formed in some places, then by nailing the nails you should make a fit (“wrinkle”), and if there is a deficiency, stretch it to the desired size. The distance between the pegs is 0.5 - 1 cm. After stuffing the collar, dry it for at least a day. Then we remove the dried collar cut from the board and accurately trim the collar according to the finishing (control) pattern. At the same time, we try to trim as little as possible along the ridge. If the cut was stuffed with the hair down, then after removing it from the board, the hair must be carefully “smoothed”, that is, given its natural direction - first we comb it with a metal comb, then we smooth it over the hair with a damp brush and, when it is completely dry, we comb it again. Mink skins are combed and smoothed against the hair so that the fur becomes fluffy and light again. Our collar cut is completely finished and finished. Depending on the type of fur and the type of “collar” (fur, coat fabric or lining), fur collars are processed differently. I give only the basics, but for the rest there is no limit to your imagination, including the technology of sewing a fur collar. 1) Collar and collar made of fur.
a) On a collar made of any fur with thin and medium core (astrakhan fur, fox, mink, nutria, etc.), we fasten thin cotton fabric (calico, calico, chintz, etc.) to strengthen it.
We cut out the fabric 1 cm more along the contours than the collar, so that later we can bend the edges - “to the side”. Having placed the fabric on the collar, we first fasten it onto the flesh with oblique basting stitches 1-1.5 cm long. We do not pierce the flesh through, but only grab it. Then we side the fabric 1mm less than the collar. We also fasten the fabric onto the fur collar, and then attach a padding made of trim, non-adhesive interlining, etc. to the fabric. (for the shape stability of the collar) Having folded the collar and collar with the fur inward, we fasten them in several places and sew them together with a furrier's stitch, placing the upper (larger) collar. The upper collar is usually cut out larger than the lower collar by about 1 cm around the entire perimeter. We do not make seam allowances, since furrier seams practically do not require them. Then turn it inside out. b) On a collar and collar with thick leather fabric (mesh), do not fasten the fabric, but only lay the edge along the cuts of the collar so that the edge does not stretch. A gasket is fastened onto the collar. c) If the flesh is very thin, weak, and the fur is cheap, then the fabric can simply be glued to the flesh (Moment, Unicum, rubber glue, etc. - as long as the flesh remains soft together with the glued fabric, and does not become "cardboard") By no means PVA and the like! In this case, we cut the fabric exactly according to the pattern of the collar or 0.1 cm less. We do the same when repairing an old collar with completely crumbling core. 2) Collar made of fur, collar made of coat fabric.
If the collar is cut exactly according to the pattern (without seam allowances), then we fasten (or glue) a gasket onto it flush with the fabric.
Or we first strengthen it with a gasket, and then cut it out together with the gasket exactly according to the pattern. We attach batting or padding polyester to the gasket. We “cover” the collar with a fur collar, fold it over and sew it with invisible stitches. In this option, it is advisable to provide hem allowances for the fur collar. If the collar is not made of coat fabric, it is advisable that it be in color to match the fur. 3) Collar made of fur, collar made of lining fabric (removable collar)
I’ll tell you, if possible, later, when we talk about making gorgets and stoles with a lining. Since their technology is essentially the same. Also, later, I will try to add drawings.
We sew our own turn-down collar from fur. In this article we will look at how to easily and simply sew a beautiful turn-down collar from fur. An ideal addition to an expensive jacket with a white shirt or a beautiful decoration for a coat or blouse. However, options for creating a stylish look with a fur collar are a separate topic, but now the master class itself: 1. Preparing the pattern The attachment contains a pattern in several parts. It must be printed so that each drawing is printed on a separate A4 sheet. Next, cut out and glue all the parts into one pattern. We cut out the finished pattern on an unnecessary piece of fabric and try it on ourselves. We check that the pattern fits in size and, if necessary, adjust the pattern to suit your taste. So, for example, you can lengthen the collar a little down or widen it at the bottom. We redraw the new pattern on new paper. Having received the final version of the pattern, 2. Select and calculate the amount of fur. We will need two sable skins or two marten skins with an average length from the ears (not counting the tail) of 30-40 cm (can be longer, but not shorter than 30 cm). 3. Correcting the skins Turn the skins inside out and cut with a blade or furrier's knife along the tummy along the entire skin from top to bottom. Cut off the tail, paws and muzzle. We edit our skins as in the article: https://vk.com/topic-63526505_29852440 We make a solution, blot the skins and leave them to soak. At this time, we take a board for editing such that our entire collar pattern fits on it. We trace our paper pattern along the contour on the board. In the process of stretching the skin, we immediately tilt the skin. That is, for the first skin we pull the right side more strongly, and for the second skin we pull the left side. When we nail the stretched skins onto the board, we immediately try to position them as much as possible along the contour of the pattern so that the skin goes in a semicircle, and only the edges of the skin stick out beyond the pattern (we will then cut them evenly). We form folds on the skin from the inside of the collar, which we also fix with nails or staples; in the future, these folds will become our tucks. Let the skins dry for a day. 4. Cutting out and sewing When the skins have dried, we first mark our tucks and tucks on the skins, and then remove the skins from the board. Next, we sew up the darts, and then cut out two parts of the collar from the skins and sew them together with one seam in the middle. It turns out that we use two backs for sewing, we cut off part of the bellies, and the middle seam of the collar is connected along the cut line of the muzzle. (I note that this is only one of the many options for cutting and arranging the skins; in the future we will consider many others.) 5. Sew on the lining, ribbons and brooches. We sew an edging tape around our fur collar (more information about the tape here.
Once you start, win!
This page is dedicated to my work with silver fox fur.
Fur is, first of all, beauty and tenderness from the softness of the pile and warmth, comfort, grace of lines...
Fox fur is beautiful, both in itself and in products.
One page on this blog has already been created by me:
However, the description there is not as detailed as it will be here, although the technique is the same...
In my practice, I have already made collars/boas from silver fox fur several times.
There was a conversion from a hat with earflaps into a boa.
To do this, I ripped open the hat and trimmed the edges of the fur to ensure that the seams were evenly connected to each other.
I selected the fur according to the pile and color and put everything together... The other was a boa made from the lining of a coat for the hood.
Namely: the quilted coat had a lining on the hood made from pieces of silver fox.
The coat itself was of some kind of underground production. Bottom line: the fur lining was of very poor quality, and my friend expressed a desire to remove it completely and replace it with just viscose, and put a real fox on the lining, which I subsequently did.
And the lining itself, made up of embroidered silver fox skin (belly) with a one-piece cut with a edging on the hood, was left for me to throw away, i.e. in the trash... I felt sorry for the fur itself, although it was overdried and old, it still had the appearance...
And now this piece, incomprehensible to me, was restored, recut, altered, placed on a lining, and out came... a silver fox boa:
We sew a collar from silver fox fur with our own hands.
For this you will need:
- A knife for cutting flesh - water - a black pen/pencil - scissors and needles for handmade work - strong threads in the color of the flesh (white) - a board for stuffing fur. This can be a sheet of plywood no thinner than 10 mm (1 cm) - a template/collar pattern. It can be removed both from the product itself (if you want a collar specifically for a particular product), and from any type that you want to make.
In collars made from both red and silver fox furs, the direction of the pile is observed from the ends to the center, i.e. half skins, cut along the ridge exactly in the middle
Connect with the rump sides (back).
Sometimes, to make the fur join more beautifully, they also insert a piece of leather (1 cm) or fur between the rumps (as I did)
But first, these halves of the skin need to be prepared, and then work with them.
To do this, use the skin itself, if it is a stocking. turn the flesh side up,
Cut down the middle of the belly
The front paws are removed using a “fish” cut.
The tail is cut off: you can have one tail, or you can already have a small part (1-2 cm) of the rump, - the ridge line is outlined,
They sew up the slits from the paws: you can use a furrier’s machine, but at home there is such a hand-made furrier’s stitch, a stitch over the edge, where through the puncture the stitch itself is made in one place, it turns out: 1- 2 -2-1-2, etc...
Then you can first moisten the skin and let it sit, and then put the skin itself on straightening, or you can first cut it along the ridge and work with separate halves of the skin.
Caring for a fur scarf
In order for this headdress to please you for more than one season, you need to remember a few rules of care:
- Do not wear such a headscarf in wet weather; not only rain, but also wet snow will damage it.
- Immediately when you return home, shake the fur thoroughly and remove any remaining snow or frost.
- Let it dry well and hang out.
- Comb dry fur with a brush.
- Store the scarf so that it does not wrinkle.
- If you have sewn a product from a real Pavlovo Posad scarf, then do not wash it, take it to the dry cleaner.
Scarves, shawls, scarves with fur trim are not only warm, but also incredibly beautiful, and they are easy to make yourself.
Almost every woman has mink and fox hats, which have gone out of fashion. Using them, you can create a completely new, up-to-date accessory. Boho dress models
Knitted hat for a boy
