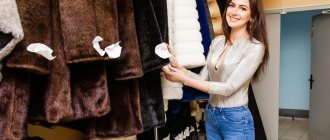
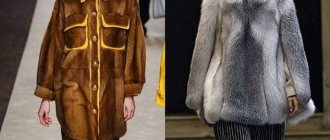
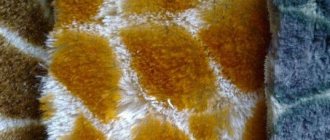
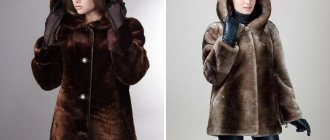
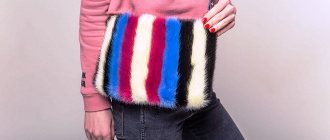
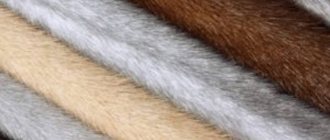
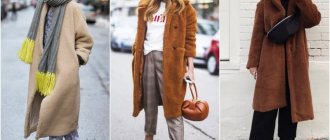
Today women prefer faux fur coats. Some out of love for animals, and some simply to save money. And this trend was quickly picked up by designers, offering fashionistas a huge number of fur options for raccoon, mink and fox. And taking into account the use of new technologies, the result is a rather believable pile, pleasant and soft to the touch, with a beautiful shine and even with high wear-resistant qualities, similar to natural fur.
If you have tailoring skills, you can easily learn how to sew from faux fur. Patterns, tips for making and will be discussed further.
Product template
The pattern of a faux fur coat with a hood should have a minimum number of details. Firstly, it will make the work easier, and secondly, the product will be more beautiful. To build a template, you will need the following measurements: chest circumference, hips, chest height, length from shoulder to waist, product length, back width, front width.
The pattern of a faux fur coat with a hood is constructed as follows:
- Draw a rectangle with sides where the length is equal to the measurement from the shoulder to the hem, and the width is ½ the chest measurement, the allowance for a loose fit is from 7 to 10 cm.
- A neck appears in the right and left corners of the drawing. To do this, step back 9 cm from the vertical to the side and deepen from the back by 1.5 cm, and from the side of the shelf - by 5 cm.
- The cuts of the shoulder seams are outlined, equal to the width of the shoulder +3 cm, lowered to the edges by 1-1.5 cm to the edge.
- Along the chest line, which is located below the upper side of the rectangle in accordance with the “chest height” measurement, the width of the back + 1/3 of the increase is noted, and on the reverse side the width of the front + 1/3 of the increase for a loose fit.
- Next, close the armhole with a smooth line.
How to make a fur coat pattern?
In order to correctly calculate the parameters of the future product in full size, you must take into account the following:
- Determine the length of the fur coat - the distance from the upper shoulder point to the selected point;
Attention ! When creating a pattern for a short fur coat, use a line 10 cm below the waist or the middle of the hips as the extreme point. When working with a straight fur coat, its length can reach the knee or even lower.
- When creating a fur coat sleeve pattern, you need to measure the distance between the shoulder point and the selected sleeve length;
Important ! When creating a pattern for a bat-style fur coat, it is necessary to take into account that the loose sleeve style implies a rounded bottom seam, which goes into the side line.
- Forming a silhouette. For a fur coat of size 42-48 and any style, you need a fur fabric 147-150 cm long. When building a fur coat from size 50, you need a fabric of 2 lengths. For a bat style of any size, you also need 2 lengths of fabric;
- If the fur coat pattern includes a hood, then the size of the fabric used increases by 80 cm. The presence of a stand-up collar increases the footage by 50 cm. And when patterning patch pockets, there is no need for additional footage. The pieces that remained when forming the sleeves or shelves are quite enough;
- Allow at least 10 cm for allowances and seams;
- When combining different types of fur (natural and artificial material), the calculation of the required amount of footage is determined separately. The main emphasis is on the height of the parts.
Construction of the sleeve
A fur coat pattern made from faux mink or other fur should have a sleeve with a low edge. The construction of such a drawing can be based on the armhole or can be built separately on the triangle, taking into account the length of the cut of the base armhole. A more accurate way is to build along the armhole.
For it, you should cut out the cut details developed in the drawing, combine the shoulder seams and transfer the main lines of the armhole to a separate sheet.
Next, measure the circumference of your upper arm and add a few centimeters for a looser fit. After this value is transferred to the drawing, it should pass along the chest line.
You should also determine the middle of the armhole cuts along the front and back flanges. The sleeve cap is drawn 1 cm above the armhole line at the top, then strictly along the cuts to the set midpoints, and then rounded and tapered to the base on the chest line, connecting with the extreme points corresponding to the segment defining the circumference of the upper arm.
Hood-collar in the neck
Here is the construction of the hood with the edge extended into the rim. Lyubasha, it’s normal to have different hair directions on the hood and the brim. Don’t worry so much))) After all, the collars are not cut with the hair down, like on a fur coat, but since it is most appropriate for the appearance of the collar... Well, for a full-fledged hood, I don’t even know if it’s enough... Even if you embroider this collar, then the back the hood still needs to be made from something...
The hood must be sewn exactly to the head, so that it does not hang over the forehead or fall back. In addition to this, its bottom edge must exactly match the width and depth of the neckline. However, if you cut out the hood using this measurement, it will be too small for you, so add from 8 to 20 cm to this measurement (depending on how loose you want the hood to be).
Construction of the hood
The faux fur coat pattern with a hood can be constructed with two hood options. The first is a hood sewn along the neck line, and the second is a hood coming out of the front shelf. The latter looks better and is more comfortable to wear.
To build a template for this cut detail, you should take two measurements: head circumference, the value from the base of the neck at the back through the top of the head and to the base of the neck at the front of the model. Afterwards, in accordance with the measurements, a rectangle is built with sides equal to ½ of the obtained values.
For the first option of attaching the hood, you should round off the upper right corner, bevel the part to the bottom of the right side by 5 cm and, along the base of the hood, raise it at the back of the head by 3-4 cm.
In the second option, you should take the shelf and determine at what level the hood will be sewn. To do this, you can simply wrap the template, as when turning a flap on a jacket, and cut off this part. Afterwards, this element needs to be glued to the drawing of the hood so that it continues the open cut near the face. The remaining manipulations with rounding at the top of the head and inflating at the back of the head are identical.
What can you sew from faux fur with your own hands?
Warm, beautiful outerwear from fur coats to vests, durable and wear-resistant hats, visually very attractive decorative items and individual elements of any textile products (for example, fur sewn to the hood or on the collar of a coat, or pieces of fur in the trim of skirt pockets) - here only a small list of models that require synthetic fur on a knitted basis. Do you want a jacket? Please! Would you mind giving up a sheepskin coat, a fur coat and a coat? There are a lot of options for sewing warm and spectacular models.
Cutting the product
The pattern of a faux fur coat with a hood should be gradually transferred to the canvas. In this case, you should monitor the pattern on the material, if any, and the direction of the pile. First, all elements need to be outlined. Here you can use a pen or felt-tip pen. The parts should be cut out with allowances of about 1 cm. For this purpose, you will need a sharp tailor's knife. If scissors are used, then the pile should be separated well so that bald spots do not form at the junction of the parts.
What do you need to sew a fur coat?
First of all, you need to buy materials for work:
- Natural fur is the most expensive material. Products made from natural fur always look impressive, but require special skills, knowledge and professional equipment;
- Faux fur as a more affordable alternative to natural material. Working with a solid piece of fur fabric will be easy even for sewing enthusiasts. In this case, you can always combine natural and artificial materials. For example, use natural raw materials to cut collars;
- The base from an old fur coat is the most popular raw material for new clothes. But, you should always understand that any fur can have a certain period of operation. Therefore, all worn areas cannot be used when sewing a new item and will have to be removed during sewing.
Natural fur (animal skins) are purchased exclusively in specialized stores. If you want to save money, you can turn to fur factories. There are not many skins on the market, so they are often pre-ordered, otherwise the cost of raw materials will be inflated.
But artificial raw materials are quite accessible. In any fabric store you can find a variety of “natural” fur in a wide range of colors and types. The ready-made patterns presented below can be used for both natural and artificial raw materials.
The lining is simple satin , as the most classic option. But, you can use a quilted lining made of combined fabrics. This material is characterized by strength and acts as additional insulation. But satin looks more beautiful.
In addition to the material, you need to stock up on tools for work:
- Sharp scissors;
- Hairpins or clothespins (necessary for fixation). Their benefits will be appreciated by that category of seamstresses who preferred natural material;
- Punching pliers for installing accessories;
- Hammer with cloth winding (necessary for breaking or softening seams);
- Special triangular needles;
- Comb brush for combing fur;
- Chalk (soap) to mark markings;
- High-quality accessories: hooks, buttons, straps, ties and so on.
Need to know! Working with fur material is not so easy.
The work is hampered by the pile and characteristics of the skin (hide). Therefore, some craftswomen use a scalpel or a simple blade instead of scissors. Good sharpness of the tools will allow you to make confident and fast movements when cutting the material.
Assembly steps and lining design
The lining fabric is cut according to the same patterns, excluding the size of the edges from the details. Assembling the product should begin with stitching the shoulder seams, then sew on the sleeves, hood and close the side sections. Next comes work with pick-ups and zippers. The lining is assembled in the same order, the only thing is that the seam in one sleeve is left open. The lining is sewn to the lining and, turning the product through the sleeve, the lower section of the base and lining is sewn. To stabilize, use non-woven fabric and hand-baste the fold so that the fold holds well.
General nuances of working with faux fur
• Choose the simplest models without darts, gathers or folds. Even experienced seamstresses do this - fur is completely self-sufficient. • When making clasps, avoid welt loops, opting for cord or leather loops, hooks or clips. • Duplicated faux fur loses its plasticity, so it does not need to be duplicated with adhesive materials. How to insulate synthetic fur models correctly? We recommend using a lining made of a layer of synthetic padding and fabric with a windproof effect. • Sometimes the pile becomes wrinkled; to smooth or straighten it, you can use a dry iron at low temperature through an ironing machine. • If the fur on the item is matted, use a brush or comb to return it to its original shape. Now you know how to work with trending material. Our catalog presents different types of textile materials that imitate natural fur, foreign production, as well as other fabrics for the manufacture of outerwear. Every crafter will find here the right materials for any sewing project - we can handle any request!
Practical advice
The pattern of a fur coat (short fur coat) with a hood must have an allowance for a loose fit, otherwise the product will be uncomfortable and will hinder movement when worn. Some craftswomen cut off the pile at the joints to make the seams softer. It is better to do this after stitching, after the curled pile has been pulled out with a thin crochet hook.
Such a voluminous work can be done by a diligent craftswoman. A little perseverance and you will end up with a chic fur coat or jacket. The ideas, patterns and stages of work presented in this article will help you navigate and break down the manufacturing process into stages. And the result will be a chic new product of your own production.
About the technology of sewing a fur coat or sheepskin coat using a pattern
Sewing fur products begins with preparing the pattern. For sewing, you can use a ready-made pattern for a fur coat or sheepskin coat, or you can borrow a drawing from the Internet. But it’s not difficult to make a pattern yourself.
Pattern
Basic Rules:
- Each cut piece must match in the direction of the pile.
- Parts of each part must be mirrored;
- Symmetrical design in detail is required;
- Only the base of the fur is subject to cutting (the pile is not cut).
Cutting a fur coat begins with modeling the back (1 part) and the shelves (2 parts). A sleeve pattern is created (they can be single-seam, straight or flared). And then the collar or hood is cut out. A collar pattern, for example, for a mink coat is not difficult to construct. The hood will require diligence.
You might be interested in this: Constructing a pattern and sewing an owl pillow from felt or fabric
About sewing a children's fur coat
The material from which fur coats for children are made is inexpensive fur, in the shape of a rabbit, squirrel or cowtail. Sewing a small fur coat is not a painstaking and time-consuming process. Of course, there are features. For example, the width of the sleeves - they should be tailored taking into account the child’s mobility. But the width is normal, not “flying”, so that the baby does not freeze. The length is also averaged.
Children's version
The pattern is initially made from thick fabric and is pre-basted. The “preliminary model” is tried on the child. And only taking into account the shortcomings and their corrections can the pattern be transferred to fur fabric. It should be noted that higher quality fur is used to sew sleeves and collars. Seam allowance is allowed at least 0.4 mm. You should leave up to 2-3 cm for the hem. Next, the process of sewing the product, which includes:
- sewing fasteners;
- stitching of side seams;
- lining hem;
- sewing shoulder seams;
- sewing on the finished collar;
- sewing in sleeves (together with lining).
A wonderful fur coat for the baby is ready. It's safe to say that your baby will be warm in winter.
Hood pattern with clasp
Using this measurement, you will draw the front line of the hood (face) on a paper pattern. If you want to sew a hood that fits the head, use a measuring tape to measure the distance from the tragus (the protruding cartilage above the lobe) of one ear to the other. If you want to sew a loose hood, measure from one outer end of the brow bone to the other. You will need to “adjust” the pattern to the neckline of the product to which the hood will be sewn.
