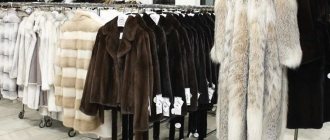
What do you need to sew a fur coat with your own hands?
The main thing is the material for work:
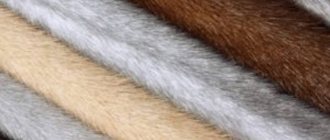
- Natural fur can be purchased in specialized stores or from hunters in the form of individual skins. Working with this material requires certain specialized knowledge and is one of the most difficult areas in sewing.
- Faux fur can be found in almost any fabric store. Working with it is much easier than with its natural analogue. This material is much cheaper in price, and it is not so scary to spoil it; it is sold in the form of a single piece, like regular fabric.
- Old fur fabrics, for example in the form of a fur coat and vest, which can be converted into a new fur coat. In this case, you need to understand that if there are abrasions and unsightly places on the material, they will have to be removed.
- Lining material. Satin or satin is often used as a lining for a fur coat; they are usually inexpensive. The product is given a rich look due to its smooth shiny surface, and these materials are very wear-resistant and retain their shape well during use.
In addition to the material itself, to create a fur coat with your own hands you will need the following equipment:
- Tailor's sharpened scissors or furrier's knife, the second option is preferable when working with natural fur.
- Clothespins are also needed for working with natural fur.
- Hammer with a soft silicone head or wrapped in cloth.
- Chalk, soap or gel ballpoint pen in a bright color.
- Metal long ruler.
- Safety pins.
- Small nails (when working with natural fur).
- Tape measure.
- A punch for installing accessories and attachments for it.
- Furrier's needles for machines, having three edges or gypsy needles.
- Comb.
- Thimble.
- The fittings are decorative and functional.
Fur coat sewing technologies
The most popular technologies for sewing fur coats today are loose or plated. Although in fact, both fur coats will be sewn from separate parts. A loose fur coat is made from whole skins, they are laid out and the color is carefully selected. From the inside, the seam will look like a Christmas tree.
The second variety is a fur coat with plates. This is a special technology, it is considered simpler. Such a fur coat is not always of worse quality. The fur product acquires a special texture.
To sew a high-quality fur coat from plates, the seams are made strong, with the skins overlapping each other.
Such a fur coat will not unravel over time and will have excellent warming qualities.
Fur coat sewing technologies
How to calculate the required footage for a fur coat?
To understand how much material is needed to sew a fur coat, you need to decide on its style - will it be a fur coat to the knee or below, or maybe a flared sheepskin coat?
To calculate the footage for the manufacture of a product, the following parameters must be taken into account:
- The length of the product, which is determined from the top shoulder point to the preferred length.
- The length of the sleeve is also determined from the top point of the shoulder to the desired length.
- Product style. For example, if a fur coat is planned to have a straight or slightly flared silhouette, with a size of 42-48 and a canvas width of approximately 150 cm, then one length of the product will be enough. For sizes starting from 50, two lengths are taken. For a fur coat with a large flare or wrap, two lengths are needed, regardless of size.
- For all decorative and structural elements, such as a hood, collar, belt, approximately 0.5 to 0.8 m of material is required, depending on the size of the elements. The linings in fur coats are made quite rarely, but sometimes they are still made of suede or leather, or a one-piece lining is made. Most often, the lining goes to the very edge of the product, while the fur is tucked inward. Elements such as a patch pocket are cut out from the remnants of the main material.
- Allowances for processing seams, and, in rare cases, for shrinkage of the fabric, range from 10 to 20 cm.
- If the product is planned from different types of fur, then for each of the parts the footage will be calculated separately; for this it is necessary to take the height of these parts.
- The lining footage is calculated based on the length of the product plus the length of the sleeve.
Which sewing method is best?
There are a lot of disputes on the Internet - which is better, a fur coat in loose layers or in plates. It is impossible to answer this question unequivocally, because there are no comrades in taste and color, some like cutlets more, others prefer roast beef or steak.
In the case of a fur coat, both are sewn from separate parts, only using different technologies.
It is more difficult to sew a loose fur coat; it is distinguished by the fact that it flows downward, and the styles are more varied. A mink coat with plates also looks good, wears for a long time and warms perfectly if it is sewn with high quality. To sew some fur coats, both technologies are used, for example, the bottom is sewn from plates, and the sleeves and top are solid.
Which sewing method is better?
In any case, it is important to choose high-quality fur from a trusted manufacturer and measure the fur coat. Outerwear sewn from plates of poor quality will bulge, provide poor warmth, and the interior will be damaged. The seams may unravel after a short period of time or, even worse, come unglued.
Fur coat patterns and transfer of patterns onto canvas
For a fur coat, it’s easiest to take a ready-made one, but you can use coat patterns of different silhouettes. As soon as the pattern is printed or transferred from a magazine to paper, you can begin to transfer the patterns onto the material.
Faux fur coat
If a fur coat is made from faux fur, then you need to pay attention to the following rules for working with the material:
- To transfer patterns onto faux fur fabric, it is necessary to take into account that a long pile is cut in its direction, while a short pile can be cut in any direction.
- Sew down eco-fur parts with straight stitches, after which on the front side along the seams, pull out the pile from the seams with a needle or ripper.
- Excess fur, if it is long and thick, must be removed from the allowances by cutting it off.
- Details of faux fur products are not duplicated with adhesive-based materials to avoid damage to the main fabric.
- Excess volume in the hem areas is removed by heat treatment.
- It is not recommended to subject artificial fur to wet heat treatment, but if there is a special need, for example, to iron the seams, you can heat treat the areas without steam and the iron - a piece of natural fabric, usually cotton, white. The iron should be slightly heated during operation.
- If the base material is thin and is not able to hold its shape on its own, then it is recommended to reinforce the edges and shoulder seams with strips of cotton fabric so that the seams do not creep. In this case, the product must have a lining.
Important! Do not forget that if the fur has a pattern, then there is a need to adjust it at the stage of laying out the patterns.
Natural fur coat
Working with natural fur involves the following steps:
- Since working with natural fur requires a certain set of skills, it is better to start by practicing on an old, worn product that you can find at home or purchase at a flea market.
- Parts made of natural fur must be sewn either by hand or on a special furrier's machine, since ordinary household machines will greatly stretch the seams or tear the fabric.
- To sew any product made from natural fur, you need to connect the skins together, unfold them and straighten the seam, then tap the seams thoroughly with a hammer from the wrong side. This is done in order to obtain smooth and flat seams, the edges of which fit perfectly together.
4. If there is a slight difference in the length of the pile on the skins being joined, then the problem can be solved by moving the skin with a longer pile upward.
Then you should tighten the stitches well. 5. Hand stitches are made with a slight slack, and all stitches should be made with the same tension.
6. To avoid deformation of some areas or parts of the fur coat, it is necessary to duplicate them with cushioning material.
7. All seams that have a large load, for example, shoulder, armhole or neck seams, must be additionally reinforced with cotton tapes.
8. Fur coats connected to each other are stretched on a wooden surface using small nails and a hammer, while the fabric is first slightly moistened with water from the reverse side. This operation allows you to align the seams and the skins themselves, and also, in some cases, increase the size of the fabric.
9. The joints of the skins are processed with a special metal comb.
10. The skins must match in pile consistency, length and shade.
Pattern pattern for a fur coat with a stand-up collar:
It is better to look at models of fur coats made from natural fur in catalogs. Mink coats with a stand-up collar look stylish. Long scarves and stoles look impressive on them, which can be tied differently every day, creating a new look.
Important! Please note that the skins are cut exclusively using a blade or a special shoe knife, but in no case with scissors, which damage the fur itself; this also applies to artificial material.
Faux fur short fur coat
When all the details of the fur coat are transferred to the fur fabric and cut out, you can start working:
- We transfer the same patterns from which we cut out the main parts to the lining and, if there is insulation, do not forget about the allowances for stitching, we cut them out.
- We sew down the details of the fur coat on a machine. The allowances need to be trimmed a little so that they are invisible.
- We assemble and sew the lining alone or with insulation. We process the edges using an overlocker.
- It's time to attach the main piece to the lining. To do this, we fold the parts face to face, secure them with pins, insert the sleeve lining into the base sleeve and sew them on a machine. Then we grind down the neck and side sections of the shelf.
- Turn the product right side out.
- Using a needle, we pull out all the fur caught in the stitches with a needle and comb the fur coat well.
- Carefully process the bottom cut of the product.
Now all that remains is the hardware you have chosen. It is best to use either sewn-on buttons or buttons with loops as fasteners in such fur coats, and you can also sew on hooks.
The product is ready!
What is a sleeveless sweater called?
What to wear with a denim sundress
What you need for work
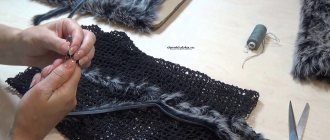
In our case, we choose the simplest way to make a knitted fur coat - weaving fur into a pre-made mesh . To do this we need:
- pattern;
- cotton yarn to match the fur;
- thick hook;
- rabbit fur (pre-wash and dry);
- thick needle and thread for sewing fur strips.
If there is not much fur, we recommend choosing one-sided weaving. It is more economical, although less fluffy, than double-sided.
Stitching parts
The cut parts of the product must be swept away. Then try it on. If there are any fitment defects, correct them by adjusting the parts. You may have to add darts, or move further away from the edge when basting (in case the item “hangs”).
It happens the other way around, the cut parts lay for a long time and were not stitched. During this time, the woman's figure changed. The allowances left may not be enough. Here you will have to add elements.
The length of the part with fur must correspond to the length of the lining. The base and lining are cut out separately, but using the same patterns.
Faux fur coats
Next you need to do this:
- The details of the shelves and sleeves are machined.
- The lining is sewn separately.
- The lining and the main part are sewn together.
- All small details are processed: collar, hood, cuffs, pockets, belt, etc.
- The bottom of the product is hemmed. To do this, you must first put on the item and check the length. The edges should be smooth on all sides. Where necessary, trim with sharp scissors. Take it off and tuck the edge around the entire perimeter. Baste by hand, then measure again. If the length suits you, finish it by machine. In some models, the edges are not folded at all. This is the case when sewing with wedges.
- Decorative details can be sewn on after processing the bottom.
- Lastly, the fastener is sewn in: zipper or buttons.
That's all! Women's faux fur coat is ready. You can wear something new and amaze others.
Features of making a knitted rabbit fur coat
Listen to the advice of experienced needlewomen so that the work goes without incident.
- To prevent the shoulders and armhole from stretching, it is recommended to sew a thin braid along their edges.
- A fur strip sewn to its edge will help hide the uneven edges of the hood.
- Trim or braid will also help to gather the seam between the hood and the finished product and prevent it from stretching.
- To ensure that the fur coat is the right size, it is advisable to make a sample before starting work. Due to the fact that the base is knitted, it may stretch and be larger than the planned size.
- Well, for convenience, don’t forget about the inside pocket; think about this when making the lining.
And now you can make such a beautiful and versatile thing with your own hands. Good luck in job!
How to choose a quality case
Covers made of cotton, velvet and spunbond
The first thing you should pay attention to is the size. The fur coat should be placed freely in it, without folds or bends of the fur. See how the side insert is made. The longer the fur, the wider it should be. The length should also correspond to the length of the fur item and even slightly exceed it. There should be 10 to 15 cm of free space at the bottom, so it is better to purchase a long cover. Standard length available:
Read more: DIY chair headrest
It is important that the anti-moth cover is made from natural fabric. Give preference to cotton or linen. They will provide maximum air access, but at the same time the fabrics are dense enough to make the product dense and durable. Sometimes non-woven polypropylene material is used, which also allows free air circulation. The classic color is black or brown, for white fur – blue.
The zipper must be sewn along the entire length. Manufacturers of cases provide special reinforcement to provide protection against ruptures, which most often occur in the lightning area.
Materials
Spandond is often used for manufacturing. Velvet and cotton covers are also popular.
How to cut a fur coat or sheepskin coat using a simple ready-made pattern
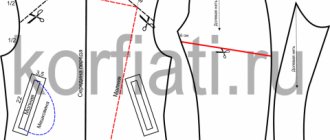
We start by determining the length of the future fur coat and, if necessary, lengthen it by extending the lines of the middle lines and side seams.
We carry out the cutting based on the rules for cutting fur, that is, we lay out the fur in one layer and lay the patterns so that the direction of the pile is in the same direction (Figures 3 and 4). Even if the direction of the pile is not clearly defined, it is better to cut so that the pile is in the same direction.
But for the top collar, the pile should be in the direction of departure.
You need to cut the fur by running the scissors under the base, but if possible, without cutting the pile.
It is better to cut out collars after the selection has been processed and the fitting has been completed. The collar size is selected based on the length of the neck.
Seam allowances depend on the chosen processing method, but we are considering the simplest option of sewing on household machines.
Let me make a reservation right away: many household sewing machines run the risk of breaking when sewing fur. A deviating needle bar, a weak toothed rack, and a weak spring on the presser foot make it difficult to sew fur at home. And if the base of the fur is impregnated with a special composition, then this sewing is made almost impossible.
To increase the machine’s chances of “staying alive” and reduce future difficulties, use special paws for leather - they glide well over faux fur bases.
You can also use a walking foot, you can sew fur on an overlock... In a word, everyone chooses their own method.
Now about the seam allowances.
Shoulder and side, sleeve cuts - 1 cm.
Neckline and armhole, collar stitching cut – 0.3 – 0.5 cm, BUT NO MORE!!!
Side lapel - 0.7 - 1 cm, hem lapel - 2 - 2.5 cm to fit and form a large fur edging.
For a sheepskin coat, the selection may not be cut out at all or may be cut out with different allowances. For a sheepskin coat with a selvedge, the allowance on the lapel of the selvedge is 0.7 - 1 cm, and the lapel of the side - 2 - 2.5 cm. In this case, the selvedge acts as a trim for the fur coat.
The opening cut of the upper collar is 2 – 2.5 cm, as for the collar.
Horizontal cut of the hem – 1 cm.
Don't forget to score in the corner between the full-cut hem and the lapel. The length of this notch is 0.9 - 1 cm. Don’t be afraid to cut, because without it, processing the edges will not work and it will not be visible among the pile, even if you make the cut larger than necessary.
You will also need notches on the border of the collar and lapel - they are marked on the patterns.
At the bottom of the fur coat and sleeves - 4 cm.
Cutting out the lining is not difficult (Figures 4 and 5), but it also has some nuances.
Seam allowances for lining.
Shoulder, side, sleeve - 1 cm, along the sprout - do not add, cut to the side - 2.5 cm, bottom - 4 - 5 cm (it is better to cut off the excess later).
Along the middle seam of the back, you can make a dart vent in the area of the shoulder blades, as shown in Figures 4 and 5, but this is only suitable for linings that are quilted by hand. If you are cutting from a quilted lining, then the middle seam along the back is not needed - we place the pattern along the fold of the fabric with the middle line.
For burlap, you don’t have to make allowances, but if you want to make it a little larger, add 1 cm.
The lining pocket is a rectangle and its size can be arbitrary, or you can download free patch pocket patterns.
There is also the option of a quilted pocket with a lining.
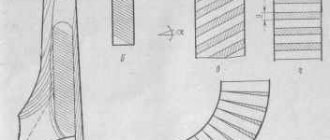
The cutting of the lower collar and stand is shown in Figure 6. Allowances are 0.5 cm along the collar stitching cut and along the stand cuts, and up to 1 cm along the flyaway.
As for the belt, it can be cut across from short fur, and lengthwise from long fur, but it must consist of two parts so that the direction of the fur is down towards its ends.
How to sew fur with a hand furrier's stitch
Fur parts, unlike leather, are not sewn down on a straight-stitch machine, but are sewn together either with a hand furrier's stitch or with a special furrier's machine. Sewing fur on a regular sewing machine will make the seam stretched, wavy, poor quality and weak. There are many types of hand furrier stitches for joining fur skins, but it is enough to learn how to sew fur with at least one of them, for example, the “overcast” furrier stitch. This furrier stitch is made from right to left, with a “double puncture,” that is, the needle goes into the same place twice. The edges of the two skins being sewn are folded with the hair inward so that when sewing the fur together, the hair does not interfere with the needle. The needle pierces the edge of the skins folded together in a direction away from itself. After pulling the needle and thread from the opposite side, the needle and thread are transferred through the edges to be sewn and a new hole is pierced, at an equal distance. Experienced furriers repeat the same stitch, that is, the needle goes through the same hole twice. This seam ensures maximum joint strength. The stitch density and puncture depth depend on the thickness of the fur leather fabric. A slight difference in the hair length of the two skins being sewn together can be hidden by moving up the edge of the skin with the longer hair. In this case, the stitch must be tightened tightly to fix this displacement.
