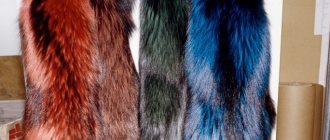
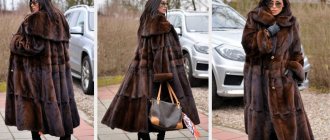
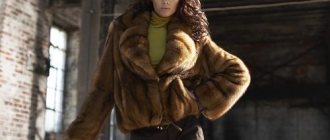
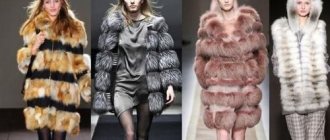
The world of leather and fur is a fascinating world of handicrafts that gives a lot of positive creative emotions. But working with natural fur differs from other types of sewing work. Knowledge of the technology of sewing fur products is required, including the cutting of natural skins, and the rules for selecting fur. You need to master the techniques of making connecting seams of skins, have skills in working with a furrier’s machine, etc. In addition, no video tutorials or courses on working with fur can provide the most important thing - experience that appears only after years of working with fur.
How to sew fur at home? What is a furrier's machine and is it possible to do without it? How to cut and what knife can you use to cut natural fur skins? These and other issues are briefly outlined in this article.
Video of a furrier's hand stitch for sewing fur skins. The video is in English, but it is understandable. As a last resort, you can switch the subtitles to the language you need.
How to sew fur pelts by hand stitching
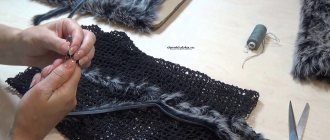
Fur parts, unlike leather, are joined either by hand or on a special furrier's machine. Sewing fur on a conventional sewing machine makes the seam stretched and of poor quality, and besides, the leather fabric of the fur may tear from this method of joining. There are several techniques for joining fur skins by hand; I suggest you study one of the options for a manual furrier’s seam with a “double puncture”.
First, the edges of the two skins to be sewn are folded with the hair inward so that the hair is not visible during sewing. The needle should pierce both skins towards itself, that is, from the reverse side, but you can start from the left edge or the right, whichever is more convenient for you. The main thing is to figure out how to make such a stitch.
Flower nursery Green Gate
Do you like indoor or garden flowers? At the Green Gate nursery you can buy rooted cuttings and divisions of various domestic and perennial garden flowers. We have a constantly updated collection of anthuriums and hibiscus. Flowers and plants are sent by mail.
The furrier's hand stitch is made with simple stitches across the edge from right to left with a small step between stitches. Stitch forward, stitch in place, into the same holes from the needle, and again stitch forward, stitch in place, etc. Experienced furriers always repeat the stitch, that is, the needle always goes through the same hole twice. Stitch density (0.3-0.5cm) and stitch height (0.3-0.8cm) depend on the thickness of the leather fabric. The thicker the fur pelt, the higher the stitch, and vice versa.
After joining the fur skins with a furrier's seam, both parts are unfolded, the seam is straightened by tapping along it with a small hammer from the side of the leather fabric. The seam is smooth, flat and strong, and the edges of the connected parts are positioned end-to-end.
A slight difference in the hair length of the two skins being sewn together can be evened out by moving the edge of the skin with the longer hair upward. In this case, the stitch should be tightly tightened. By the way, when performing a hand furrier's stitch, you should not tighten the thread too much; it is enough to simply “pick up” the slack in the thread. It is much more important to maintain the same thread tension in each stitch.
Video on how to repair a bald spot on a fur coat, this method is called the “fish cut.” A very simple way to save on fur coat repairs. All you need is a needle and thread.
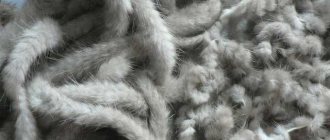
The first method of making a “fur loop” (schemes No. 1 and No. 2)
Figure 2 - The first method of knitting the “Fur” pattern, wrong side
You can knit loops in the classic or grandma's way.
1. Knit one stitch without removing it from the left needle, move the working thread to the front side and make one turn of the thread with your right hand counterclockwise around the thumb of your left hand.
2. Move the thread behind the work and make another knit stitch from the same loop, previously knitted and not dropped from the left knitting needle. Finally, slip it off the left needle and slip the “fur loop” off the thumb. In total, from one loop we got three loops: one “fur” and two knit loops on the right knitting needle.
3. In order to block the “fur loop” and maintain the initial number of loops on the knitting needle, you need to knit two loops together with a knit stitch tilted to the left, that is, pull one loop through the other. Pulling is done as follows: the end of the left knitting needle should be inserted into the second loop on the right knitting needle (look from left to right), pull it slightly, and with the right knitting needle pull the first loop through the second. Drop the second loop from the left knitting needle, and on the right knitting needle there will remain a loop with a “fur loop” made. The front side of the pattern (Figure 1), the wrong side (Figure 2)
Some seams need to be taped
Some areas of fur clothing need to be duplicated, for example, hem, collar, hem and others. Duplicating with cushioning material will protect them from stretching and give them the required shape. It is imperative to strengthen connecting seams such as armhole seams, neck seams, and shoulder seams. These areas are subject to stretching and the tape sewn into the seam strengthens and strengthens it. In sewing accessories stores you can buy regular cotton tape 1.5-2cm wide and use it for these purposes. There are also special adhesive tapes, which furriers call “amplifiers.” They are also used when sewing products made from genuine leather. The tape is placed on one side.
DIY fur bonnet
You can sew a bonnet with fur trim or completely made of fur yourself. Internet resources have a large number of all kinds of patterns, even those models that are available in elite salons. Photo and video tutorials will show you how to do the sewing correctly.
The pattern for the proposed hood style is quite simple. An old fur coat, stole or other fur product can be used to make the product. Also, if you have sewing experience, you can remake an old hat into a hood or trim a scarf with fur.
A fur bonnet is an unusual headdress, but this season it will be in demand among customers, so manufacturers of fur products are already presenting new and interesting models for the new season.
Purchasing a stylish fur coat that looks like animal skin, but at the same time artificial, is available to any woman. Natural fur is beauty and chic. A fur coat made from it is for those who can afford to combine comfort and luxury: materials approaching the quality of furs such as mink and sable have not yet been invented by the fashion industry.
It is possible to sew wonderful fur clothes in a studio, or you can try to create it yourself; patterns for fur coats can be found on the Internet. In the fascinating world of handicrafts, during the process of making a fur product, positive emotions are guaranteed, the result is a dream come true.
Hand-sewn fur coat
Connecting furrier seams need to be stretched
Pieces of skins connected into one whole must be stretched on a wooden surface. To do this you will need small nails and a hammer. A fur skin collected from different pieces is lightly moistened with a damp sponge from the side of the leather fabric and then nailed along the edges with nails to the board, at the same time slightly stretching it. This is a very complex process, experience is required, so I will not dwell on it in detail. I will only say that with the help of such an operation, the fur skins are leveled, the seams are straightened, and sometimes it is even possible to increase the size of the skin.
About types of faux fur
Faux furs, which are reproduced by modern technologies, have characteristics that confirm their high quality, and are in appearance little distinguishable from natural ones. They have been a trend for the last few years. The products are part of the collections of many famous designers. The choice is wide and varied. And if you think about one thing: “Faux fur coat, how to sew, what to choose?” Let's resolve the issue. To make a choice in favor of a specific fur, an individual approach is required.
Faux fur material consists of two layers: a smooth woven or knitted base and a piled outer side. The woven base of faux fur includes materials in the form of:
- synthetic;
- viscose;
- cotton;
- woolen;
- silk
Textile fibers
Textile fibers (synthetic, mixed or natural, for example sheep wool) form the basis of faux fur fibers. The positive qualities of these fabrics include:
- durability;
- wear resistance;
- thermal conductivity;
- beautiful appearance.
One of the main advantages of faux fur is that you can sew things from this material yourself, and in the future, with simple care, it is possible to sew a faux fur coat with your own hands using patterns.
Tools for working with fur
Working with fur requires a special tool. In addition to the shoemaker's knife, with which (not scissors) the fur skin is cut, many other tools are also used. For example, a hammer for smoothing and softening seams, adhesive interlining tapes, special needles for hand sewing, threads, etc.
Why can’t you cut natural fur skins with scissors? Because scissors cut the hair, and the seam after joining will be very noticeable.
Video on how to cut fur pelts with a knife.
A small hammer and postal small nails are a must-have in a furrier's kit. You need to use a hammer to soften the connecting seams by tapping them, and you will also need it when stretching the moistened skin on a wooden surface.
Reinforcing tapes, 0.8-1.5 cm wide, are installed (glued) onto the cut edge of the skin in places where the fur will experience tension, for example in the armhole, neck of a fur coat or vest, etc.
Be sure to get non-adhesive cushioning materials. They will be needed to strengthen the side of a fur coat or fur vest, collars, cuffs, etc.
Buy a good metal comb for combing your hair. With its help, it is good to “comb” the junction of the skins.
You will also need an awl, strong threads, special needles, leather glue, a thimble, and, of course, a sharp shoe knife. By the way, you can use a regular stationery knife with a retractable blade instead. It is inexpensive and a dull blade can be easily “sharpened.” To do this, you just need to break off the lower section of the blade with pliers (at a special mark).
Styles of fur bonnets
Bonnets are mainly made from short-pile fur, such as mink, sable, and honor. However, hoods made of fox and silver fox look very luxurious and will perfectly complement, for example, a mink coat without a collar.
Bonnet
This is the most common style option, which combines a fur hat and bonnet. The headdress is tied with laces, the ends of which are decorated with fur pompoms or long “ears”. Such hats practically never went out of children's fashion; they were and are worn with pleasure by young people.
Bandana bonnet
Designers offer interesting models of headwear, for example, a bonnet that can be tied at the back like a bandana. Its main part is made of whole skin, and the bottom is made of thick silk fabric. The hood is put on the head like a hood, and with the help of a cord it is tightened, becoming a bandana. Thick fabric is quite capable of replacing a shirtfront or neckerchief.
Bonnet scarf
One popular option is a kind of hat-scarf. The loose ends of the hood wrap around the neck for a stunning look. This headdress looks great with a down jacket or coat and does not require wearing a scarf.
Hood-hood
This headdress made of mink fur looks very neat and elegant. It looks like a hood with a small shirtfront. There are no unnecessary elements here. However, designers, using beautiful fur inserts, create luxurious, elegant bonnets, as shown in the photo.
Knitted mink
Models made from mink yarn look very interesting and beautiful. This type of hood is more elastic than one sewn from whole skin. Thrown over the shoulders, it can become a luxurious snood. A knitted mink hood goes well with a natural fur coat, coat or down jacket.
Knitted mink hood
Bonnet trimmed with mink
You can buy a hood inexpensively, the base of which is thick fabric or knitted fabric, and the edge is trimmed with expensive fur.
Bonnet trimmed with mink
How to choose the right fur skins
Working with fur has one important advantage - you can always add a missing piece to any part or replace a section of fur skin with another, since the connecting seam will be hidden in thick hair.
The fur pelts of any fur-bearing animal are never exactly the same. They differ in size, hair height, shade, and sometimes some skins have “bald spots” and other defects. In general, selecting fur is the most important skill for which a good furrier is valued.
The correct selection of fur will make the fur coat “monolithic”, as if sewn from one large skin, without focusing on the joining of skins of different quality and shade. A good master furrier, like a sculptor, feels the fur and sculpts a real work of art from different pieces, which is why sewing fur products is the most expensive service of the atelier. It is difficult to give any specific recommendations on the selection of skins, but when sewing, for example, a fur vest, place the best pieces of skin (back) on the center of the front and back. It is advisable to install the side parts of the skins in other places, for example, in the side seams. When connecting different pieces of fur skins, pay attention to the height of the fur and its shade. Attach them to each other and compare, if they fit, connect them together.
Fur scarf for cold winter
Fur is the most popular winter material that has never lost its relevance. It gives a rich, luxurious and sophisticated look. Recently, the scarf + fur combination has risen to the top of fashion trends. When using this variation, the product is worn not only on the head, it is used as a cape, vest or poncho. Let's figure out how to make a headdress with a fur element at home, on your own.
Preparation
When creating a fashionable headdress, you are given a full flight of imagination: combination of colors, shape, color scheme, pattern.
At the first stage, decide what shape of shawl fabric you need: square or triangle.
https://platoktut.ru/wp-content/uploads/2018/05/5737345-300×225.png 300w" w />
Next, you need to decide which part of the fabric will be covered with an expensive accessory. If the product is sheathed completely around the entire perimeter, then such a thing will be extremely difficult to tie on your head. Rich fur will make the fabric heavier and make it bulkier; in this form it is more suitable for wearing on the shoulders.
https://platoktut.ru/wp-content/uploads/2018/05/6457548-215×300.png 215w" w />
One of the popular options for a fur scarf is a partial trim that frames only the oval of the face. If you look at creative design works, you can decorate the shawl fabric completely with a beautiful pattern or sew on elegant stripes of fluffy material.
Choosing fabric for a fashion accessory.
For winter, thick wool fabric is good; it will warm you and protect you from frost.
In the autumn-spring period, natural and light fabrics are relevant.
For the trim, the fur element can be taken from an unnecessary worn item: jacket, coat, down jacket.
Preferred skins for future headdress: sable, arctic fox, fox, mink.
For a harmonious and sophisticated finished product, it is advisable to select the colors and tones of fabric and fur.
Source
Cut out 2 pieces for the hood and 2 of the same for the lining. Dimensions - choose the length and width based on your preferences. We sew the hood, then the lining. We connect the first with the second, process the edges. You can sew pockets onto the scarf.
Source
The fur strip should be neat and not cover the face and fabric.
Cutting and sewing
Currently, there are no problems with the choice of material and fabric for the future product. For a simplified version, buy a scarf in a store. For the option of a “do-it-yourself” head scarf with fur, a pattern is included.
https://platoktut.ru/wp-content/uploads/2018/05/543647-300×148.png 300w, https://platoktut.ru/wp-content/uploads/2018/05/543647-768×379 .png 768w, https://platoktut.ru/wp-content/uploads/2018/05/543647-500×247.png 500w" w />
Tools for work:
- tailor's scissors;
- measuring tape;
- furrier's needle;
- machine;
- stationery knife;
- chalk;
- iron.
- Take the necessary measurements. Draw a diagram of the desired size of the finished product.
- Material before cutting: wet, dry, iron.
- Lay out the prepared piece of fabric on the table. Attach the pattern to it and, with a seam allowance of 1 cm, begin cutting. You can use chalk to completely go along the edge of the pattern, then remove it, add 1 cm at a time and cut out the desired part.
- Lay out the pre-prepared skin and grind it to the desired size for the edge. If the skin is not whole, but in pieces, then before starting work they need to be sewn together.
Note: Fur is a material that requires a very delicate approach. It is better to process it manually and cut it into strips with a sharp leather knife. Then the fur hairs will remain intact, and the finished item will look rich and elegant.
https://platoktut.ru/wp-content/uploads/2018/05/7658588-200×300.png 200w, https://platoktut.ru/wp-content/uploads/2018/05/7658588-500×752 .png 500w" w />
- Finish the edges of the cut piece.
- Fold the fabric and baste future folds, iron.
- Sew on a machine. The chic headdress is ready.
- The crucial moment is to sew the fur strip to the fabric. To sew fur to a scarf, a zigzag stitch is used, and it is advisable to do it by hand. As the picture shows
https://platoktut.ru/wp-content/uploads/2018/05/11353-300×225.jpg 300w" w />
It will be difficult to connect the mesh and the fabric, so use a lining, it can be fleece or shawl fabric. This is done so that the membrane does not experience tension, otherwise it will very quickly become unusable. A thin or furrier's needle is used for stitching.
How to sew fur skins on a furrier machine
Fur skins are sewn together either by hand or using a furrier's machine. To make a furrier's seam on a machine, the skin at the seam is folded with the hairs facing each other, carefully tucked the hair inward with the index finger or an awl, and the edges of the skin are sewn together. The stitch height and width are adjustable.
The thickness of the needle and thread should correspond to the thickness of the leather fabric. Choose the color of the threads not to match the color of the fur, but to the color of the leather fabric, then they will be less noticeable on the front side of the skin. When working on a furrier's machine, you should carefully tuck the hair between the skins, since the furrier's machine will “put” hair into the seam, which will be very difficult to pull out. In addition, this can lead to malfunction of the furrier’s machine, skipping stitches, breaking the needle, etc.
For arctic fox and fox skins, use thread No. 80, for thin rabbit skins - No. 50, 60, for other skins - No. 40, 50. After joining, furrier's seams are smoothed with the butt of a shoemaker's knife or with light blows of a hammer with a rubber sole.
You can cut fur only with a special shoe knife on the back side of the fur laid out on a plastic board or plexiglass. It is inconvenient to cut with a knife on a wooden surface; the tip of the knife will constantly cut into the boards. If you cut off a fur skin with scissors, some of the fur will fall off on both sides, and when joined, the seam will be very noticeable.
I advise beginning furriers to first work with old fur that has not yet lost its aesthetic qualities. In addition, such fur can be slightly updated if you combine it with genuine leather and install new accessories.
In this video you will see how a furrier machine works. We sew together two small pieces of fur especially for you.
What to wear with a hood?
Stylists give some recommendations on how to properly combine a bonnet with other wardrobe items.
- A mink fur hood goes harmoniously with a natural fur coat, as well as coats, sheepskin coats, and leather jackets. The only thing here is that you will need to combine the style of the hood with outerwear.
- Under the hood, you need to select a style of outerwear without a voluminous collar and without a hood. Fur bonnets and hoods are mutually exclusive.
- A hood made of mink and other fur should be worn with a fur coat made of natural fur. With an artificial fur coat they wear a knitted headdress or one made of synthetic fur.
Otter fur is considered the most wear-resistant.
Fur skins have a standard of wearability. Otter fur is considered the most durable and resistant to waterlogging. It is the otter that has the honor of being the standard for all fur-bearing animals, and the fur of fur-bearing animals is compared against it. Even sable fur is inferior to it in strength and wear resistance.
So, if otter fur is 100%, then sable has 80%, mink - 70, arctic fox - 65, astrakhan fur - 60, fox - 50, muskrat - 45, squirrel - 30, ermine and weasel - 25, rabbit - 12, mole and gopher - 10, hare - 5.
About calculations of the required footage for a fur coat
First of all, you need to choose a style. Having decided on the model (straight, trapezoid or cocoon), you can begin to calculate the footage.
The main parameters of the product are presented:
- length (distance “upper shoulder point - preferred length”);
- sleeve length (the value “upper point of the shoulder - desired length”).
Depending on what is planned: the fur coat is straight, or the silhouette is flared (size 42 48), - one length is enough in a canvas whose width is 150 centimeters. The size is larger - for a given width, more fabric will be required (up to two lengths). If the product being manufactured is intended to be decorated with structural elements, a reserve of material will be required (0.5–0.8 m). Additional costs for allowances when processing seams and shrinkage (0.1–0.2 m) should be taken into account. Elements in the form of collars (rarely found), lapels, patch pockets - they contain remnants of fur fabric.
Ready product
In the case when the product includes different types of fur, the footage of the fabric is calculated taking into account the height of each part, and separately.
When determining the lining fabric, the calculation is carried out taking into account the style of the product, as with the yardage of the main fur fabric, the length of the product itself and the sleeves are taken as a basis.
Additional Information. Inexpensive fabrics, such as satin or satin, are used as lining material. They are wear-resistant, easy to use and look presentable - they have a smooth shiny surface.
Caring for fur clothing
Don't put mothballs in your fur coat. Some furs, including humans, are allergic to mothballs. Protect natural fur from rubbing; such areas make the fur coat very old. Faded and elongated areas of fur on a fur coat may appear when driving a car. Try not to ride in a car wearing a long fur coat, it is uncomfortable and will quickly ruin its appearance. Natural furs must be protected from direct exposure to various chemicals and perfumes. This can cause the hair to lose its shine and the skin tissue to lose its elasticity. Try to avoid getting fur clothing too wet. If you do find yourself caught in wet snow, dry your fur coat or fur vest at room temperature in a ventilated area, but not near a heater.
In this video you will see how easy it is to sew leather on a Podolsk type sewing machine by installing a Teflon foot on it.
Benefits of a hood
The practicality of the bonnet has already been appreciated by those who wear this feminine headdress with pleasure in recent seasons, when the fashion for it has revived again.
Fur hood hood
- The main advantage of this headdress is its ability to protect the owner from frost and wind. The hood reliably protects not only the head, but the neck and shoulders from bad weather.
- A fairly spacious hood does not crush the hairstyle, leaving it in its original form.
- The practicality of this thing also lies in the fact that when entering a room there is no need to completely remove it - just fold it over your shoulders like a hood. The result will be the image of a chic wide scarf, hood or snood.
- In addition to its practical side, a bonnet is a very feminine, graceful, elegant headdress. It creates a romantic, fragile image.
Cleaning white fur
Particular attention should be paid to cleaning yellowed white fur. Before the procedure, it is recommended to clean the fur from dirt using sorbents:
A solution will help refresh the color: 0.5 teaspoon of ammonia, 1 teaspoon of peroxide and 200 ml of water. The fur is wiped with a cloth soaked in the solution and left to dry.- A mixture of purified gasoline and magnesium oxide (burnt magnesia) helps prevent yellowing. The pulp is rubbed in, after fifteen minutes the product is shaken off and the residue is removed with a soft brush.
Removing dirt
When cleaning with sorbents (substances that absorb dirt), cleaning is carried out until the color of the cleaning substance changes. A change in color means that the substance has reacted with dirt and absorbed it.
- Potato starch or semolina
Sometimes the question arises of how to clean a rabbit fur coat that is heavily soiled. Open the lining and wash it separately. Pour warm water into a large basin and dilute starch or cereal at the rate of 1.8 kg of dry matter per 10 liters of water. After rinsing thoroughly, shake off the fur well and lay it out on a clean white sheet. Then take a vacuum cleaner and a soft attachment (you can use a car one) and walk over the surface, cleaning it from any paste residue. Once dry, sew on the lining.
- Flaxseed, oat bran
Pour a handful of bran into a clean, dry Teflon-coated frying pan. Dry them without letting them brown. Lay the fur coat on a clean, dry surface, pour the bran onto the contaminated area and rub in. After rubbing, take a brush and carefully comb the product along the pile, trying not to damage it. Leave the product to dry completely and brush again.
- Talc or flour
