- December 27, 2019
- Miscellaneous
- Dina Nigmatulina
Bear hunting is an activity that requires strength and skill. The weapon is used with powerful penetrating ability. In Russia, 2 cases were recorded when double-barreled shotgun bullets did not kill, but only angered the animal, which led to the death of hunters.
Dressing bear skins occupies an important place in the traditions of hunting the animal. Let's consider all stages of this process.
Hunting goals
There are 2 species and 8 subspecies of bears in Russia. They hunt everyone. Among hunters, brown and polar bears are of greatest interest. These large predators have several features that are attractive to people.
The brown bear goes into hibernation for 6-7 months. His body draws strength from a fat layer up to 10 cm thick. Fat contains vitamins, acids, and nutrients. Its healing qualities attract hunters. Bear bile has found application in the field of medicine. Doctors talk about its positive effect on the gastrointestinal tract.
The animal's meat is edible. However, we must not forget that a bear’s body can be infected with parasites. Therefore, when preparing delicacies from bear meat, it is necessary to follow the heat treatment technology.
Many people don't know what to do with a bear skin. There are 3 ways to dispose of it:
- The predator's fur is easy to cut and can be dyed. The skin can be used as interior decoration.
- Fur retains heat well, so the skin often serves as a carpet.
- You can sell the skin.
Hunters say that they make fur coats and bedding from bear skins for winter hunting. This is their most common use. The most valuable is the black bear skin. It is shiny and looks luxurious, but is prone to fading quickly.
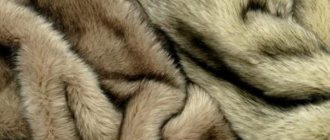
Polar bears are hunted in the Arctic. A photo of the skin after processing is shown above. Polar bears are very large animals. Their body length is 3 m, and the height at the withers is 1.5 m. These predators are desirable prey.
Purposes of tanning bear skins
On sale you can see a lot of fur coats and other clothing made from natural fur. These products are light, soft and beautiful. To obtain such fur, you need to carry out a number of operations. Processing the bear skin is a mandatory process.
Its main purpose is to remove all fragments of meat, fat, cartilage and other elements of the animal's body, as they are subject to decomposition and rotting. Also, tanning the skin makes it possible to get rid of a large number of bacteria and other parasites that are almost always present in the fur of a wild animal.
In addition, the treatment increases the water resistance of the hide and improves its appearance. Factory-processed bear skins are expensive. This is due to a number of reasons. The main ones are:
- Bearskin is very heavy. With head and paws, its weight ranges from 30 to 60 kg.
- The preparation process is lengthy and requires constant monitoring.
- Increased attention is paid to the animal's head. The oral cavity is cleaned and treated. All cartilage in the nose and ear area is removed.
- A large number of drugs are consumed. It takes 4 times more salt to process bear fur than the skin of a large elk.
In factories, wool is combed and coated with protective agents. Additional fabric is sewn on the skin side (at the client’s request). This is necessary to increase wear resistance and prevent slipping on the floor. The advantages of factory tanning are that the skin ends up in the hands of professionals, so all work is done to a very high quality.
Good day, boys and girls! This is me, alive and well and not coughing. I warn you right away, militant animal rights activists, people with a tender psyche, zoophiles and pacifists, YOU MAY NOT READ ANY FURTHER, you will feel bad.
Today we will talk about skinning and subsequent processing of skins. If anyone hopes that in the conditions of Postapa, synthetic winterizer and other insulating disgraces will be produced, he is seriously mistaken. We will, like our ancestors, ride around in fur coats and fur coats, well, those who will survive.
But peeling off the skin is actually a piece of cake, but processing it is no small task. Therefore, you need to train in advance. I will share my experience, and then you can do it yourself.
First of all, you need to get a fur carrier (Fig. 1). A hamster or rat is a good place to start. But it’s better to take a hare or a forest, dogs and cats will also do, but this is not humane at the moment. I haven’t had to sand larger animals, but I think there will be a slight difference.
After you have obtained the animal, hang the trophy by its hind legs on a strong rope or wire. For convenience, you can also put a crossbar (Fig. 2 and Fig. 3.).
There are two ways to remove the skin: with a stocking and a mat. In addition, we decide whether we will remove the skin from the head and paws or whether we are only interested in the fur. The trophy skin must be removed with the head, paws and claws, and preferably with a rug. So it will look beautiful on the wall, floor or chair (Fig. 4). I take it off with a stocking (Fig. 5).
For reasons of hygiene and simply convenience, I recommend using gloves (Fig. 6).
To speed up the removal process, I personally use a utility knife (Fig. 7).
The cut is good and there is no need to sharpen. If you are skinning indoors, lay down a film so you don't get the floor dirty. We make the necessary cuts (Fig. 8).
Then, with our hands, we separate the skin from the carcass; if it doesn’t work, we help with a knife (we cut off the film, fat and meat). First we remove it from the hind legs. If we have long-tailed animals, then we will have to work hard. Carefully separate the skin in a circle from the back with your hands. From the side of the tail (ass, chocolate eye) we make a straight cut along the tail, 3-5 centimeters long (Fig. 8). We move the skin with one hand. Using the fingers of the second hand, we grab the tail at the base and carefully pull it out of the skin (Fig. 9).
It won't go right away. In general, this process is similar to pulling the cores out of the cable braid (Fig. 10).
After the skin is removed from the tail, we make a cut on it along the entire length to the very tip, cutting off the tendons along the way, if any remain. After the tail is freed, we continue to pull the skin off the carcass, helping ourselves with a knife if necessary. Reaching the skin to the front paws, release them, much like the tail. We pull the skin to the base of the skull and cut it in a circle. All the skin has been removed. We throw it into a bucket or some other container. We remove the carcass and place it under a tree or wrap it in film. We take a pack of ordinary table salt and very well sprinkle the entire inside of the skin. You don't have to spare salt, especially on the tail. We leave our skin overnight, let it salt. We take cold water, really cold, so that it really hurts your teeth. In this water we dilute detergent and furatsilin. For 5 liters of water, add 10 crushed furatsilin tablets. We put the skin and salt into the solution and begin to wash it. We rinse and squeeze. Wash it for about 10 minutes, leave the skin in water for half an hour or an hour. Drain the water and hang the skin to drain. Pour a new portion of water and add 50 grams of vinegar 70% to it. 10 grams per liter of water. Rinse the skin in it for 5 minutes, leave for 10 minutes. We hang the skin out again to drain and drain the water. We take a new portion of water, but this time add soda, 2-3 tablespoons per 5 liters. We rinse the skin in it and then leave it to soak for 10-15 minutes. This is necessary to neutralize the acid. We hung out the skin and drained the water. Now you just need to rinse it in water. Rinse and hang to drain. While the water is draining, prepare the tools and straightener. I use a plastic pipe as a rule. But according to the mind, a wooden rule is needed (Fig. 11).
We stretch the skin with the flesh out (fur inside) onto the straightener (Fig. 12 and Fig. 13).
We take a knife and with the blunt side we begin to scrape off the flesh; our task is to clean the skin of any remaining meat, fat, films and tendons, as well as to expel subcutaneous fat. The process is long and dirty. I start cleaning from the head, although my friend always cleans from the tail. Why the blunt side? And so as not to overdo it, the skin of the living creature is thin, you will get carried away and you can accidentally cut off the layer of skin that contains the hair follicles. Accordingly, the wool will come out stupidly. In addition to the blunt side of the knife, you can use a spoon or a metal plate. There is no need to try to clean off the entire length of the flesh at once. It is better to clean in small areas. After all the films and scraps have been removed, we go over the skin with an iron again, we need to remove as much fat and dirt as possible. The quality of the skin directly depends on this. We remove the srach and tools. Again we take cold water with detergent, rinse and wash the skin. And this time we turn it inside out to wash off everything we can. Then rinse in clean water and hang to drain (Fig. 14).
While the water is draining, prepare the pickel (Fig. 15 and Fig. 16).
For 1 liter of water add 30 grams of vinegar 70% and 30 grams of table salt. Stir until the salt is completely dissolved. Dip the skin into the resulting solution (fur side in). The stench is still the same, so we breathe every once in a while. We rinse the skin a couple of times and leave it in this syrup (Fig. 17).
Picking time is 12 hours minimum and 24 hours maximum. The larger the animal and the thicker its skin, the longer it must be fermented. While our skin is fermenting, we make a frame for drying (Fig. 18).
If the skin is removed with a mat, we need a square frame, if with a stocking, a triangular one. You can use wood as a material; I used plastic pipes (Fig. 19).
After 24 hours, take out the skin and hang it to drain. We pour the pickle somewhere far away. Because it stinks simply brutally. We collect clean water. Add soda to it, about 1 tablespoon per liter. And we put the skin there. We rinse and press the skin. Our task is to neutralize acetic acid. Drain the water and pour in a new portion of cold water, rinse again. And so on 2-3 times until the wild vinegar stench becomes tolerable. At the last rinse, you can add shampoo, so that the fur is beautiful and lush. Don’t forget to turn the skin regularly so that it is washed evenly. He pulls out the skin and hangs it to drain. Prepare the thread and needle. As soon as most of the water has drained away. We sew up the holes left by the shot and the cuts. I sew it up with a regular mattress stitch. By the time sewing is finished, the water will drain. Carefully stretch the skin onto the frame, with the fur inward (Fig. 20).
We straighten the fur on the tail so that it dries (Fig. 21).
And set it to dry. DO NOT dry skins in direct sunlight, near a stove, radiator or other heating and heating devices. The ideal place is the hallway, especially if there is a draft. As it dries, the skin must be removed and kneaded in your hands (Fig. 22).
Anyone who went to shit with a newspaper knows what I mean. Yes, yes, this is exactly how we gently and carefully knead the dry areas of the skin. After about 12 hours, turn the skin inside out (Fig. 23).
Let the fur dry now. Don't forget to knead the skin in dry places. Well, in principle, we repeat the trick with turning and kneading every 6-12 hours until completely dry. When the skin and fur are completely dry, turn the skin inside out and apply, without hesitation, liquid glycerin to the entire surface of the skin. This can be done with a bandage swab or a brush. Let the glycerin soak in and turn the skin inside out. Take a comb or a clean shoe brush and comb the fur. Our task is to comb out excess fluff and hairs from it. It is better to do this outside or with the vacuum cleaner turned on. That’s basically it, the skin is ready for further use (Fig. 24).
If the vinegar smell remains, and it stays bad, you can hang the skin in the garage or hallway, let it hang, breathe, and dissipate.
PS: If the animal carcass is frozen, put it in a warm place, but away from heat sources, and let it thaw on its own.
PS: The main thing from all of the above: the water should be cold or icy, hot or warm water will lead to baldness of the skin; clean the skin with a blunt object; We wear rubber gloves, it’s hygienic, warm and our hands don’t stink; The skin does not need to be squeezed, at most you can squeeze it lightly.
ZYYY: Some of the photos were taken from the World Wide Web using Yandex search. For which I apologize to the authors of photographs and drawings, your authorship will remain a secret.
If you have something to share, share it. It will be interesting and useful.
Thank you for your attention!
Processing at home
Making a bear skin with your own hands is a labor-intensive process that requires skills and time. Work begins with proper skinning of the animal carcass. An indicator of quality is clean skin on the back side of the skin, without a sharp characteristic odor, removed in a single layer. After skinning, the skin is cleared of any remaining fat, cartilage and meat. To prevent lint loss, try not to deform the skin. The fur is cleaned with extreme care.
Dressing bear skins at home requires certain tools and preparations. You will need:
- Large capacity for dipping and soaking the skins. Its volume depends on the size of the animal.
- Laundry soap - 500 g.
- Antiseptic (formalin) - 300 g.
- A medium-sized stick for beating the skin.
- Knife.
- Scraper.
- Baking soda - 1 kg.
- Glycerin, ammonia and animal fat - 500 g each.
- Willow bark - 300 g.
- Salt - at least 5 kg.
After proper skinning, preparation for the main stages of dressing begins with removing blood from the fur and salting the skin. To do this, it is laid on a flat surface with the fur down, and the top is thickly sprinkled with salt.
The process of salting the skin takes 2 days. The next stage is drying. To do this, the skin is stretched on a wooden frame.
Primary processing of hides
The choice of dressing technology depends on the species, lifestyle and physiological state of the animal, the type and quality of fur, age, gender and many other factors. Improper primary processing reduces the quality of leather and fur raw materials and shortens their shelf life.
The mature fur is lush and shiny, with a thick, uniform undercoat. The hair should be elastic and even, with a well-developed spine, and not fall out.
Before fur dressing begins, the animal's hair should be carefully examined. Dirt and blood are washed off using a rag or gauze soaked in warm water and laundry soap. Tangled and matted areas of fur are usually combed with a special brush. The skin must be removed carefully, avoiding cuts and tears. It is advisable to preserve the head, paws and tail.
Main stages
How to tan a bear skin correctly? Experts give the following recommendations:
- the skins are soaked in water at a temperature of 30 degrees Celsius;
- high-quality dressing should take at least 7 days;
- If the skin is not soaked after 12 hours, it is placed in water again.
The main process includes 5 stages:
- Soaking.
- Fleshment.
- Pickling.
- Tanning.
- Fatliquoring.
At home, they do this work in warm spring or summer (to avoid dirt getting on the fur and prolonged drying).
How to tan a bear skin and make it soft?
How to tan a bear skin with your own hands is a question asked by hunters who want to keep the trophy and sell it at a good price. Experienced professionals give simple recommendations on how to make a clubfoot’s fur coat more beautiful and of higher quality:
- Soaking the skin is one of the most important steps because this process removes bacteria. To do this, antiseptics are added to the solution.
- After fermenting the fur coat, you need to try to stretch it. To do this, its edge is folded in four in the groin area - into the so-called pig's ear. You need to run your fingernail along the edge, and then straighten the skin: if at the site of the scratch the mark gradually disappears, then the skin is ready.
- The softness of the skin is affected by how correctly it was removed from the animal’s carcass. This must be done in one piece. It is equally important to properly and promptly clean the skin of meat, fat, cartilage and tendon, and then carry out timely soaking, pickling and fatliquoring.
Soaking
At this stage, use a large container with a volume of 250-300 liters, into which the skin can be placed freely. The product is periodically moved in the liquid with a wooden stick.
Soaking takes place in 2 stages.
At the first stage, take the required amount of water, the temperature of which is +30 °C. The skin must be completely immersed in the liquid. The following components are added to the water:
- salt at the rate of 30 g per 1 liter of liquid;
- formalin solution (1 g per 1 liter of water);
- grated laundry soap (1 teaspoon per 1 liter).
The skin is immersed in the prepared mixture for 6 hours. Next, it is wrung out, placed on the surface, and then beaten on the fur with a stick.
In the second stage, the skin is placed in another solution. To prepare it take:
- Water heated to a temperature of + 30 °C. It will require 250-300 liters.
- Acetic acid (70%). This ingredient is taken at the rate of 60 ml per 1 liter of water.
The container with the solution is insulated. The room should also be warm. After 7 hours, the product is inspected. When the fur weakens (if the hair falls out), soaking stops. Overexposure to water negatively affects the quality of the skin. The maximum time for the second stage is 15 hours. During the procedure, the solution is intensively mixed twice for 20 minutes. Next, the skin is hung on a crossbar to drain water.
Fatliquoring
This operation is carried out to give the skin softness and elasticity and consists, as the name suggests, of introducing fatty substances into the inner skin of the skin, which, in fact, cause this effect. For fatliquoring, water emulsions of animal fats are most often used. Skins are often fattened using the dipping method, in which a batch of raw materials is dipped into a container with a fat emulsion and kept in it for up to 8 hours. After the fatliquoring process is completed, the skins are taken out, stretched and dried until excess moisture is completely removed.
The next process is fatliquoring.
Flesh
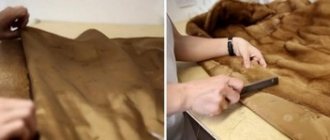
In industrial enterprises, a skinning machine is used to clean the skin of muscle fibers and fat deposits. At home, a metal scraper comes to the rescue.
The skin is placed on a vertical surface with its head down. The fibers are cleaned with intense movements from the rump to the head, while avoiding damage (removal of fur and cuts).
The skin is cleaned as efficiently as possible. Otherwise, there is a possibility of a bad smell. After cleaning with a scraper, the skin is treated with a rough brush. Fleshing makes the hide thinner and softer.
Degreasing on deck
The deck is made as follows . Two legs are inserted into an oval-shaped chopping block so that the upper edge of the block is at the level of the degreaser body. The oval surface of the deck is carefully planed so that it is completely smooth, and is usually covered with tin, or, in extreme cases, with plywood. The skin is placed on the deck so that the head hangs over the top edge of the deck. The skinner presses the skin with his body and carefully degreases the tail and edge of the rump. Then the skin is turned upside down and, pressing the rump with the body, it is degreased in the direction of the hair. Fleshing is subsequently carried out on the same deck (Fig. 3 and Fig. 4).
Rice. 3. Hide decks
Fig.4. Fleshing the skin on a block (A) and its head part on a block clamped in a vice (B).
Rice. 5. Collapsible meat board on the bench
On the block, the skins are degreased with a scythe or a flesh scraper . The deck is convenient for degreasing skins removed in layers; but skins removed with a tube are very difficult to process on this machine. It is especially difficult to degrease skins with deep hair roots and thin flesh. You need to have great skill so as not to tear the skin and expose the hair roots. When degreasing on a block, the hair of the skin is heavily fried.
Rice. 6. Fleshing on a deck with a stirrup clamp
Pickling
The fermentation solution is prepared in a glass container. Each product is taken at the rate of 1 liter of hot water. Ingredients:
- 200 g rye flour;
- 30 g salt;
- 0.5 g soda;
- 7 g yeast.
Yeast is added after the solution has cooled to 30 degrees. The starter is prepared for 24 hours in a warm place. Bubbles on the surface indicate readiness. For 1 kg of skin mass, take 3 liters of solution. The starter is stirred every 4 hours. The skin is immersed in the prepared solution for 2-5 days. The amount of time depends on the following factors:
- quality of raw materials;
- age of the bear;
- room temperature;
- gender of the animal;
- fermentation conditions.
The optimal temperature of the liquid should be 36-38 degrees Celsius. With greater heating, the yeast fungus dies, and when the solution cools below normal, fermentation occurs very slowly.
After 2-5 days, the skin is removed from the solution and placed on a wire rack, skin side down. A board with a load is placed on the fur. At this stage, excess liquid is removed from the skin. It lasts 2 days.
After 2 days, the load is removed, and excess acid is removed from the fur. To do this, wipe it with a solution of baking soda and water (2 g per 1 l).
Pickling
Water as during soaking (LC = 7), temperature 38 - 40 degrees, . Salt - 60 g/l, sulfuric acid 4 - 5 g/l (you can use acetic acid 70% - 20 - 25 g/l or formic acid 8 g/l). We load the skin into the solution during the day, stir continuously for one hour, then for 15 minutes every hour and so on until 24:00. We maintain the temperature constant. We insulate the container at night and leave it in a warm room until the morning. R.N. = 2.8 - 3. If there is a pH meter, check the acidity and bring it to normal.
Duration – 18 – 24 hours. In the morning we check the skin for “drying” and “pinch”; if it does not appear, we equalize the temperature and increase the duration and concentration of the acid. When finished, wring out the skin and place it in an envelope, fur side out, in a container to keep for one to two days. After curing the skins, beat them with a dead end on a block. Then tanning.
Tanning
Dressing bear skins includes this important stage. A decoction is prepared from the bark and branches of willow. Add 60 g of salt to it for every 1 liter of water. Boil for 30 minutes. Cool to room temperature. The skin is kept in the decoction for no more than 3 days. To determine readiness, take a small fragment of it. This is done in the following ways:
- Pull back the skin in the groin area.
- Cut a piece of leather with a diameter of 3 cm.
- They make an incision.
Under a magnifying glass, the degree of penetration of the decoction into the skin can be seen. Complete impregnation with the yellow mixture is a signal to complete the process.
